Table of Contents
The trend of nail designs and the Nail’s decoration in your hands it will continue to be a fashion of beauty this year, which is becoming much more elegant as it also has greater elaboration and creativity.
Everything was born with nail art in the United States and in Europe but it became massive worldwide where teenage girls let their creativity fly and oriental manicures had the precision of the detail of the small brush to make different types of drawings on the parts of the Body.
As if it were a bonsai, the nail of each finger was a space where it was always painted with solid colors, but more and more colors were added, such as red, pink, black, blue and white, among other ranges and combinations, until reaching make enamel paintings of different themes.
This is how the general line was born where it was imposed by a need to find new ways in beauty and fashion as it happened with tattoos where it was thought that at one time it was a passing fashion and it was shown that today it is part of culture.
¿Decorated nails that match everything?
The nail art It is very delicate but at the same time something that requires a lot of patience, having good taste to combine the colors and dedication to be able to change the models and figures that you are choosing.
There are different types of techniques and ways to paint your nails but one of the easiest to start without a doubt is the one that I explain in this article about how to paint your nails as if you were a manicure?
What you always have to achieve is that in addition to looking pretty you have to look elegant and that is only achieved with the good combination of colors, with the neatness when making an illustration.
From the simple fact of abstract figures or geometric figures that you want to appear on your fingers to a children’s theme where hearts, flowers, cartoon characters like mickey mouse, minnie, minions, even animals can be your theme for the day you want to show.
How to make decorated nails step by step
I am convinced that nail decoration is an art, that is why nail art as it is well defined is a discipline that came to stay within the world of fashion and beauty.
To start doing a design with each step the first thing you have to be clear about is knowing what type of drawing, illustration or design you want on your nails.
Once you have defined the shape, you have to think about the type of color to combine with your clothing, which can be of different colors combined with your shoes, handbags, accessories or your dress.
Then have a lot of patience, practice as much as possible with your nails or those of a friend, family member, neighbor or the person you want because it will give you more precision when making designs.
But above all, you have to buy or get the tools to be able to apply as if you were a professional manicure.
From nail brushes such as flat brush, liner brush, cat’s tongue brush and the abancio brush as the most basic and necessary of which what varies fundamentally is the size and type of bristles.
Another element that can help you is the nail art tape or else called striping tape.
Nail polish remover much needed to make corrections.
Glitter enamels and nail stickers.
Manicure Punch or Dotting Tool Bolillo Punch For Nail Art Designs and some Set with Stamping Nail Art.
The list goes on and on, but it will all depend on how decorated you want your hands to be starting from your nails.
I’m going to name all the types of nail designs that are trending
How to paint decorated nails
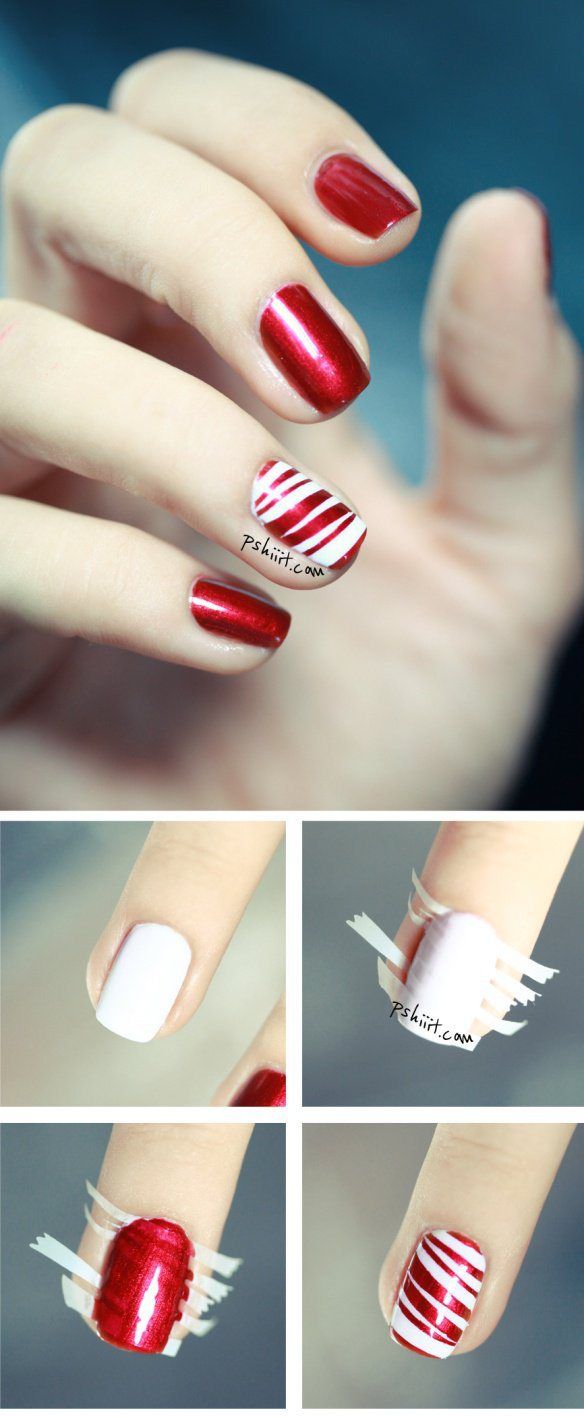
💅 Red Nail Designs with Ribbons
- You make a white base with paint on a nail you want or on all
- After you let it dry you add several ribbons as you like of different widths and sizes
- Raisins paint red nails and let dry
- Slowly take out the tapes you used and see the finished work on this nail decoration
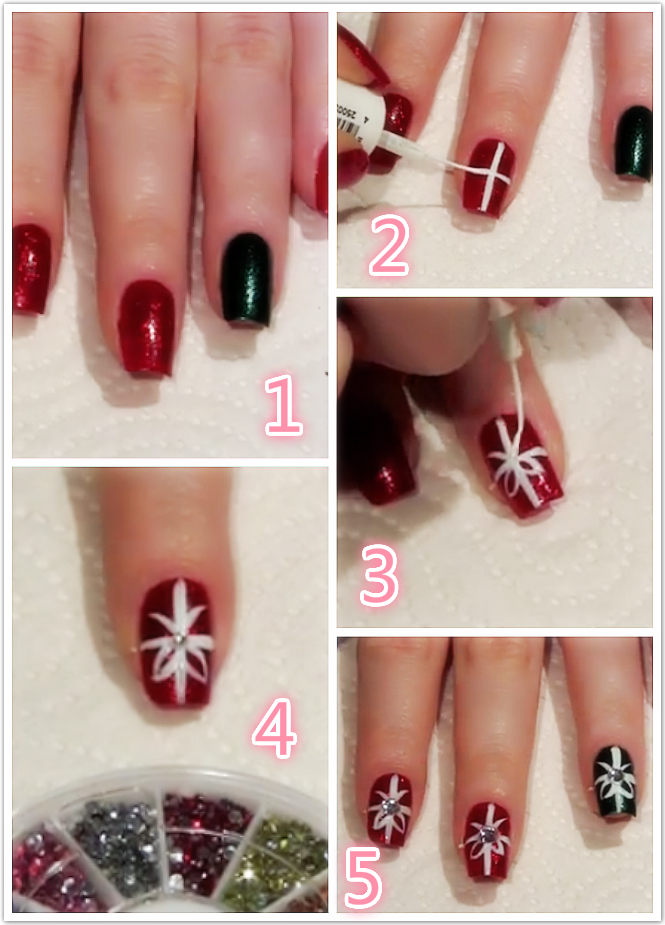
💅 Christmas Nail Decoration
- As a base of your nails you have to degrade with the enamel using blue and light blue ranges
- Once you let it dry you can add the elements you want from a pine, snow or a snowman
- You will have your Christmas nails ready
These same steps serve to implement in summer nails by changing the combination of enamels but applying the same gradient that can be from the cuticle a more intense color and degrading to the tip depending on the size of the nail due to its length, since for short nails not highly recommended.
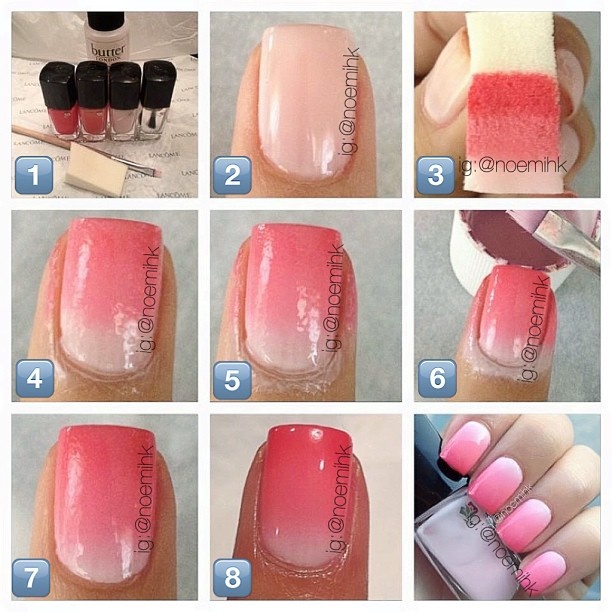
💅 Color Degrade Nails
- With a small sponge for your fingers, you have to pass it to your nails in the shade that you like the most
- You have to achieve the perfect point of the color you are looking for by combining the intensity of the top to the bottom of the nail.
- Use before starting to degrade with the sponge, add ribbons around the nail to avoid staining the skin of the finger and make it more clean to remove the excess paint from the nail art.
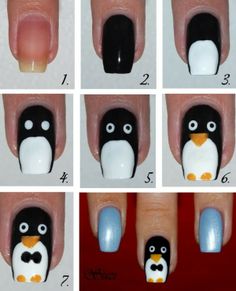
💅 Penguin nail design
It is an animal that is done a lot by teenage girls and is very fashionable for being easy to do and using few enamels
- You paint with black nail polish the nail you want to make the penguin
- With white paint you have to make a curve that its upper point is the middle of the nail to make the penguin chest
- To make the eyes white you use a dotter and make two medium dots and then with a smaller dotter inside it when you let it dry in black
- With orange color you make the beak through a small triangle in the upper chest and the legs with two squares at the tip of the nail
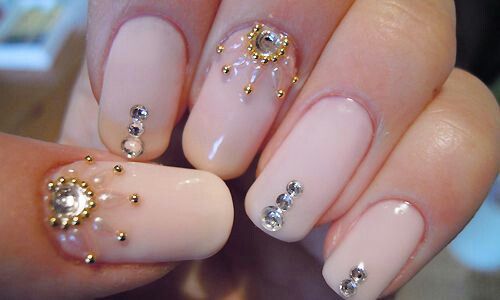
💅 Nail design with stones
Before you start you need to have a stone accessory applicator to add to your designs that you plan to make
- You paint a white background and start marking the edges as if it were a spider web
- Then you let them dry to apply your stones, which can be crystal strass or fancy stones with a lot of shine, Swarovski style, they have between 2 and 3 millimeters
- Use nail glue on the stones before gluing
- Do not glue all the stones together interspersed with a different color to cover the box leaving empty without stone
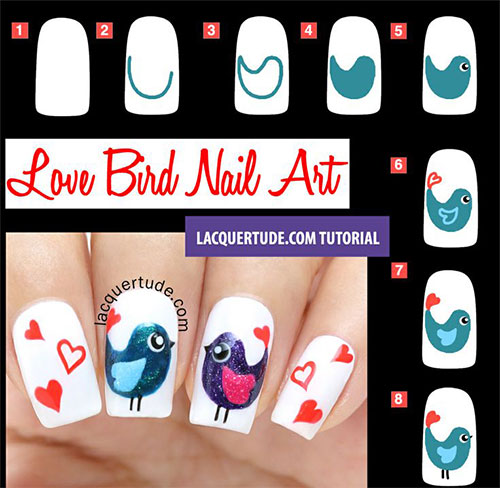
💅 Nails decorated with bird
It is an animal that is also chosen a lot especially by the Twitter logo especially adolescents
- Make a blank base with paint and then let it dry
- You draw with a brush with fine bristles the shape of a crescent but with one of the rounded ends filling with the color you want to give the bird
- Then you apply the dotter to make the eye white and the heart-shaped wing tilted horizontally in another color
- You make the beak and legs with a small black enamel brush
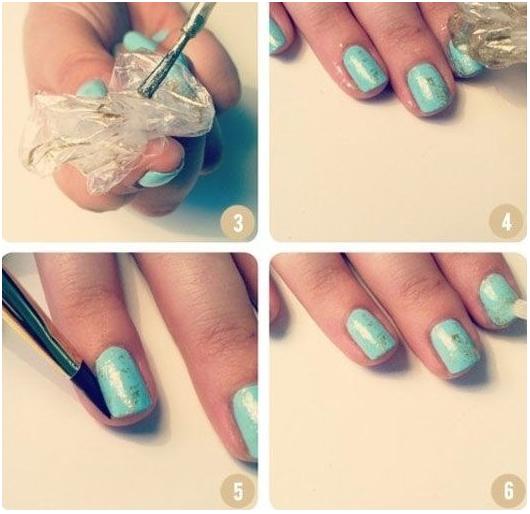
💅 Nail Decoration with Bags
- You apply paint gray nails on the nail then let it dry for about 15 minutes
- To apply the gray color and give it that random effect on the whole nail, just give it a brushstroke
- Then with a rigid bag you rest on the nail and you will have a discontinuous dot effect
💅 White nail design with blue ribbons
The tapes can be used to protect the color, or removed to give it the effect where we do not want it to be painted in the second layer, but in this case I am going to teach you how to make the tape part of the design by painting, cutting and molding as you like. like it.
- Paint your nails with white enamel and let dry
- Cut four small ribbons for one nail and put two horizontally and two others vertically over the other ribbons

Previously these ribbons must be painted in the color that you like the most but the blue is very beautiful with a light background such as white.
💅 Green dotted nails
- With dark green nail polish you can paint your nails and then implement the points
- For large points I recommend using an applicator brush where you use a lighter green color
- For small circles use a mechanical pencil with a lighter tint
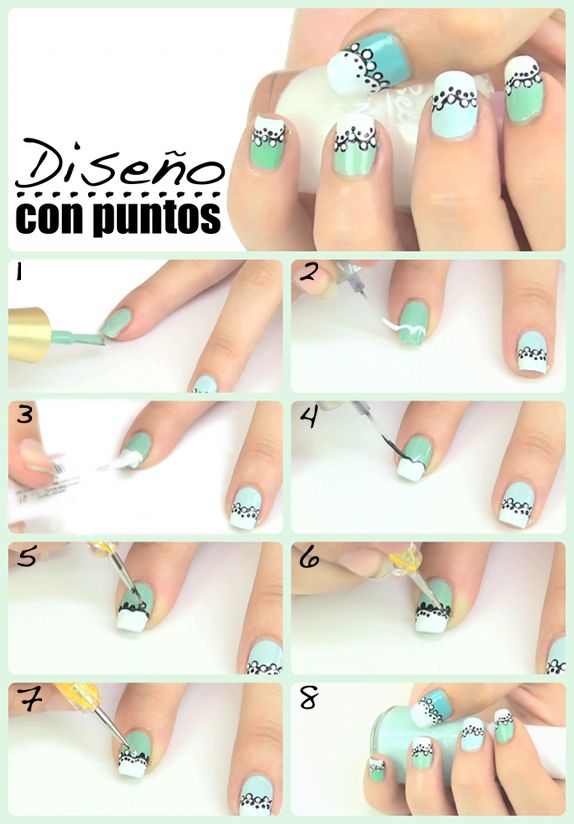
Beauty tip: if you do not have a mechanical pencil you can take a pencil and in the back where it has the eraser you stick a bishop and with this you can apply color to have the smallest circles.
💅 White nails with negative designs
- First you add the ribbons on your nails as you like it can be arrow-shaped or short V-shaped staggered
- The next step is to paint on the tape and the nail in white
- You remove the tapes once the enamel is very dry

You will get a negative effect with the natural nail color through which the very elegant ribbon passed.
💅 Caviar Nail Designs
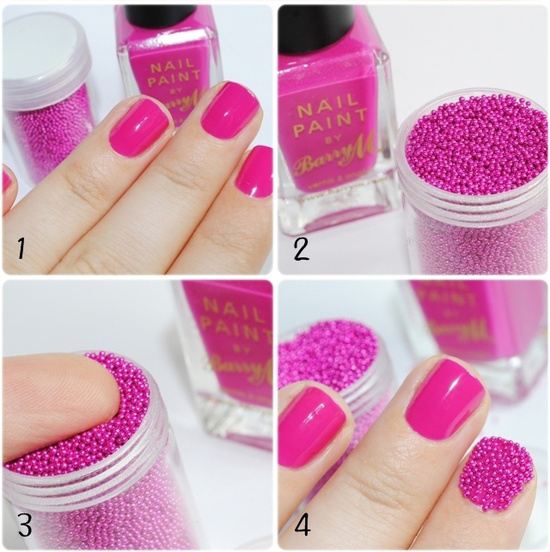
This type of design does not like all women but if it is your style it is certainly simple if you do it with patience this type of nail decoration with fish eggs that are actually small pearls of different colors that you can find from pink, Fluo, black and white that many times use manicures for the nails of brides in their marriage.
I will explain the caviar nail design step by step
- Select the nail polish color you like best and apply two coats
- Before leaving the second layer of enamel to dry, add the pearls on the nail, I recommend that it be on top of a canvas to do it with greater precision and not waste pearls when applying
- Apply pressure on the nail so that the pearls are firmly fixed and adhere well to the nail
- You have to calculate 20 minutes to dry completely
Beauty tip: do not do all the nails at once but do it one by one so that you have more neatness when designing.
Nail art recommendation: do not do all the nails with the caviar design but apply on one hand only and the rest leave them smooth so as not to overload the general design.
💅 Opaque matte nail design
This is a technique that I recommend you try with a single color of enamel which you can transform into a opaque or rather a matte shade to the selected model if you want.
In this case you can divide the nail into two colors the shade of the original enamel and then transform the other part into opaque.
You can do it from one half of the nail in different ways, both triangular, linear and form a kind of square or rectangular.
- You start by applying a clear base to use a dark enamel base
- Paint with enamel of the color you want and let dry, then apply a second coat
- The third step is to seal the application with a layer of enamel on the top of your nail
- Take a piece of Scotch tape or any type of mark and stick to your hand before sticking to your fingernail to remove excess glue
- Now glue the tape in the middle of the nail and paint in a darker tone the exposed part of the nail where you stuck the adhesive tape
- Remove and apply a fixative so that the paint does not come off and the application lasts much longer
💅 Gold nails with black dots
It is a very classic design that is widely used and is a trend in all beauty magazines
- You paint with a golden enamel that you like nails that have shine if you want
- With an applicator you make dots of different sizes in black (before letting the golden enamel dry)
If you do not have an applicator to make precision points on the nails, I recommend using a pint for hair that generally has a rounded tip at its end.

💅 Purple Nail Decoration
Three to four different colors are generally used but of the same hue always in the range of purple trying to respect an abstract geometric figure
- You apply a base coat so that your design lasts much longer
- Then you paint a pink base or some light color on the nail
- Let dry and apply as if it were a rectangle with a shade darker than the base
- A smaller rectangle on the other half of the nail but with a darker shade than the previous one, respecting the purple shade
- With a small bristle brush you can make the limits and boxes

💅 Color Splattered Nails
Beauty Secret: the main factor to make this type of colorful splashed nails is to use a toothbrush
- Start by selecting five types of light and youthful colors that you like to paint each of your nails
- Take a dark enamel color and dump a little on a paper and then pass an old toothbrush that you do not use and you can use its bristles
- Apply on the nails to give that splashed effect (previously I recommend putting ribbons on your fingers to avoid staining when applying the splashed style)

💅 Designs with ribbons and colors
- You paint your nails a color base that you like
- You add ribbons to decorate nails making the shape that you like generally in a triangular way
- To paint inside that triangle in a different shade and after the enamel dries carefully remove those small tapes

You can repeat this process several times and paint in solid colors or with dots inside each triangle you form.
💅 Nails decorated half moon
This step by step advice that I am going to explain to you for this type of design is in case you still do not have much experience and little precision in making a half circle just on the side of the cuticle and achieving this half moon design effect.
With a ribbon in a circle or in the shape of a donut you can achieve it very easily and that it is elegant as a professional
- Paint the nail yellow with an enamel to allow it to dry for 10 minutes
- You apply the tape in a circular way on part of the finger where the cuticle is and the other half on the nail
- Pints with the red enamel on the nail tackling the tape
- Let dry and remove the tape to achieve the half moon effect

💅 Splash nail design
This is another way of making this type of decoration that I explained previously and that was done with a toothbrush, in this case you will do it with a straw or cigarette that when you blow will achieve the desired effect.
- You paint your nails as always to give it a clear base
- You use a tape to cover your fingers and not stain them as well you can also use a glue
- You dip the tip of your sherbet in the enamel paint of another color at the base and then blow on the nail you want
- You repeat with two colors of different enamels and blow on the nail consequently the splash effect

Nubes Nail designs with clouds
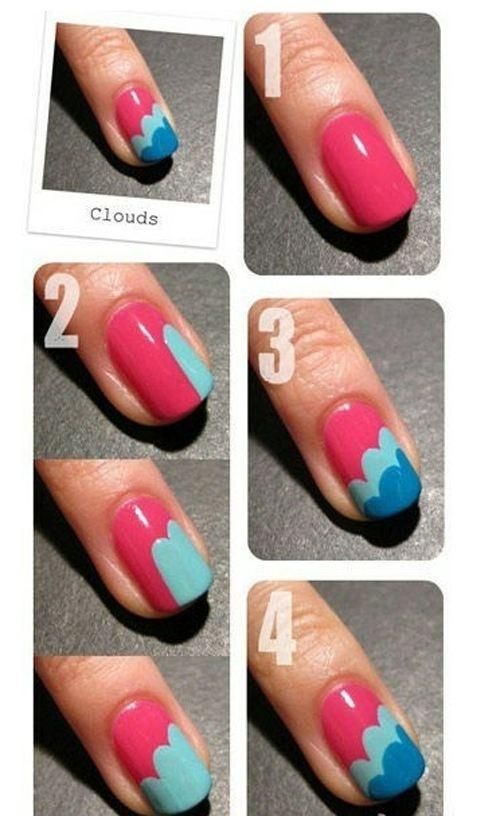
You need to have three colors of nail polish which I recommend using pink, blue and light blue
- The base of the nail is painted pink or purple
- The next step is to make three mountains along the nail descending with the light blue
- You let it dry and with the blue color you do the same on the light blue color that you already painted the clouds achieving a desired effect
💅 Zig Zag design nails
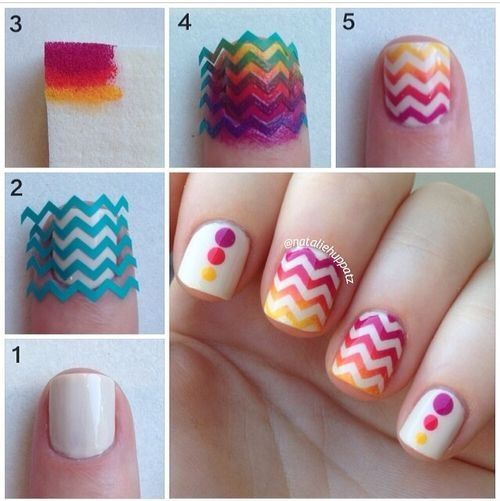
There are several ways to make this type of decoration but the best and easiest way to do it is with a zig zag scissors and an adhesive tape that you cut with these scissors to make the design.
- Cut a piece of tape with the zig zag scissors for a mountain and triangle effect
- You paint the nail a dark color to have the first layer of your design
- Let it dry and then stick the zig zag tape on the nail that you want to achieve that effect
- You paint with another color that can be golden on the rest of the nail that is left without the tape
- Take off slowly and you will have your nails decorated with a zig zag effect
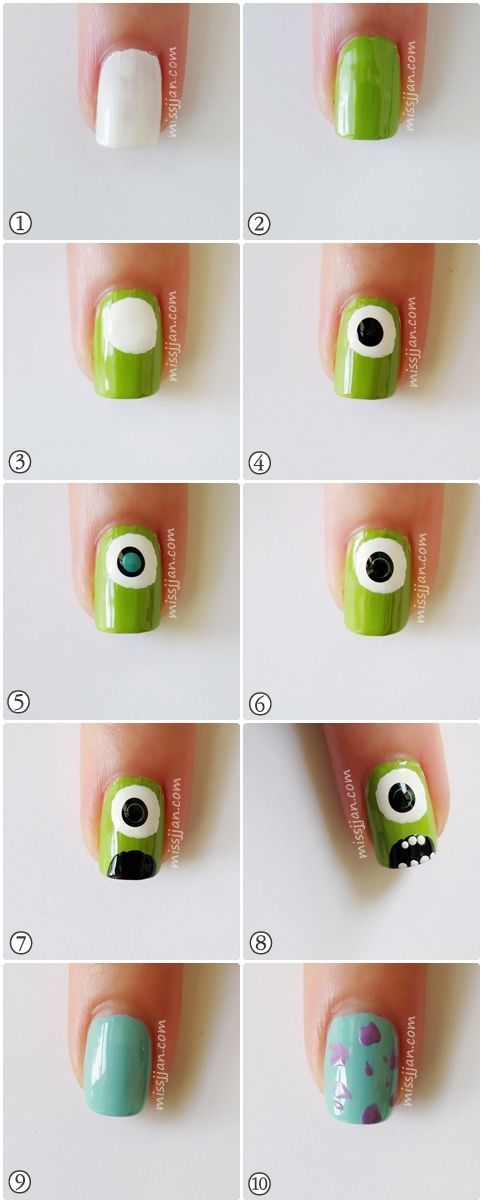
Inc Monster inc nail decoration
The animated series of the funniest monster cartoons is undoubtedly a design that many teenagers and girls want to have, that’s why I’m going to teach you easily how to draw on your nails.
The really difficult thing is that every detail is done with a raised hand and some precision is needed but it is a matter of practice.
- Paint your nail white with polish that is not shiny
- Let it dry and then apply a coat of fluo green or apple green enamel
- When it finishes drying you make a large circle that covers the entire nail of white color
- The next step is a black circle inside the target to make the eye
- On the black circle you make a smaller dark green one and then another black leaving the edges of the green layer exposed so that the edge is visible
- At the end of the protruding nail you make a crescent to simulate the black mouth
- With four half points at the end of the nail you make the lower teeth and on the end of the black crescent three whole points as the upper teeth
💅 Black and Shiny Black Decorated Nails
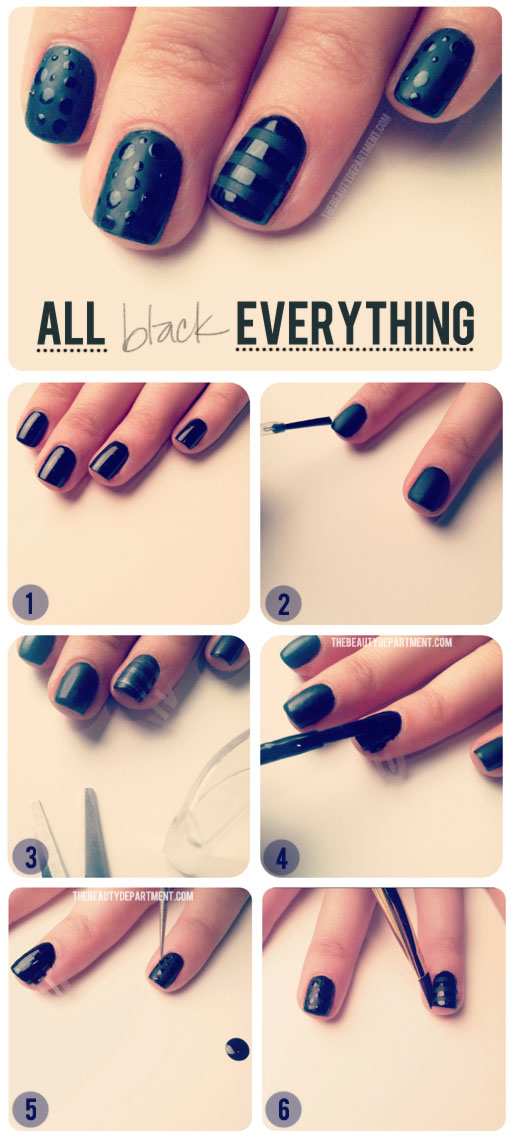
This is a widely used trend way when you want only the shade of a single color such as black but differentiate it so that the design is noticed so you can use glossy black, opaque black or matte enamel
- You make a first coat of black enamel without shiny or matte additives
- A second coat of shiny black enamel
- When drying you apply three separate nail tapes in the same measure
- Pints of matte black to make them stand out after removing the ribbons the shiny lines that were left
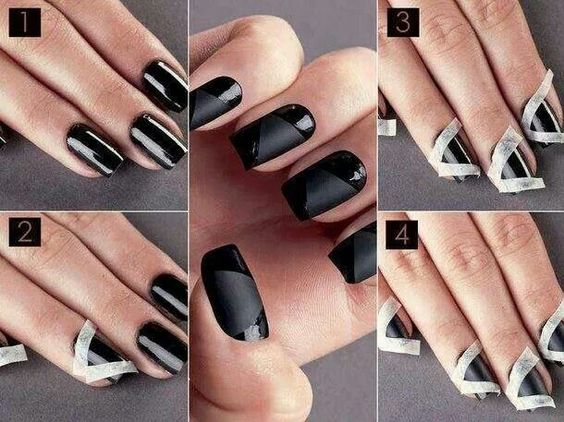
This same process can be done on one nail through the other you can complement it with dots making an opaque base and then apply with dotting glossy paint for the black dots with which you will also have a Dots and Stripes Nail Designs
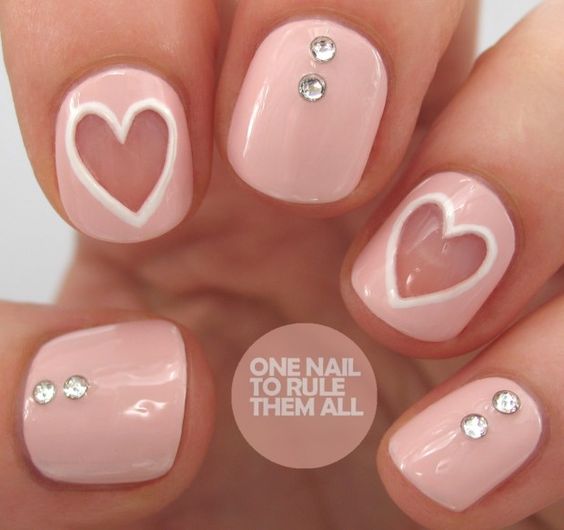
💅 Nail designs in negative
These designs are the latest trend when it comes to nail art, so I am going to show you how to make one that is used a lot among women with a beautiful heart.
It has the characteristic of using tapes to cover the part that you do not want to paint and leave without paint, it can also be done with nail polish remover to make the heart design in this case.
- Paint your nails with a coat of light pink nail polish
- Once you let it dry, what you do is paint a heart with white enamel and then let it dry. I recommend you to insert the drawings between fingers to avoid overloading the general design
- With nail polish remover what you have to do is pass over the white heart but you leave the outline intact so that it has a limited effect between the pink and the unpainted of the nail
💅 Nail Decoration with Stickers
Stickers are also a faster and easier option than painting each design, although it is not as professional, it is used a lot if you do not have manicure experience
I am going to explain a simple one that is made with stickers that represent a fire flame
- You paint your nails with a layer of blue and then let it dry, but not completely
- You peel off the flame and stick it on your nail previously the enamel of the blue color has to be semi dry so that you can adhere the image of the flame
- Finally you can pass a nail fixer so that it does not peel off with the water and the sticker lasts much longer

💅 Nails decorated with marker
The indelible markers are ideal for this type of decoration, especially the fibers that have a small point for drawing.
It is a technique that is widely used in nail makeup so much so that it can be corrected very easily and because it is something much more homemade when designing.
- You can paint dark or light base with any type of enamel to make the first layer
- Once it is dry, I recommend using a golden marker to make the figure you want from lines, hearts, geometric figures or whatever comes to your imagination or the ideas you have.

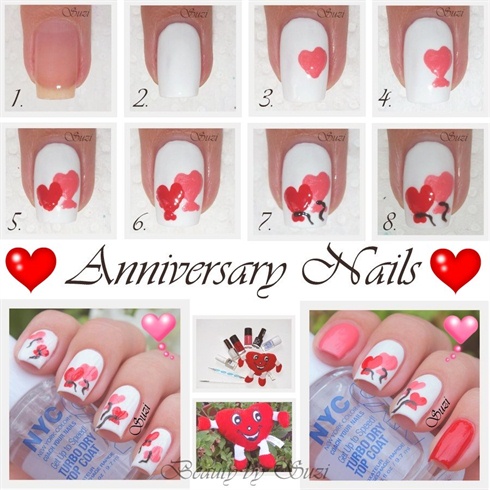
💅 Nails decorated with hearts
Teenagers or girls who are in love with life use it a lot for Valentine’s Day or romantic nights.
I am going to teach you how to make a heart with enamel and a liner brush that has a very thin and small tip
- A first coat of red paint to let dry for 20 minutes
- With the small bristle brush you make a short white letter V to make the heart
- Then you shape the lines of the V by circulating the shape to form a heart
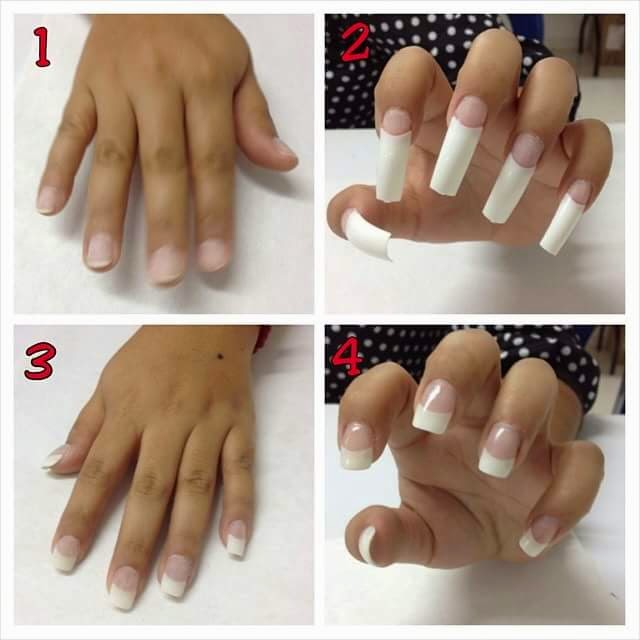
How to Put Acrylic Nails Decorated
The advantage of using this type of nail is that you can change the design whenever you want in a simple way without painting your real nail, but to put them on you have to take into account some important steps that I am going to explain to you right now.
You can also visit the most complete tutorial on how to put on false nails
You need to have:
- acrylic false nails
- Nail glue
- Small scissors to cut false nails (there are pliers but they are not as neat and effective as the nail clipper scissors)
- Acrylic liquid and acrylic powder used to create acrylic nails
- Acrylic brush and acrylic container
Now it’s time to prepare your nails
- Clean your nails removing any type of previous enamel waste that you have used, the acrylic has to be applied to clean nails in its entirety
- If you use acetone to clean with a cotton pad, it doesn’t hurt, so I advise you
- Soak acrylic nails in acetone if you already had them from another use to remove all kinds of old enamel
- With a nail clipper or a nail clipper you can cut the natural nails to make them as short as possible and with a file you match them
- The surface of the nails you have to file with a soft file which will get less shine on natural nails favoring acrylic nails in their adhesion to the surface
- Push the cuticle back with a cuticle pusher is enough before applying the false nail (remember to dip your fingers in hot water before doing this step)
- With a nail dehydrator what you can do is remove and remove the oil from your nails so that the acrylic adheres as well as possible. Apply it with cotton since its acid is very strong and can damage your skin.
- A drop of glue on your natural nail and apply the nails pressing for 10 seconds
Videos of how to make decorated nails
Different types of photos with decorated nails to get ideas about trends of the year 2020 and 2021 everything that is used.
2020 Nail Art Decorations
I am going to show you the best decorations and designs so that you have new ideas about the type of model you want to carry in your hands.
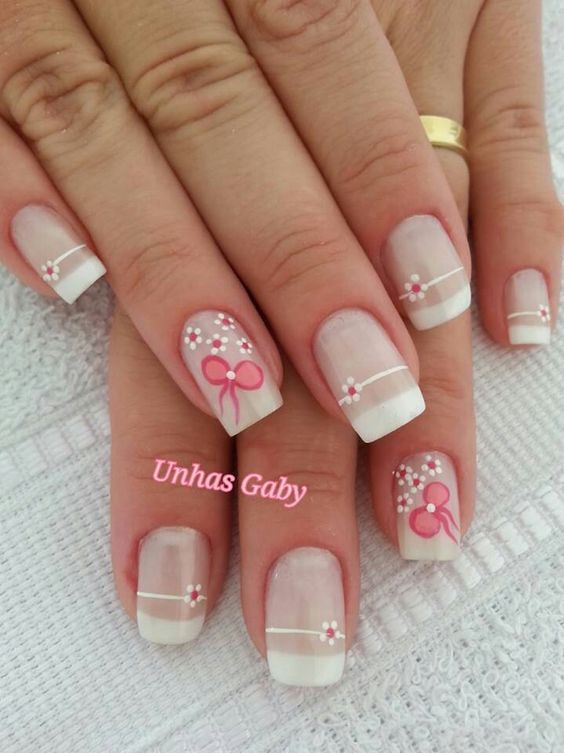
nails decorated with flowers
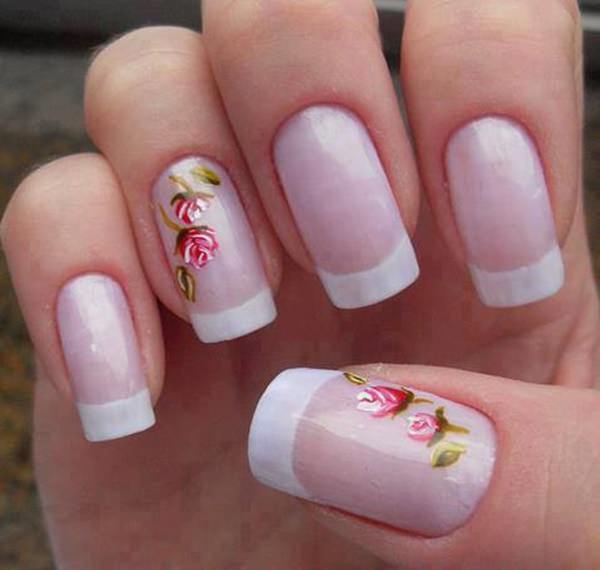
flower nail designs
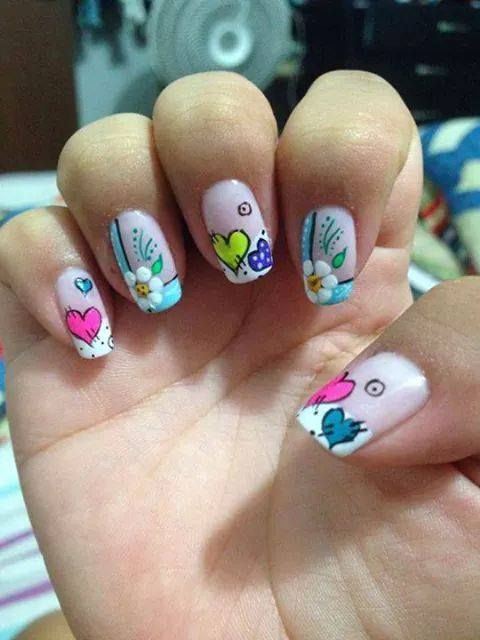
nails decorated with hearts and flowers
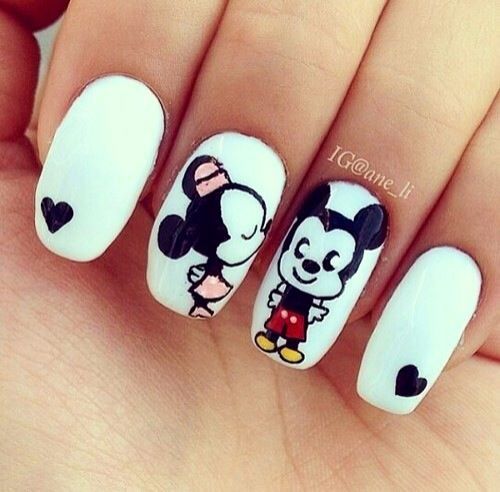
Photos painted nails of love with mickey mouse and minnie
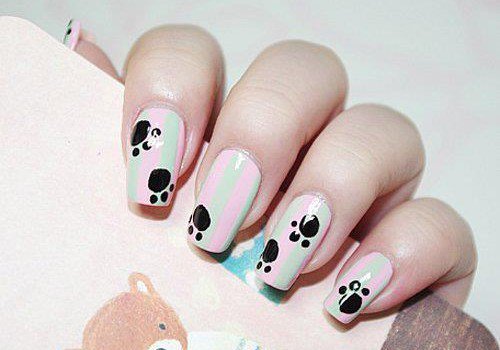
nails painted with animal tracks
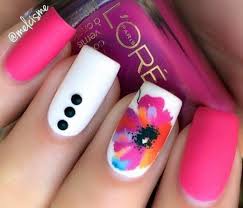
nails painted with flowers and dots
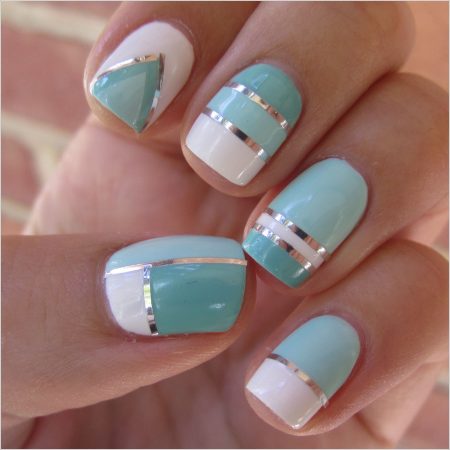
nails with bright blue lines
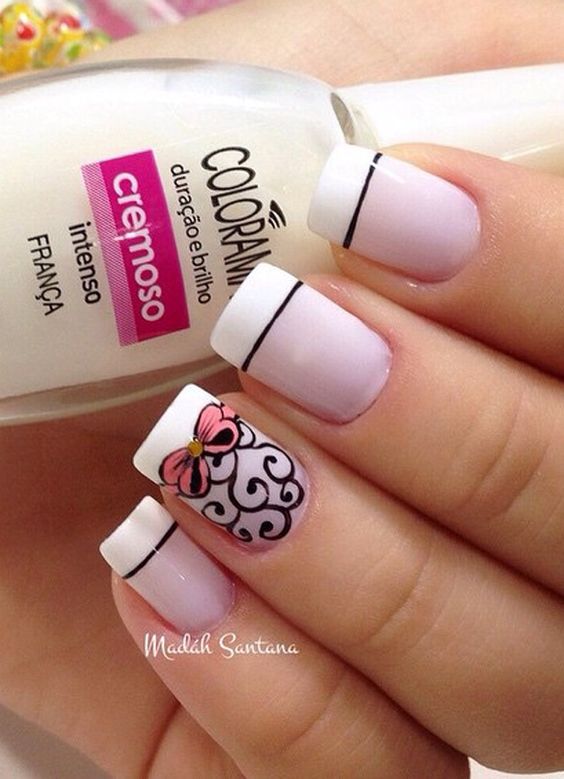
decorate white and pink french nails
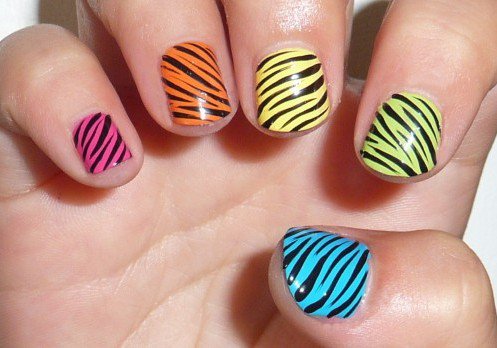
Colorful Zebra Nail Designs
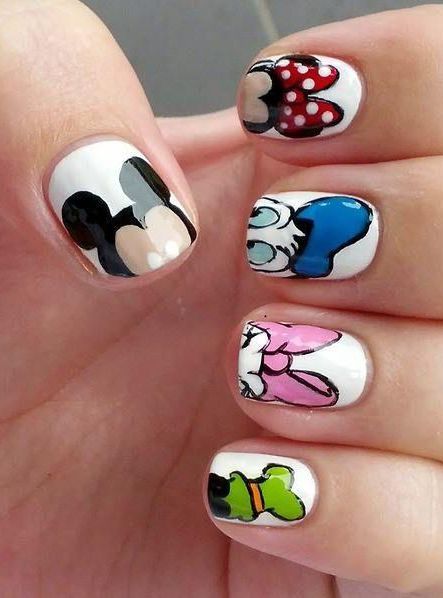
pictures nails decorated disney
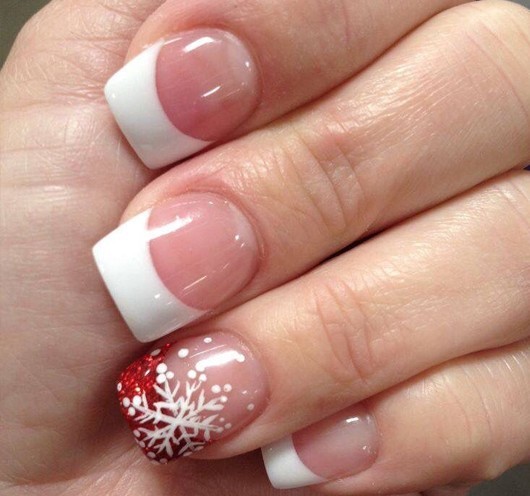
french nails images
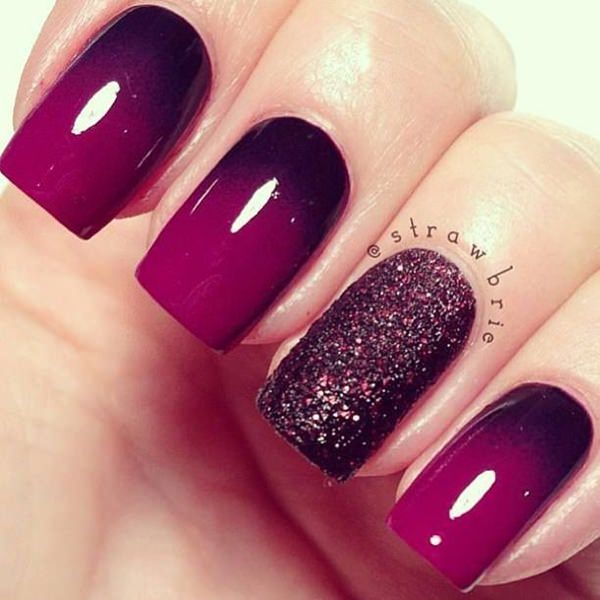
degraded purple nails images
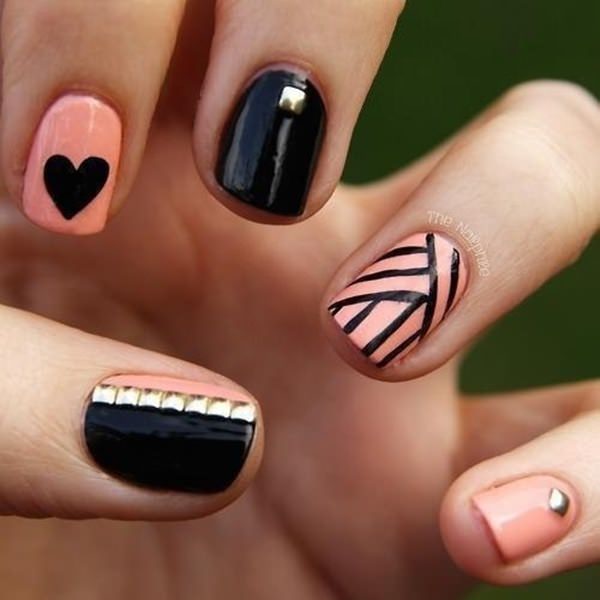
black and pink decorated nails
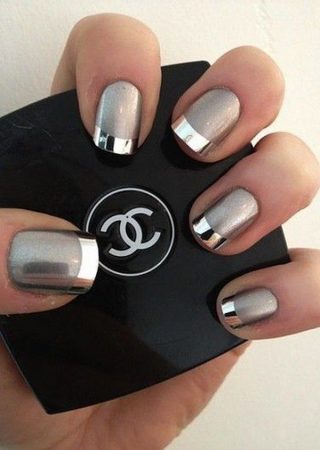
french mirror decorated nails
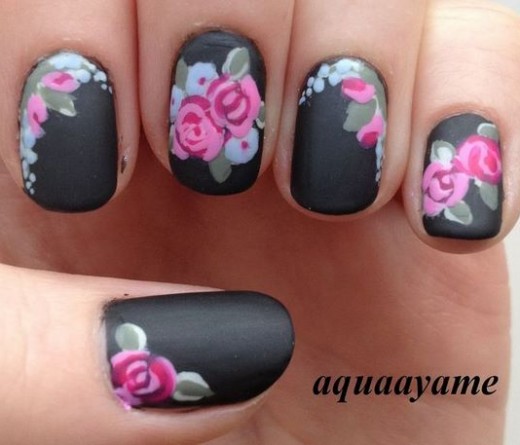
images nails with flowers
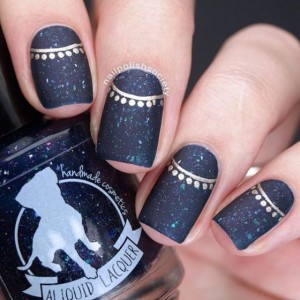
elegant nails to decorate
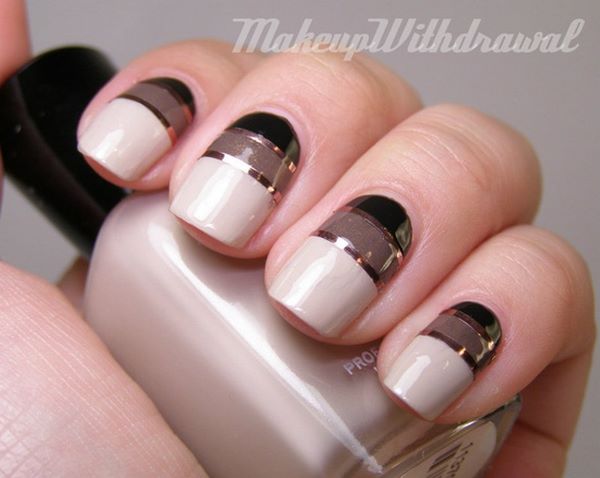
elegant decorated nails
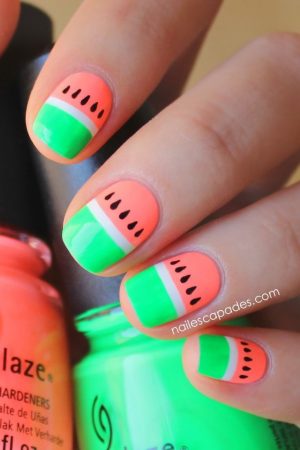
acrylic nails watermelon
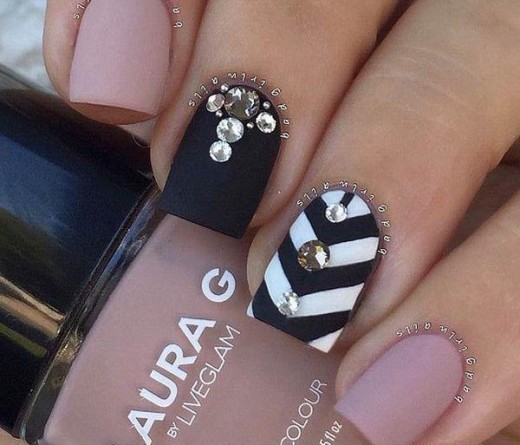
long nails decorated with stones
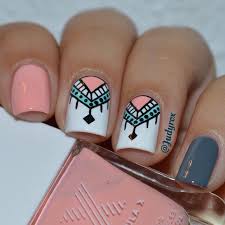
beautiful nails with designs
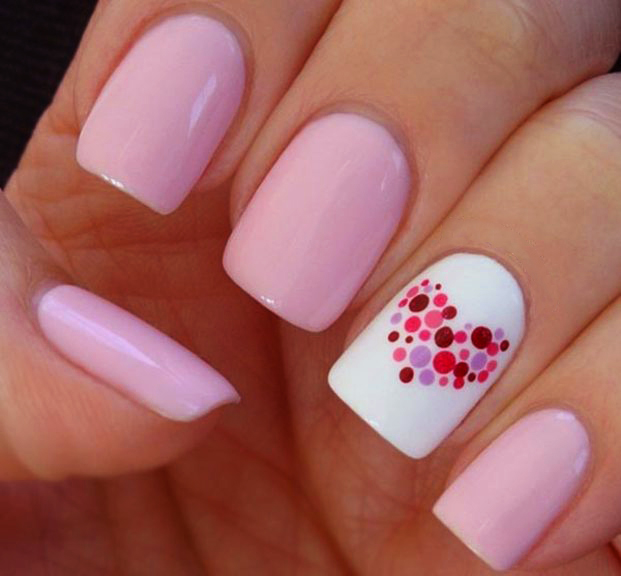
nails decorated love
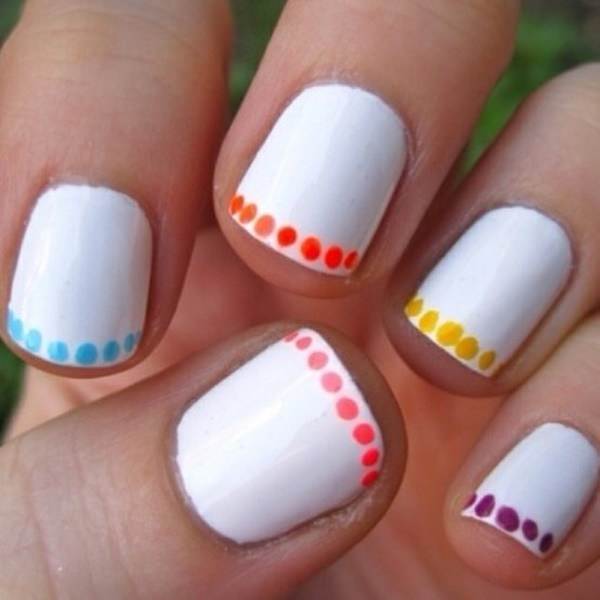
nails decorated with points
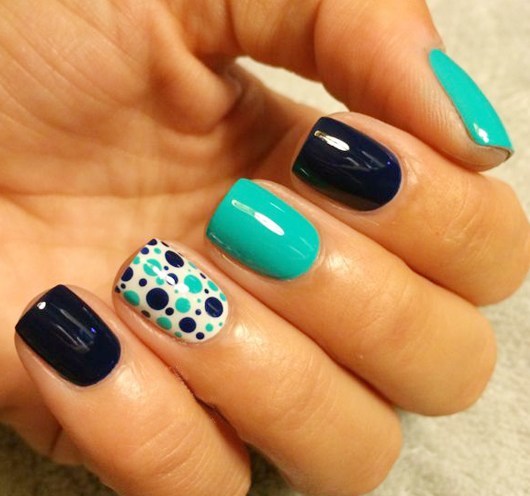
green and black nail art
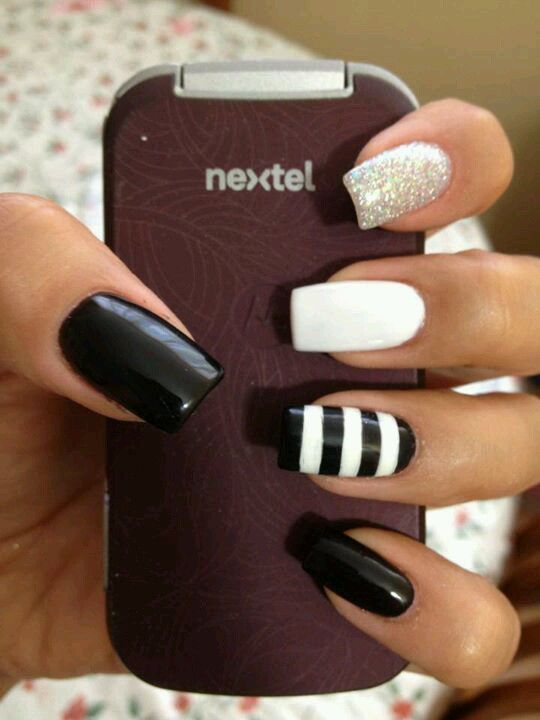
black and white nail art
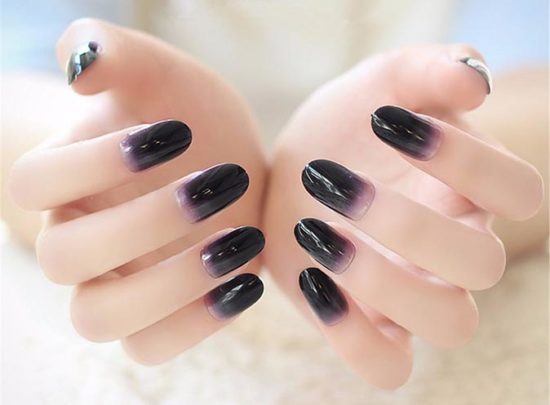
degraded nails
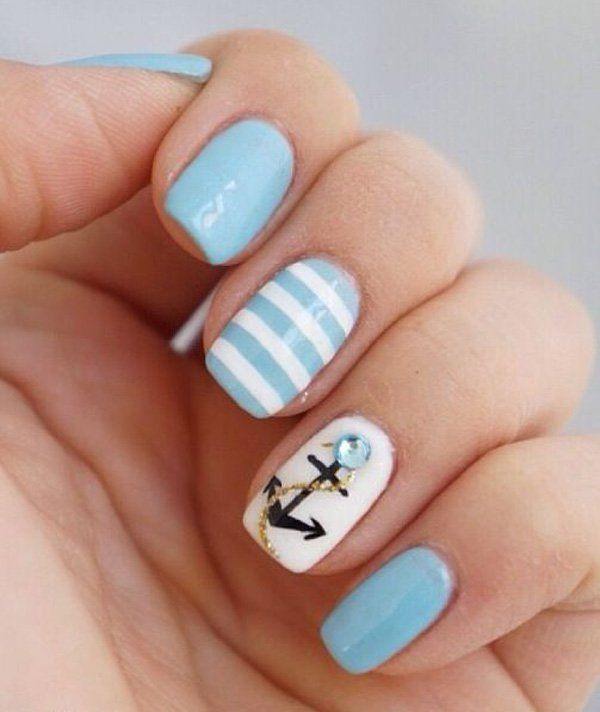
light blue nails
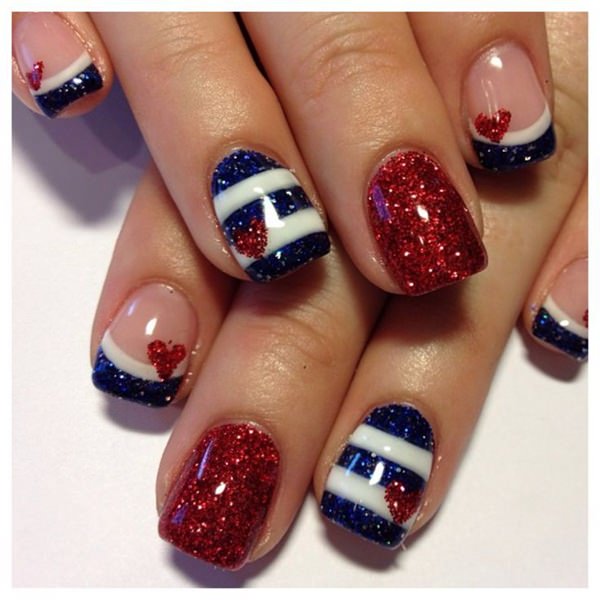
Stylish nails
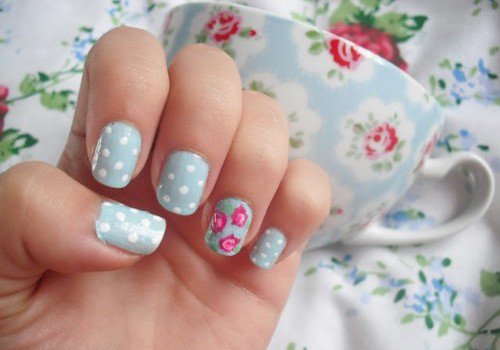
beautiful painted nails
The trend of nail designs and the Nail’s decoration in your hands it will continue to be a fashion of beauty this year, which is becoming much more elegant as it also has greater elaboration and creativity.
Everything was born with nail art in the United States and in Europe but it became massive worldwide where teenage girls let their creativity fly and oriental manicures had the precision of the detail of the small brush to make different types of drawings on the parts of the Body.
As if it were a bonsai, the nail of each finger was a space where it was always painted with solid colors, but more and more colors were added, such as red, pink, black, blue and white, among other ranges and combinations, until reaching make enamel paintings of different themes.
This is how the general line was born where it was imposed by a need to find new ways in beauty and fashion as it happened with tattoos where it was thought that at one time it was a passing fashion and it was shown that today it is part of culture.
¿Decorated nails that match everything?
The nail art It is very delicate but at the same time something that requires a lot of patience, having good taste to combine the colors and dedication to be able to change the models and figures that you are choosing.
There are different types of techniques and ways to paint your nails but one of the easiest to start without a doubt is the one that I explain in this article about how to paint your nails as if you were a manicure?
What you always have to achieve is that in addition to looking pretty you have to look elegant and that is only achieved with the good combination of colors, with the neatness when making an illustration.
From the simple fact of abstract figures or geometric figures that you want to appear on your fingers to a children’s theme where hearts, flowers, cartoon characters like mickey mouse, minnie, minions, even animals can be your theme for the day you want to show.
How to make decorated nails step by step
I am convinced that nail decoration is an art, that is why nail art as it is well defined is a discipline that came to stay within the world of fashion and beauty.
To start doing a design with each step the first thing you have to be clear about is knowing what type of drawing, illustration or design you want on your nails.
Once you have defined the shape, you have to think about the type of color to combine with your clothing, which can be of different colors combined with your shoes, handbags, accessories or your dress.
Then have a lot of patience, practice as much as possible with your nails or those of a friend, family member, neighbor or the person you want because it will give you more precision when making designs.
But above all, you have to buy or get the tools to be able to apply as if you were a professional manicure.
From nail brushes such as flat brush, liner brush, cat’s tongue brush and the abancio brush as the most basic and necessary of which what varies fundamentally is the size and type of bristles.
Another element that can help you is the nail art tape or else called striping tape.
Nail polish remover much needed to make corrections.
Glitter enamels and nail stickers.
Manicure Punch or Dotting Tool Bolillo Punch For Nail Art Designs and some Set with Stamping Nail Art.
The list goes on and on, but it will all depend on how decorated you want your hands to be starting from your nails.
I’m going to name all the types of nail designs that are trending
How to paint decorated nails
💅 Red Nail Designs with Ribbons
- You make a white base with paint on a nail you want or on all
- After you let it dry you add several ribbons as you like of different widths and sizes
- Raisins paint red nails and let dry
- Slowly take out the tapes you used and see the finished work on this nail decoration

💅 Christmas Nail Decoration
- As a base of your nails you have to degrade with the enamel using blue and light blue ranges
- Once you let it dry you can add the elements you want from a pine, snow or a snowman
- You will have your Christmas nails ready

These same steps serve to implement in summer nails by changing the combination of enamels but applying the same gradient that can be from the cuticle a more intense color and degrading to the tip depending on the size of the nail due to its length, since for short nails not highly recommended.
💅 Color Degrade Nails
- With a small sponge for your fingers, you have to pass it to your nails in the shade that you like the most
- You have to achieve the perfect point of the color you are looking for by combining the intensity of the top to the bottom of the nail.
- Use before starting to degrade with the sponge, add ribbons around the nail to avoid staining the skin of the finger and make it more clean to remove the excess paint from the nail art.

💅 Penguin nail design
It is an animal that is done a lot by teenage girls and is very fashionable for being easy to do and using few enamels
- You paint with black nail polish the nail you want to make the penguin
- With white paint you have to make a curve that its upper point is the middle of the nail to make the penguin chest
- To make the eyes white you use a dotter and make two medium dots and then with a smaller dotter inside it when you let it dry in black
- With orange color you make the beak through a small triangle in the upper chest and the legs with two squares at the tip of the nail
💅 Nail design with stones
Before you start you need to have a stone accessory applicator to add to your designs that you plan to make
- You paint a white background and start marking the edges as if it were a spider web
- Then you let them dry to apply your stones, which can be crystal strass or fancy stones with a lot of shine, Swarovski style, they have between 2 and 3 millimeters
- Use nail glue on the stones before gluing
- Do not glue all the stones together interspersed with a different color to cover the box leaving empty without stone

💅 Nails decorated with bird
It is an animal that is also chosen a lot especially by the Twitter logo especially adolescents
- Make a blank base with paint and then let it dry
- You draw with a brush with fine bristles the shape of a crescent but with one of the rounded ends filling with the color you want to give the bird
- Then you apply the dotter to make the eye white and the heart-shaped wing tilted horizontally in another color
- You make the beak and legs with a small black enamel brush

💅 Nail Decoration with Bags
- You apply paint gray nails on the nail then let it dry for about 15 minutes
- To apply the gray color and give it that random effect on the whole nail, just give it a brushstroke
- Then with a rigid bag you rest on the nail and you will have a discontinuous dot effect

💅 White nail design with blue ribbons
The tapes can be used to protect the color, or removed to give it the effect where we do not want it to be painted in the second layer, but in this case I am going to teach you how to make the tape part of the design by painting, cutting and molding as you like. like it.
- Paint your nails with white enamel and let dry
- Cut four small ribbons for one nail and put two horizontally and two others vertically over the other ribbons

Previously these ribbons must be painted in the color that you like the most but the blue is very beautiful with a light background such as white.
💅 Green dotted nails
- With dark green nail polish you can paint your nails and then implement the points
- For large points I recommend using an applicator brush where you use a lighter green color
- For small circles use a mechanical pencil with a lighter tint

Beauty tip: if you do not have a mechanical pencil you can take a pencil and in the back where it has the eraser you stick a bishop and with this you can apply color to have the smallest circles.
💅 White nails with negative designs
- First you add the ribbons on your nails as you like it can be arrow-shaped or short V-shaped staggered
- The next step is to paint on the tape and the nail in white
- You remove the tapes once the enamel is very dry

You will get a negative effect with the natural nail color through which the very elegant ribbon passed.
💅 Caviar Nail Designs
This type of design does not like all women but if it is your style it is certainly simple if you do it with patience this type of nail decoration with fish eggs that are actually small pearls of different colors that you can find from pink, Fluo, black and white that many times use manicures for the nails of brides in their marriage.
I will explain the caviar nail design step by step
- Select the nail polish color you like best and apply two coats
- Before leaving the second layer of enamel to dry, add the pearls on the nail, I recommend that it be on top of a canvas to do it with greater precision and not waste pearls when applying
- Apply pressure on the nail so that the pearls are firmly fixed and adhere well to the nail
- You have to calculate 20 minutes to dry completely

Beauty tip: do not do all the nails at once but do it one by one so that you have more neatness when designing.
Nail art recommendation: do not do all the nails with the caviar design but apply on one hand only and the rest leave them smooth so as not to overload the general design.
💅 Opaque matte nail design
This is a technique that I recommend you try with a single color of enamel which you can transform into a opaque or rather a matte shade to the selected model if you want.
In this case you can divide the nail into two colors the shade of the original enamel and then transform the other part into opaque.
You can do it from one half of the nail in different ways, both triangular, linear and form a kind of square or rectangular.
- You start by applying a clear base to use a dark enamel base
- Paint with enamel of the color you want and let dry, then apply a second coat
- The third step is to seal the application with a layer of enamel on the top of your nail
- Take a piece of Scotch tape or any type of mark and stick to your hand before sticking to your fingernail to remove excess glue
- Now glue the tape in the middle of the nail and paint in a darker tone the exposed part of the nail where you stuck the adhesive tape
- Remove and apply a fixative so that the paint does not come off and the application lasts much longer

💅 Gold nails with black dots
It is a very classic design that is widely used and is a trend in all beauty magazines
- You paint with a golden enamel that you like nails that have shine if you want
- With an applicator you make dots of different sizes in black (before letting the golden enamel dry)
If you do not have an applicator to make precision points on the nails, I recommend using a pint for hair that generally has a rounded tip at its end.

💅 Purple Nail Decoration
Three to four different colors are generally used but of the same hue always in the range of purple trying to respect an abstract geometric figure
- You apply a base coat so that your design lasts much longer
- Then you paint a pink base or some light color on the nail
- Let dry and apply as if it were a rectangle with a shade darker than the base
- A smaller rectangle on the other half of the nail but with a darker shade than the previous one, respecting the purple shade
- With a small bristle brush you can make the limits and boxes

💅 Color Splattered Nails
Beauty Secret: the main factor to make this type of colorful splashed nails is to use a toothbrush
- Start by selecting five types of light and youthful colors that you like to paint each of your nails
- Take a dark enamel color and dump a little on a paper and then pass an old toothbrush that you do not use and you can use its bristles
- Apply on the nails to give that splashed effect (previously I recommend putting ribbons on your fingers to avoid staining when applying the splashed style)

💅 Designs with ribbons and colors
- You paint your nails a color base that you like
- You add ribbons to decorate nails making the shape that you like generally in a triangular way
- To paint inside that triangle in a different shade and after the enamel dries carefully remove those small tapes

You can repeat this process several times and paint in solid colors or with dots inside each triangle you form.
💅 Nails decorated half moon
This step by step advice that I am going to explain to you for this type of design is in case you still do not have much experience and little precision in making a half circle just on the side of the cuticle and achieving this half moon design effect.
With a ribbon in a circle or in the shape of a donut you can achieve it very easily and that it is elegant as a professional
- Paint the nail yellow with an enamel to allow it to dry for 10 minutes
- You apply the tape in a circular way on part of the finger where the cuticle is and the other half on the nail
- Pints with the red enamel on the nail tackling the tape
- Let dry and remove the tape to achieve the half moon effect

💅 Splash nail design
This is another way of making this type of decoration that I explained previously and that was done with a toothbrush, in this case you will do it with a straw or cigarette that when you blow will achieve the desired effect.
- You paint your nails as always to give it a clear base
- You use a tape to cover your fingers and not stain them as well you can also use a glue
- You dip the tip of your sherbet in the enamel paint of another color at the base and then blow on the nail you want
- You repeat with two colors of different enamels and blow on the nail consequently the splash effect

Nubes Nail designs with clouds
You need to have three colors of nail polish which I recommend using pink, blue and light blue
- The base of the nail is painted pink or purple
- The next step is to make three mountains along the nail descending with the light blue
- You let it dry and with the blue color you do the same on the light blue color that you already painted the clouds achieving a desired effect

💅 Zig Zag design nails
There are several ways to make this type of decoration but the best and easiest way to do it is with a zig zag scissors and an adhesive tape that you cut with these scissors to make the design.
- Cut a piece of tape with the zig zag scissors for a mountain and triangle effect
- You paint the nail a dark color to have the first layer of your design
- Let it dry and then stick the zig zag tape on the nail that you want to achieve that effect
- You paint with another color that can be golden on the rest of the nail that is left without the tape
- Take off slowly and you will have your nails decorated with a zig zag effect

Inc Monster inc nail decoration
The animated series of the funniest monster cartoons is undoubtedly a design that many teenagers and girls want to have, that’s why I’m going to teach you easily how to draw on your nails.
The really difficult thing is that every detail is done with a raised hand and some precision is needed but it is a matter of practice.
- Paint your nail white with polish that is not shiny
- Let it dry and then apply a coat of fluo green or apple green enamel
- When it finishes drying you make a large circle that covers the entire nail of white color
- The next step is a black circle inside the target to make the eye
- On the black circle you make a smaller dark green one and then another black leaving the edges of the green layer exposed so that the edge is visible
- At the end of the protruding nail you make a crescent to simulate the black mouth
- With four half points at the end of the nail you make the lower teeth and on the end of the black crescent three whole points as the upper teeth

💅 Black and Shiny Black Decorated Nails
This is a widely used trend way when you want only the shade of a single color such as black but differentiate it so that the design is noticed so you can use glossy black, opaque black or matte enamel
- You make a first coat of black enamel without shiny or matte additives
- A second coat of shiny black enamel
- When drying you apply three separate nail tapes in the same measure
- Pints of matte black to make them stand out after removing the ribbons the shiny lines that were left

This same process can be done on one nail through the other you can complement it with dots making an opaque base and then apply with dotting glossy paint for the black dots with which you will also have a Dots and Stripes Nail Designs
💅 Nail designs in negative
These designs are the latest trend when it comes to nail art, so I am going to show you how to make one that is used a lot among women with a beautiful heart.
It has the characteristic of using tapes to cover the part that you do not want to paint and leave without paint, it can also be done with nail polish remover to make the heart design in this case.
- Paint your nails with a coat of light pink nail polish
- Once you let it dry, what you do is paint a heart with white enamel and then let it dry. I recommend you to insert the drawings between fingers to avoid overloading the general design
- With nail polish remover what you have to do is pass over the white heart but you leave the outline intact so that it has a limited effect between the pink and the unpainted of the nail

💅 Nail Decoration with Stickers
Stickers are also a faster and easier option than painting each design, although it is not as professional, it is used a lot if you do not have manicure experience
I am going to explain a simple one that is made with stickers that represent a fire flame
- You paint your nails with a layer of blue and then let it dry, but not completely
- You peel off the flame and stick it on your nail previously the enamel of the blue color has to be semi dry so that you can adhere the image of the flame
- Finally you can pass a nail fixer so that it does not peel off with the water and the sticker lasts much longer

💅 Nails decorated with marker
The indelible markers are ideal for this type of decoration, especially the fibers that have a small point for drawing.
It is a technique that is widely used in nail makeup so much so that it can be corrected very easily and because it is something much more homemade when designing.
- You can paint dark or light base with any type of enamel to make the first layer
- Once it is dry, I recommend using a golden marker to make the figure you want from lines, hearts, geometric figures or whatever comes to your imagination or the ideas you have.

💅 Nails decorated with hearts
Teenagers or girls who are in love with life use it a lot for Valentine’s Day or romantic nights.
I am going to teach you how to make a heart with enamel and a liner brush that has a very thin and small tip
- A first coat of red paint to let dry for 20 minutes
- With the small bristle brush you make a short white letter V to make the heart
- Then you shape the lines of the V by circulating the shape to form a heart

How to Put Acrylic Nails Decorated
The advantage of using this type of nail is that you can change the design whenever you want in a simple way without painting your real nail, but to put them on you have to take into account some important steps that I am going to explain to you right now.
You can also visit the most complete tutorial on how to put on false nails
You need to have:
- acrylic false nails
- Nail glue
- Small scissors to cut false nails (there are pliers but they are not as neat and effective as the nail clipper scissors)
- Acrylic liquid and acrylic powder used to create acrylic nails
- Acrylic brush and acrylic container
Now it’s time to prepare your nails
- Clean your nails removing any type of previous enamel waste that you have used, the acrylic has to be applied to clean nails in its entirety
- If you use acetone to clean with a cotton pad, it doesn’t hurt, so I advise you
- Soak acrylic nails in acetone if you already had them from another use to remove all kinds of old enamel
- With a nail clipper or a nail clipper you can cut the natural nails to make them as short as possible and with a file you match them
- The surface of the nails you have to file with a soft file which will get less shine on natural nails favoring acrylic nails in their adhesion to the surface
- Push the cuticle back with a cuticle pusher is enough before applying the false nail (remember to dip your fingers in hot water before doing this step)
- With a nail dehydrator what you can do is remove and remove the oil from your nails so that the acrylic adheres as well as possible. Apply it with cotton since its acid is very strong and can damage your skin.
- A drop of glue on your natural nail and apply the nails pressing for 10 seconds

Videos of how to make decorated nails
Different types of photos with decorated nails to get ideas about trends of the year 2020 and 2021 everything that is used.
2020 Nail Art Decorations
I am going to show you the best decorations and designs so that you have new ideas about the type of model you want to carry in your hands.

nails decorated with flowers

flower nail designs

nails decorated with hearts and flowers

Photos painted nails of love with mickey mouse and minnie

nails painted with animal tracks

nails painted with flowers and dots

nails with bright blue lines

decorate white and pink french nails

Colorful Zebra Nail Designs

pictures nails decorated disney

french nails images

degraded purple nails images

black and pink decorated nails

french mirror decorated nails

images nails with flowers

elegant nails to decorate

elegant decorated nails

acrylic nails watermelon

long nails decorated with stones

beautiful nails with designs

nails decorated love

nails decorated with points

green and black nail art

black and white nail art

degraded nails

light blue nails

Stylish nails

beautiful painted nails
The trend of nail designs and the Nail’s decoration in your hands it will continue to be a fashion of beauty this year, which is becoming much more elegant as it also has greater elaboration and creativity.
Everything was born with nail art in the United States and in Europe but it became massive worldwide where teenage girls let their creativity fly and oriental manicures had the precision of the detail of the small brush to make different types of drawings on the parts of the Body.
As if it were a bonsai, the nail of each finger was a space where it was always painted with solid colors, but more and more colors were added, such as red, pink, black, blue and white, among other ranges and combinations, until reaching make enamel paintings of different themes.
This is how the general line was born where it was imposed by a need to find new ways in beauty and fashion as it happened with tattoos where it was thought that at one time it was a passing fashion and it was shown that today it is part of culture.
¿Decorated nails that match everything?
The nail art It is very delicate but at the same time something that requires a lot of patience, having good taste to combine the colors and dedication to be able to change the models and figures that you are choosing.
There are different types of techniques and ways to paint your nails but one of the easiest to start without a doubt is the one that I explain in this article about how to paint your nails as if you were a manicure?
What you always have to achieve is that in addition to looking pretty you have to look elegant and that is only achieved with the good combination of colors, with the neatness when making an illustration.
From the simple fact of abstract figures or geometric figures that you want to appear on your fingers to a children’s theme where hearts, flowers, cartoon characters like mickey mouse, minnie, minions, even animals can be your theme for the day you want to show.
How to make decorated nails step by step
I am convinced that nail decoration is an art, that is why nail art as it is well defined is a discipline that came to stay within the world of fashion and beauty.
To start doing a design with each step the first thing you have to be clear about is knowing what type of drawing, illustration or design you want on your nails.
Once you have defined the shape, you have to think about the type of color to combine with your clothing, which can be of different colors combined with your shoes, handbags, accessories or your dress.
Then have a lot of patience, practice as much as possible with your nails or those of a friend, family member, neighbor or the person you want because it will give you more precision when making designs.
But above all, you have to buy or get the tools to be able to apply as if you were a professional manicure.
From nail brushes such as flat brush, liner brush, cat’s tongue brush and the abancio brush as the most basic and necessary of which what varies fundamentally is the size and type of bristles.
Another element that can help you is the nail art tape or else called striping tape.
Nail polish remover much needed to make corrections.
Glitter enamels and nail stickers.
Manicure Punch or Dotting Tool Bolillo Punch For Nail Art Designs and some Set with Stamping Nail Art.
The list goes on and on, but it will all depend on how decorated you want your hands to be starting from your nails.
I’m going to name all the types of nail designs that are trending
How to paint decorated nails
💅 Red Nail Designs with Ribbons
- You make a white base with paint on a nail you want or on all
- After you let it dry you add several ribbons as you like of different widths and sizes
- Raisins paint red nails and let dry
- Slowly take out the tapes you used and see the finished work on this nail decoration

💅 Christmas Nail Decoration
- As a base of your nails you have to degrade with the enamel using blue and light blue ranges
- Once you let it dry you can add the elements you want from a pine, snow or a snowman
- You will have your Christmas nails ready

These same steps serve to implement in summer nails by changing the combination of enamels but applying the same gradient that can be from the cuticle a more intense color and degrading to the tip depending on the size of the nail due to its length, since for short nails not highly recommended.
💅 Color Degrade Nails
- With a small sponge for your fingers, you have to pass it to your nails in the shade that you like the most
- You have to achieve the perfect point of the color you are looking for by combining the intensity of the top to the bottom of the nail.
- Use before starting to degrade with the sponge, add ribbons around the nail to avoid staining the skin of the finger and make it more clean to remove the excess paint from the nail art.

💅 Penguin nail design
It is an animal that is done a lot by teenage girls and is very fashionable for being easy to do and using few enamels
- You paint with black nail polish the nail you want to make the penguin
- With white paint you have to make a curve that its upper point is the middle of the nail to make the penguin chest
- To make the eyes white you use a dotter and make two medium dots and then with a smaller dotter inside it when you let it dry in black
- With orange color you make the beak through a small triangle in the upper chest and the legs with two squares at the tip of the nail
💅 Nail design with stones
Before you start you need to have a stone accessory applicator to add to your designs that you plan to make
- You paint a white background and start marking the edges as if it were a spider web
- Then you let them dry to apply your stones, which can be crystal strass or fancy stones with a lot of shine, Swarovski style, they have between 2 and 3 millimeters
- Use nail glue on the stones before gluing
- Do not glue all the stones together interspersed with a different color to cover the box leaving empty without stone

💅 Nails decorated with bird
It is an animal that is also chosen a lot especially by the Twitter logo especially adolescents
- Make a blank base with paint and then let it dry
- You draw with a brush with fine bristles the shape of a crescent but with one of the rounded ends filling with the color you want to give the bird
- Then you apply the dotter to make the eye white and the heart-shaped wing tilted horizontally in another color
- You make the beak and legs with a small black enamel brush

💅 Nail Decoration with Bags
- You apply paint gray nails on the nail then let it dry for about 15 minutes
- To apply the gray color and give it that random effect on the whole nail, just give it a brushstroke
- Then with a rigid bag you rest on the nail and you will have a discontinuous dot effect

💅 White nail design with blue ribbons
The tapes can be used to protect the color, or removed to give it the effect where we do not want it to be painted in the second layer, but in this case I am going to teach you how to make the tape part of the design by painting, cutting and molding as you like. like it.
- Paint your nails with white enamel and let dry
- Cut four small ribbons for one nail and put two horizontally and two others vertically over the other ribbons

Previously these ribbons must be painted in the color that you like the most but the blue is very beautiful with a light background such as white.
💅 Green dotted nails
- With dark green nail polish you can paint your nails and then implement the points
- For large points I recommend using an applicator brush where you use a lighter green color
- For small circles use a mechanical pencil with a lighter tint

Beauty tip: if you do not have a mechanical pencil you can take a pencil and in the back where it has the eraser you stick a bishop and with this you can apply color to have the smallest circles.
💅 White nails with negative designs
- First you add the ribbons on your nails as you like it can be arrow-shaped or short V-shaped staggered
- The next step is to paint on the tape and the nail in white
- You remove the tapes once the enamel is very dry

You will get a negative effect with the natural nail color through which the very elegant ribbon passed.
💅 Caviar Nail Designs
This type of design does not like all women but if it is your style it is certainly simple if you do it with patience this type of nail decoration with fish eggs that are actually small pearls of different colors that you can find from pink, Fluo, black and white that many times use manicures for the nails of brides in their marriage.
I will explain the caviar nail design step by step
- Select the nail polish color you like best and apply two coats
- Before leaving the second layer of enamel to dry, add the pearls on the nail, I recommend that it be on top of a canvas to do it with greater precision and not waste pearls when applying
- Apply pressure on the nail so that the pearls are firmly fixed and adhere well to the nail
- You have to calculate 20 minutes to dry completely

Beauty tip: do not do all the nails at once but do it one by one so that you have more neatness when designing.
Nail art recommendation: do not do all the nails with the caviar design but apply on one hand only and the rest leave them smooth so as not to overload the general design.
💅 Opaque matte nail design
This is a technique that I recommend you try with a single color of enamel which you can transform into a opaque or rather a matte shade to the selected model if you want.
In this case you can divide the nail into two colors the shade of the original enamel and then transform the other part into opaque.
You can do it from one half of the nail in different ways, both triangular, linear and form a kind of square or rectangular.
- You start by applying a clear base to use a dark enamel base
- Paint with enamel of the color you want and let dry, then apply a second coat
- The third step is to seal the application with a layer of enamel on the top of your nail
- Take a piece of Scotch tape or any type of mark and stick to your hand before sticking to your fingernail to remove excess glue
- Now glue the tape in the middle of the nail and paint in a darker tone the exposed part of the nail where you stuck the adhesive tape
- Remove and apply a fixative so that the paint does not come off and the application lasts much longer

💅 Gold nails with black dots
It is a very classic design that is widely used and is a trend in all beauty magazines
- You paint with a golden enamel that you like nails that have shine if you want
- With an applicator you make dots of different sizes in black (before letting the golden enamel dry)
If you do not have an applicator to make precision points on the nails, I recommend using a pint for hair that generally has a rounded tip at its end.

💅 Purple Nail Decoration
Three to four different colors are generally used but of the same hue always in the range of purple trying to respect an abstract geometric figure
- You apply a base coat so that your design lasts much longer
- Then you paint a pink base or some light color on the nail
- Let dry and apply as if it were a rectangle with a shade darker than the base
- A smaller rectangle on the other half of the nail but with a darker shade than the previous one, respecting the purple shade
- With a small bristle brush you can make the limits and boxes

💅 Color Splattered Nails
Beauty Secret: the main factor to make this type of colorful splashed nails is to use a toothbrush
- Start by selecting five types of light and youthful colors that you like to paint each of your nails
- Take a dark enamel color and dump a little on a paper and then pass an old toothbrush that you do not use and you can use its bristles
- Apply on the nails to give that splashed effect (previously I recommend putting ribbons on your fingers to avoid staining when applying the splashed style)

💅 Designs with ribbons and colors
- You paint your nails a color base that you like
- You add ribbons to decorate nails making the shape that you like generally in a triangular way
- To paint inside that triangle in a different shade and after the enamel dries carefully remove those small tapes

You can repeat this process several times and paint in solid colors or with dots inside each triangle you form.
💅 Nails decorated half moon
This step by step advice that I am going to explain to you for this type of design is in case you still do not have much experience and little precision in making a half circle just on the side of the cuticle and achieving this half moon design effect.
With a ribbon in a circle or in the shape of a donut you can achieve it very easily and that it is elegant as a professional
- Paint the nail yellow with an enamel to allow it to dry for 10 minutes
- You apply the tape in a circular way on part of the finger where the cuticle is and the other half on the nail
- Pints with the red enamel on the nail tackling the tape
- Let dry and remove the tape to achieve the half moon effect

💅 Splash nail design
This is another way of making this type of decoration that I explained previously and that was done with a toothbrush, in this case you will do it with a straw or cigarette that when you blow will achieve the desired effect.
- You paint your nails as always to give it a clear base
- You use a tape to cover your fingers and not stain them as well you can also use a glue
- You dip the tip of your sherbet in the enamel paint of another color at the base and then blow on the nail you want
- You repeat with two colors of different enamels and blow on the nail consequently the splash effect

Nubes Nail designs with clouds
You need to have three colors of nail polish which I recommend using pink, blue and light blue
- The base of the nail is painted pink or purple
- The next step is to make three mountains along the nail descending with the light blue
- You let it dry and with the blue color you do the same on the light blue color that you already painted the clouds achieving a desired effect

💅 Zig Zag design nails
There are several ways to make this type of decoration but the best and easiest way to do it is with a zig zag scissors and an adhesive tape that you cut with these scissors to make the design.
- Cut a piece of tape with the zig zag scissors for a mountain and triangle effect
- You paint the nail a dark color to have the first layer of your design
- Let it dry and then stick the zig zag tape on the nail that you want to achieve that effect
- You paint with another color that can be golden on the rest of the nail that is left without the tape
- Take off slowly and you will have your nails decorated with a zig zag effect

Inc Monster inc nail decoration
The animated series of the funniest monster cartoons is undoubtedly a design that many teenagers and girls want to have, that’s why I’m going to teach you easily how to draw on your nails.
The really difficult thing is that every detail is done with a raised hand and some precision is needed but it is a matter of practice.
- Paint your nail white with polish that is not shiny
- Let it dry and then apply a coat of fluo green or apple green enamel
- When it finishes drying you make a large circle that covers the entire nail of white color
- The next step is a black circle inside the target to make the eye
- On the black circle you make a smaller dark green one and then another black leaving the edges of the green layer exposed so that the edge is visible
- At the end of the protruding nail you make a crescent to simulate the black mouth
- With four half points at the end of the nail you make the lower teeth and on the end of the black crescent three whole points as the upper teeth

💅 Black and Shiny Black Decorated Nails
This is a widely used trend way when you want only the shade of a single color such as black but differentiate it so that the design is noticed so you can use glossy black, opaque black or matte enamel
- You make a first coat of black enamel without shiny or matte additives
- A second coat of shiny black enamel
- When drying you apply three separate nail tapes in the same measure
- Pints of matte black to make them stand out after removing the ribbons the shiny lines that were left

This same process can be done on one nail through the other you can complement it with dots making an opaque base and then apply with dotting glossy paint for the black dots with which you will also have a Dots and Stripes Nail Designs
💅 Nail designs in negative
These designs are the latest trend when it comes to nail art, so I am going to show you how to make one that is used a lot among women with a beautiful heart.
It has the characteristic of using tapes to cover the part that you do not want to paint and leave without paint, it can also be done with nail polish remover to make the heart design in this case.
- Paint your nails with a coat of light pink nail polish
- Once you let it dry, what you do is paint a heart with white enamel and then let it dry. I recommend you to insert the drawings between fingers to avoid overloading the general design
- With nail polish remover what you have to do is pass over the white heart but you leave the outline intact so that it has a limited effect between the pink and the unpainted of the nail

💅 Nail Decoration with Stickers
Stickers are also a faster and easier option than painting each design, although it is not as professional, it is used a lot if you do not have manicure experience
I am going to explain a simple one that is made with stickers that represent a fire flame
- You paint your nails with a layer of blue and then let it dry, but not completely
- You peel off the flame and stick it on your nail previously the enamel of the blue color has to be semi dry so that you can adhere the image of the flame
- Finally you can pass a nail fixer so that it does not peel off with the water and the sticker lasts much longer

💅 Nails decorated with marker
The indelible markers are ideal for this type of decoration, especially the fibers that have a small point for drawing.
It is a technique that is widely used in nail makeup so much so that it can be corrected very easily and because it is something much more homemade when designing.
- You can paint dark or light base with any type of enamel to make the first layer
- Once it is dry, I recommend using a golden marker to make the figure you want from lines, hearts, geometric figures or whatever comes to your imagination or the ideas you have.

💅 Nails decorated with hearts
Teenagers or girls who are in love with life use it a lot for Valentine’s Day or romantic nights.
I am going to teach you how to make a heart with enamel and a liner brush that has a very thin and small tip
- A first coat of red paint to let dry for 20 minutes
- With the small bristle brush you make a short white letter V to make the heart
- Then you shape the lines of the V by circulating the shape to form a heart

How to Put Acrylic Nails Decorated
The advantage of using this type of nail is that you can change the design whenever you want in a simple way without painting your real nail, but to put them on you have to take into account some important steps that I am going to explain to you right now.
You can also visit the most complete tutorial on how to put on false nails
You need to have:
- acrylic false nails
- Nail glue
- Small scissors to cut false nails (there are pliers but they are not as neat and effective as the nail clipper scissors)
- Acrylic liquid and acrylic powder used to create acrylic nails
- Acrylic brush and acrylic container
Now it’s time to prepare your nails
- Clean your nails removing any type of previous enamel waste that you have used, the acrylic has to be applied to clean nails in its entirety
- If you use acetone to clean with a cotton pad, it doesn’t hurt, so I advise you
- Soak acrylic nails in acetone if you already had them from another use to remove all kinds of old enamel
- With a nail clipper or a nail clipper you can cut the natural nails to make them as short as possible and with a file you match them
- The surface of the nails you have to file with a soft file which will get less shine on natural nails favoring acrylic nails in their adhesion to the surface
- Push the cuticle back with a cuticle pusher is enough before applying the false nail (remember to dip your fingers in hot water before doing this step)
- With a nail dehydrator what you can do is remove and remove the oil from your nails so that the acrylic adheres as well as possible. Apply it with cotton since its acid is very strong and can damage your skin.
- A drop of glue on your natural nail and apply the nails pressing for 10 seconds

Videos of how to make decorated nails
Different types of photos with decorated nails to get ideas about trends of the year 2020 and 2021 everything that is used.
2020 Nail Art Decorations
I am going to show you the best decorations and designs so that you have new ideas about the type of model you want to carry in your hands.

nails decorated with flowers

flower nail designs

nails decorated with hearts and flowers

Photos painted nails of love with mickey mouse and minnie

nails painted with animal tracks

nails painted with flowers and dots

nails with bright blue lines

decorate white and pink french nails

Colorful Zebra Nail Designs

pictures nails decorated disney

french nails images

degraded purple nails images

black and pink decorated nails

french mirror decorated nails

images nails with flowers

elegant nails to decorate

elegant decorated nails

acrylic nails watermelon

long nails decorated with stones

beautiful nails with designs

nails decorated love

nails decorated with points

green and black nail art

black and white nail art

degraded nails

light blue nails

Stylish nails

beautiful painted nails
The trend of nail designs and the Nail’s decoration in your hands it will continue to be a fashion of beauty this year, which is becoming much more elegant as it also has greater elaboration and creativity.
Everything was born with nail art in the United States and in Europe but it became massive worldwide where teenage girls let their creativity fly and oriental manicures had the precision of the detail of the small brush to make different types of drawings on the parts of the Body.
As if it were a bonsai, the nail of each finger was a space where it was always painted with solid colors, but more and more colors were added, such as red, pink, black, blue and white, among other ranges and combinations, until reaching make enamel paintings of different themes.
This is how the general line was born where it was imposed by a need to find new ways in beauty and fashion as it happened with tattoos where it was thought that at one time it was a passing fashion and it was shown that today it is part of culture.
¿Decorated nails that match everything?
The nail art It is very delicate but at the same time something that requires a lot of patience, having good taste to combine the colors and dedication to be able to change the models and figures that you are choosing.
There are different types of techniques and ways to paint your nails but one of the easiest to start without a doubt is the one that I explain in this article about how to paint your nails as if you were a manicure?
What you always have to achieve is that in addition to looking pretty you have to look elegant and that is only achieved with the good combination of colors, with the neatness when making an illustration.
From the simple fact of abstract figures or geometric figures that you want to appear on your fingers to a children’s theme where hearts, flowers, cartoon characters like mickey mouse, minnie, minions, even animals can be your theme for the day you want to show.
How to make decorated nails step by step
I am convinced that nail decoration is an art, that is why nail art as it is well defined is a discipline that came to stay within the world of fashion and beauty.
To start doing a design with each step the first thing you have to be clear about is knowing what type of drawing, illustration or design you want on your nails.
Once you have defined the shape, you have to think about the type of color to combine with your clothing, which can be of different colors combined with your shoes, handbags, accessories or your dress.
Then have a lot of patience, practice as much as possible with your nails or those of a friend, family member, neighbor or the person you want because it will give you more precision when making designs.
But above all, you have to buy or get the tools to be able to apply as if you were a professional manicure.
From nail brushes such as flat brush, liner brush, cat’s tongue brush and the abancio brush as the most basic and necessary of which what varies fundamentally is the size and type of bristles.
Another element that can help you is the nail art tape or else called striping tape.
Nail polish remover much needed to make corrections.
Glitter enamels and nail stickers.
Manicure Punch or Dotting Tool Bolillo Punch For Nail Art Designs and some Set with Stamping Nail Art.
The list goes on and on, but it will all depend on how decorated you want your hands to be starting from your nails.
I’m going to name all the types of nail designs that are trending
How to paint decorated nails
💅 Red Nail Designs with Ribbons
- You make a white base with paint on a nail you want or on all
- After you let it dry you add several ribbons as you like of different widths and sizes
- Raisins paint red nails and let dry
- Slowly take out the tapes you used and see the finished work on this nail decoration

💅 Christmas Nail Decoration
- As a base of your nails you have to degrade with the enamel using blue and light blue ranges
- Once you let it dry you can add the elements you want from a pine, snow or a snowman
- You will have your Christmas nails ready

These same steps serve to implement in summer nails by changing the combination of enamels but applying the same gradient that can be from the cuticle a more intense color and degrading to the tip depending on the size of the nail due to its length, since for short nails not highly recommended.
💅 Color Degrade Nails
- With a small sponge for your fingers, you have to pass it to your nails in the shade that you like the most
- You have to achieve the perfect point of the color you are looking for by combining the intensity of the top to the bottom of the nail.
- Use before starting to degrade with the sponge, add ribbons around the nail to avoid staining the skin of the finger and make it more clean to remove the excess paint from the nail art.

💅 Penguin nail design
It is an animal that is done a lot by teenage girls and is very fashionable for being easy to do and using few enamels
- You paint with black nail polish the nail you want to make the penguin
- With white paint you have to make a curve that its upper point is the middle of the nail to make the penguin chest
- To make the eyes white you use a dotter and make two medium dots and then with a smaller dotter inside it when you let it dry in black
- With orange color you make the beak through a small triangle in the upper chest and the legs with two squares at the tip of the nail
💅 Nail design with stones
Before you start you need to have a stone accessory applicator to add to your designs that you plan to make
- You paint a white background and start marking the edges as if it were a spider web
- Then you let them dry to apply your stones, which can be crystal strass or fancy stones with a lot of shine, Swarovski style, they have between 2 and 3 millimeters
- Use nail glue on the stones before gluing
- Do not glue all the stones together interspersed with a different color to cover the box leaving empty without stone

💅 Nails decorated with bird
It is an animal that is also chosen a lot especially by the Twitter logo especially adolescents
- Make a blank base with paint and then let it dry
- You draw with a brush with fine bristles the shape of a crescent but with one of the rounded ends filling with the color you want to give the bird
- Then you apply the dotter to make the eye white and the heart-shaped wing tilted horizontally in another color
- You make the beak and legs with a small black enamel brush

💅 Nail Decoration with Bags
- You apply paint gray nails on the nail then let it dry for about 15 minutes
- To apply the gray color and give it that random effect on the whole nail, just give it a brushstroke
- Then with a rigid bag you rest on the nail and you will have a discontinuous dot effect

💅 White nail design with blue ribbons
The tapes can be used to protect the color, or removed to give it the effect where we do not want it to be painted in the second layer, but in this case I am going to teach you how to make the tape part of the design by painting, cutting and molding as you like. like it.
- Paint your nails with white enamel and let dry
- Cut four small ribbons for one nail and put two horizontally and two others vertically over the other ribbons

Previously these ribbons must be painted in the color that you like the most but the blue is very beautiful with a light background such as white.
💅 Green dotted nails
- With dark green nail polish you can paint your nails and then implement the points
- For large points I recommend using an applicator brush where you use a lighter green color
- For small circles use a mechanical pencil with a lighter tint

Beauty tip: if you do not have a mechanical pencil you can take a pencil and in the back where it has the eraser you stick a bishop and with this you can apply color to have the smallest circles.
💅 White nails with negative designs
- First you add the ribbons on your nails as you like it can be arrow-shaped or short V-shaped staggered
- The next step is to paint on the tape and the nail in white
- You remove the tapes once the enamel is very dry

You will get a negative effect with the natural nail color through which the very elegant ribbon passed.
💅 Caviar Nail Designs
This type of design does not like all women but if it is your style it is certainly simple if you do it with patience this type of nail decoration with fish eggs that are actually small pearls of different colors that you can find from pink, Fluo, black and white that many times use manicures for the nails of brides in their marriage.
I will explain the caviar nail design step by step
- Select the nail polish color you like best and apply two coats
- Before leaving the second layer of enamel to dry, add the pearls on the nail, I recommend that it be on top of a canvas to do it with greater precision and not waste pearls when applying
- Apply pressure on the nail so that the pearls are firmly fixed and adhere well to the nail
- You have to calculate 20 minutes to dry completely

Beauty tip: do not do all the nails at once but do it one by one so that you have more neatness when designing.
Nail art recommendation: do not do all the nails with the caviar design but apply on one hand only and the rest leave them smooth so as not to overload the general design.
💅 Opaque matte nail design
This is a technique that I recommend you try with a single color of enamel which you can transform into a opaque or rather a matte shade to the selected model if you want.
In this case you can divide the nail into two colors the shade of the original enamel and then transform the other part into opaque.
You can do it from one half of the nail in different ways, both triangular, linear and form a kind of square or rectangular.
- You start by applying a clear base to use a dark enamel base
- Paint with enamel of the color you want and let dry, then apply a second coat
- The third step is to seal the application with a layer of enamel on the top of your nail
- Take a piece of Scotch tape or any type of mark and stick to your hand before sticking to your fingernail to remove excess glue
- Now glue the tape in the middle of the nail and paint in a darker tone the exposed part of the nail where you stuck the adhesive tape
- Remove and apply a fixative so that the paint does not come off and the application lasts much longer

💅 Gold nails with black dots
It is a very classic design that is widely used and is a trend in all beauty magazines
- You paint with a golden enamel that you like nails that have shine if you want
- With an applicator you make dots of different sizes in black (before letting the golden enamel dry)
If you do not have an applicator to make precision points on the nails, I recommend using a pint for hair that generally has a rounded tip at its end.

💅 Purple Nail Decoration
Three to four different colors are generally used but of the same hue always in the range of purple trying to respect an abstract geometric figure
- You apply a base coat so that your design lasts much longer
- Then you paint a pink base or some light color on the nail
- Let dry and apply as if it were a rectangle with a shade darker than the base
- A smaller rectangle on the other half of the nail but with a darker shade than the previous one, respecting the purple shade
- With a small bristle brush you can make the limits and boxes

💅 Color Splattered Nails
Beauty Secret: the main factor to make this type of colorful splashed nails is to use a toothbrush
- Start by selecting five types of light and youthful colors that you like to paint each of your nails
- Take a dark enamel color and dump a little on a paper and then pass an old toothbrush that you do not use and you can use its bristles
- Apply on the nails to give that splashed effect (previously I recommend putting ribbons on your fingers to avoid staining when applying the splashed style)

💅 Designs with ribbons and colors
- You paint your nails a color base that you like
- You add ribbons to decorate nails making the shape that you like generally in a triangular way
- To paint inside that triangle in a different shade and after the enamel dries carefully remove those small tapes

You can repeat this process several times and paint in solid colors or with dots inside each triangle you form.
💅 Nails decorated half moon
This step by step advice that I am going to explain to you for this type of design is in case you still do not have much experience and little precision in making a half circle just on the side of the cuticle and achieving this half moon design effect.
With a ribbon in a circle or in the shape of a donut you can achieve it very easily and that it is elegant as a professional
- Paint the nail yellow with an enamel to allow it to dry for 10 minutes
- You apply the tape in a circular way on part of the finger where the cuticle is and the other half on the nail
- Pints with the red enamel on the nail tackling the tape
- Let dry and remove the tape to achieve the half moon effect

💅 Splash nail design
This is another way of making this type of decoration that I explained previously and that was done with a toothbrush, in this case you will do it with a straw or cigarette that when you blow will achieve the desired effect.
- You paint your nails as always to give it a clear base
- You use a tape to cover your fingers and not stain them as well you can also use a glue
- You dip the tip of your sherbet in the enamel paint of another color at the base and then blow on the nail you want
- You repeat with two colors of different enamels and blow on the nail consequently the splash effect

Nubes Nail designs with clouds
You need to have three colors of nail polish which I recommend using pink, blue and light blue
- The base of the nail is painted pink or purple
- The next step is to make three mountains along the nail descending with the light blue
- You let it dry and with the blue color you do the same on the light blue color that you already painted the clouds achieving a desired effect

💅 Zig Zag design nails
There are several ways to make this type of decoration but the best and easiest way to do it is with a zig zag scissors and an adhesive tape that you cut with these scissors to make the design.
- Cut a piece of tape with the zig zag scissors for a mountain and triangle effect
- You paint the nail a dark color to have the first layer of your design
- Let it dry and then stick the zig zag tape on the nail that you want to achieve that effect
- You paint with another color that can be golden on the rest of the nail that is left without the tape
- Take off slowly and you will have your nails decorated with a zig zag effect

Inc Monster inc nail decoration
The animated series of the funniest monster cartoons is undoubtedly a design that many teenagers and girls want to have, that’s why I’m going to teach you easily how to draw on your nails.
The really difficult thing is that every detail is done with a raised hand and some precision is needed but it is a matter of practice.
- Paint your nail white with polish that is not shiny
- Let it dry and then apply a coat of fluo green or apple green enamel
- When it finishes drying you make a large circle that covers the entire nail of white color
- The next step is a black circle inside the target to make the eye
- On the black circle you make a smaller dark green one and then another black leaving the edges of the green layer exposed so that the edge is visible
- At the end of the protruding nail you make a crescent to simulate the black mouth
- With four half points at the end of the nail you make the lower teeth and on the end of the black crescent three whole points as the upper teeth

💅 Black and Shiny Black Decorated Nails
This is a widely used trend way when you want only the shade of a single color such as black but differentiate it so that the design is noticed so you can use glossy black, opaque black or matte enamel
- You make a first coat of black enamel without shiny or matte additives
- A second coat of shiny black enamel
- When drying you apply three separate nail tapes in the same measure
- Pints of matte black to make them stand out after removing the ribbons the shiny lines that were left

This same process can be done on one nail through the other you can complement it with dots making an opaque base and then apply with dotting glossy paint for the black dots with which you will also have a Dots and Stripes Nail Designs
💅 Nail designs in negative
These designs are the latest trend when it comes to nail art, so I am going to show you how to make one that is used a lot among women with a beautiful heart.
It has the characteristic of using tapes to cover the part that you do not want to paint and leave without paint, it can also be done with nail polish remover to make the heart design in this case.
- Paint your nails with a coat of light pink nail polish
- Once you let it dry, what you do is paint a heart with white enamel and then let it dry. I recommend you to insert the drawings between fingers to avoid overloading the general design
- With nail polish remover what you have to do is pass over the white heart but you leave the outline intact so that it has a limited effect between the pink and the unpainted of the nail

💅 Nail Decoration with Stickers
Stickers are also a faster and easier option than painting each design, although it is not as professional, it is used a lot if you do not have manicure experience
I am going to explain a simple one that is made with stickers that represent a fire flame
- You paint your nails with a layer of blue and then let it dry, but not completely
- You peel off the flame and stick it on your nail previously the enamel of the blue color has to be semi dry so that you can adhere the image of the flame
- Finally you can pass a nail fixer so that it does not peel off with the water and the sticker lasts much longer

💅 Nails decorated with marker
The indelible markers are ideal for this type of decoration, especially the fibers that have a small point for drawing.
It is a technique that is widely used in nail makeup so much so that it can be corrected very easily and because it is something much more homemade when designing.
- You can paint dark or light base with any type of enamel to make the first layer
- Once it is dry, I recommend using a golden marker to make the figure you want from lines, hearts, geometric figures or whatever comes to your imagination or the ideas you have.

💅 Nails decorated with hearts
Teenagers or girls who are in love with life use it a lot for Valentine’s Day or romantic nights.
I am going to teach you how to make a heart with enamel and a liner brush that has a very thin and small tip
- A first coat of red paint to let dry for 20 minutes
- With the small bristle brush you make a short white letter V to make the heart
- Then you shape the lines of the V by circulating the shape to form a heart

How to Put Acrylic Nails Decorated
The advantage of using this type of nail is that you can change the design whenever you want in a simple way without painting your real nail, but to put them on you have to take into account some important steps that I am going to explain to you right now.
You can also visit the most complete tutorial on how to put on false nails
You need to have:
- acrylic false nails
- Nail glue
- Small scissors to cut false nails (there are pliers but they are not as neat and effective as the nail clipper scissors)
- Acrylic liquid and acrylic powder used to create acrylic nails
- Acrylic brush and acrylic container
Now it’s time to prepare your nails
- Clean your nails removing any type of previous enamel waste that you have used, the acrylic has to be applied to clean nails in its entirety
- If you use acetone to clean with a cotton pad, it doesn’t hurt, so I advise you
- Soak acrylic nails in acetone if you already had them from another use to remove all kinds of old enamel
- With a nail clipper or a nail clipper you can cut the natural nails to make them as short as possible and with a file you match them
- The surface of the nails you have to file with a soft file which will get less shine on natural nails favoring acrylic nails in their adhesion to the surface
- Push the cuticle back with a cuticle pusher is enough before applying the false nail (remember to dip your fingers in hot water before doing this step)
- With a nail dehydrator what you can do is remove and remove the oil from your nails so that the acrylic adheres as well as possible. Apply it with cotton since its acid is very strong and can damage your skin.
- A drop of glue on your natural nail and apply the nails pressing for 10 seconds

Videos of how to make decorated nails
Different types of photos with decorated nails to get ideas about trends of the year 2020 and 2021 everything that is used.
2020 Nail Art Decorations
I am going to show you the best decorations and designs so that you have new ideas about the type of model you want to carry in your hands.

nails decorated with flowers

flower nail designs

nails decorated with hearts and flowers

Photos painted nails of love with mickey mouse and minnie

nails painted with animal tracks

nails painted with flowers and dots

nails with bright blue lines

decorate white and pink french nails

Colorful Zebra Nail Designs

pictures nails decorated disney

french nails images

degraded purple nails images

black and pink decorated nails

french mirror decorated nails

images nails with flowers

elegant nails to decorate

elegant decorated nails

acrylic nails watermelon

long nails decorated with stones

beautiful nails with designs

nails decorated love

nails decorated with points

green and black nail art

black and white nail art

degraded nails

light blue nails

Stylish nails

beautiful painted nails


