Table of Contents
If you are looking for how to make a cascade braid I will explain step by step how to do it with photos and explanation at each step with all the tricks and secrets that you can not find elsewhere.
I learned this as I worked in one of the most important hairdressing salons of today, then I perfected this technique with my young daughters as it was the best elegant hairstyle to go to school.
Hair is undoubtedly the fundamental part for our face, the frame that gives the face and a good hairstyle is essential to know how to do it.
Braided hairstyles are the most used by women since it is used a lot for a girl and a teenager because it makes you more youthful when using it.
There are many types of braids but in this case cascade or waterfall braid As it is said in English, I assure you that you will like it a lot once you learn it since it is one of the simplest hairstyles but at the same time it takes more patience when doing it.
Although it seems very complicated you will realize that by following these steps you will learn to do it quickly and easily without so many complications.
It is a hairstyle that you can do at home quietly and look your hair as if you were a model just out of a hairdresser.
Whether it matters if your hair is straight or with curlers or loops.
How to braid a waterfall
The advantage of braiding is that you can style your mane on the occasion that you implement the hairstyle.
And it can be used both for a night party and for girls especially not to have hair above their eyes or forehead at school.
The good thing about the cascade braid unlike other braids is that the hairstyle allows you to use your hair loose but at the same time arranged to be unique at that moment that you do.
Prepare the Hair for the Cascade Braid
1) Prepare materials
The first thing you have to do as for any beauty treatment is to gather and gather all the materials you need.
Since if you start braiding your hair and you lack a hair band to hold it, you will have to start again and it would be a waste of time.
So first look for a hair brush, some hair bands or hair ties and I also recommend you look for some bobby pins to hold your mane.
All this works since if you finish making the braid you can say that it does not come apart.
It happens to me many times when I start braiding my daughter that I don’t have any past to hold the braid and then when I leave her for a few minutes to go look for her, everything I did is undone.
That is why I always recommend putting the rubber bands on your wrist so that as soon as you have finished all the braiding you do not loose the tip of the braid and you can hold it.
2) Detangle hair
This is essential since if you have untangled hair it will be much easier to work with your head and mane and that the hairstyles that you make are really beautiful, this applies to any type of hairstyle that you do.
Brush your hair well with a brush that is, if possible, a bristle, or use combs that are wide-toothed, which does not hurt the scalp.
This last comb should be used if you have damp or wet hair after taking a shower.
With this comb or brush what you have to do is eliminate all kinds of knots you have or tangle that often happens to us, so this will facilitate the way to handle your locks by braiding it.
To eliminate the knots I recommend that you start from the tips of each lock you take.
With this step what you do is facilitate when taking each lock to make your braids which will be free of knots.
3) Side Stripe Hairstyle
To give the waterfall effect that is what you are looking for when making this type of braid, without a doubt the hairstyle that favors it is to make a side stripe to improve that appearance.
When you have all the hair to one side what you do is separate the other side of the head as much hair as possible is an easy hairstyle to do and what you achieve is that the mane begins to take the shape you are looking for cascade.
If your stripe is in the center of the head, it can be done the same, you should not change the style you use, but it is always advisable to make a total side stripe better so that it is much better. the other side of your face if they see you from the front and the back of your neck if they see you from the back.
4) Smoothing
If you do not have straight hair what you have to do is apply some straightening serum that allows you to perform the braiding and is more elegant and not all curly or some rinsing cream that leaves it as smooth as possible.
On the other hand, if you have straight and fine hair or if instead you have it very long, the best thing for this type of waterfall braids is to apply a cream to be able to comb easily.
The advantage of the straightening serum or a cream to remove the frizz or straightening is that you can control with more precision the lock of the braid and these hair styles will come out much easier regardless of the cuts you wear on your head.
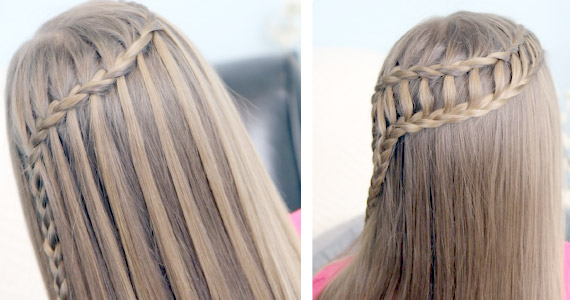
Cascade braid
1) Take the first lock of your hair
What you have to do to start making the braid is to separate in a lock of your hair that is close to the forehead where you carry the bangs.
You have to calculate the width that has to be approximately 2 to 3 centimeters between those values, that you can modify as you like, what you have to consider is that the bigger the first lock you took, the thicker the beginning of the braiding.
Tip to keep in mind if you did a side parting you have to start the braid on the side of the head where you have a greater amount of hair so that the waterfall effect you are looking for can be generated.
2) Divide the first strand into three parts that are the same
This part is essential so that you do not lose the basic effect of this hairstyle since you have to have practice with your hands so that the movements are fast.
I give you a tip to do this you can do it with two fingers that you pass through the lock of hair so that you have the three parts that have to be equal in thickness so that the braid is as perfect as possible.
The most comfortable way is to first hold your lock of hair that you are going to braid and hold two parts of the hair in one hand and take a third of the lock with the other hand.
The fingers have to tighten the strands of hair so they have to be as if it were a hook.
If you put the position of the hands well as I explain, picking up in that way, I assure you that braiding the hair will be very simple.
Any questions you have you can see at the end of the tutorial the video that looks perfectly all the steps.
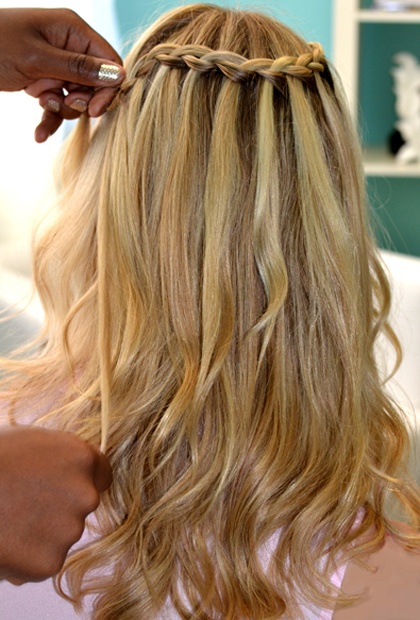
3) Complete braiding process
The first lock has to be made using the three separate locks in this section.
Using the three strand techniques used to make a classic braid.
In case you don’t know how to do it, I’ll explain it briefly.
How to make a normal braid?
– A normal braid is made first by crossing the lock you have on your left side of the mane over the center part where the nape of the neck is
-then what you have to do is cross the lock that you have on your right side of the mane over the center part that was previously the part on your left and that’s it.
let’s continue with the waterfall braid:
Once you have finished this process you have to add more hair to your braid adding also the three strands at the beginning.
This part is essential when you want to create the famous French braid that I explain in the following article.
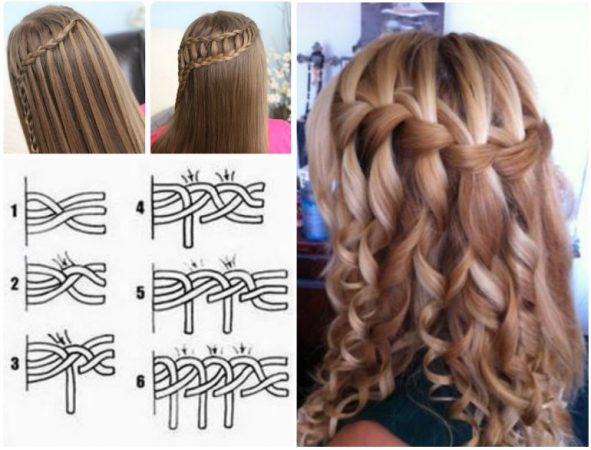
To make it clear to you how the cascade braid is composed
First you start with a normal braid with the three strands
Second step you continue with a French braid but adding the first braid.
4) Add more hair to your braid
Up to here you already have the first part done but to continue with your new hairstyle you have to add more hair and for that you collect all the hair from the top of your head.
This would be the left part where you have your hand on your hair.
After you combine it with the added part you have to continue braiding.
For that you have to do the following steps:
– You have to cross the part of the left lock of your hair, you will notice greater thickness for the part you added of hair and you have to be on the center part.
– In this step you must change what you have been doing, you have to release the right part of the hair so that it is hanging and falls, with this what you cause is to cause that waterfall effect that you are looking for.
You have to do this instead of crossing the right part of the strand over the center part, which is how you have been doing it in the braid process.
To make that right part that you drop naturally clearer is the first process of the waterfall look of the braid.
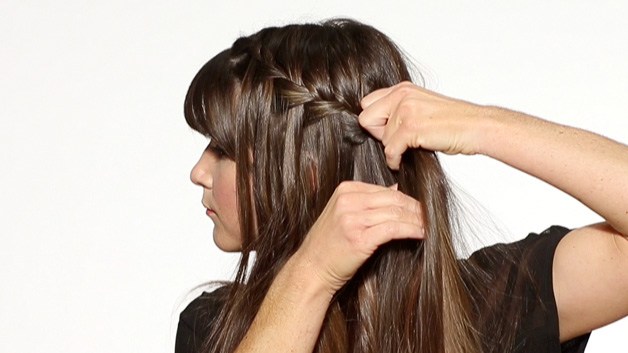
5) Keep braiding and adding hair
From this step what you should do is the French braiding technique.
Where you have to add more hair to the bottom and top of the braid you do.
French braids have an advantage of greatly favoring the face and makeup that you use as it also has the advantage of collecting all the hair although the complication within this classic hairstyle that you need help to do.
To continue with the cascade braid you have to drop the right part of the lock and then grab the new part on the right of the lock of your head from the root located just in the part behind the section you recently released.
Now you have to select a lock with the same diameter as the parts that you already used on your head throughout the mane and you must cross this new part that you took from the right over the center part.
This is what I explain to you about the technique of the three locks to make a braid.
Now you have to add more hair but on the left side.
You have to do it by taking a part of the lock of your hair from the top and combining it with the part on the left.
To make it clear to you it is the same process from the beginning to add new portions or groups of hair to your braid.
To take into account this type of braid, it is carried out horizontally as if it were a French braid that has to go through the central part of the back of your head, so that on your right side it has to be loose horizontally to give that effect to a waterfall.
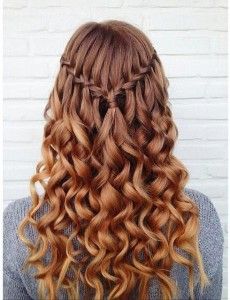
6) End of the Waterfall Braid
If you have already grasped the process, once you have made the braid that is around your entire head to where you want it to end (I recommend that it be near the other ear) you have to stop adding hair.
Then you release the hair so that the braid is finished but with the addition of continuing to braid the three strands of the parts of your hair as if you were making a normal but crossed braid.
These tips I recommend so that it is perfect when it comes to seeing your hairstyle well.
Hold the tip of the braid with a hair band, hairpin or just an elastic band but try to make sure that it does not cut the hair due to pressure.
To keep the strands in place you can use a headband or a little spray fixative on the braids.
If you want how to apply a beautiful flower it is beautiful.
With this you will have your hair collected with one of the simplest hairstyles when you learn to perform the braiding process.

Tips to make a waterfall braid
– Always try to comb and shape with wet hair so that it is easier for you to do the braids since having wet hair the braids will exert more pressure and the shape that you give will be better supported.
– The strands have to be left flat so that there are no lumps in the final hairstyle.
– The pins and bands that you apply to the braids to fix them that are a color or shade that matches your hair color.
– As I said before so that your makeup stands out next to the hairstyle you can add a hair appliqué that is a flower or a colored ribbon at the ends of the braids.
– The braids always do them when the hair is not clean for at least 24 hours which allows you not to slip or slide as much and will make it easier to build the waterfall.
Video to learn how to make a waterfall braid
Youtube video that explains step by step how to make a waterfall braid
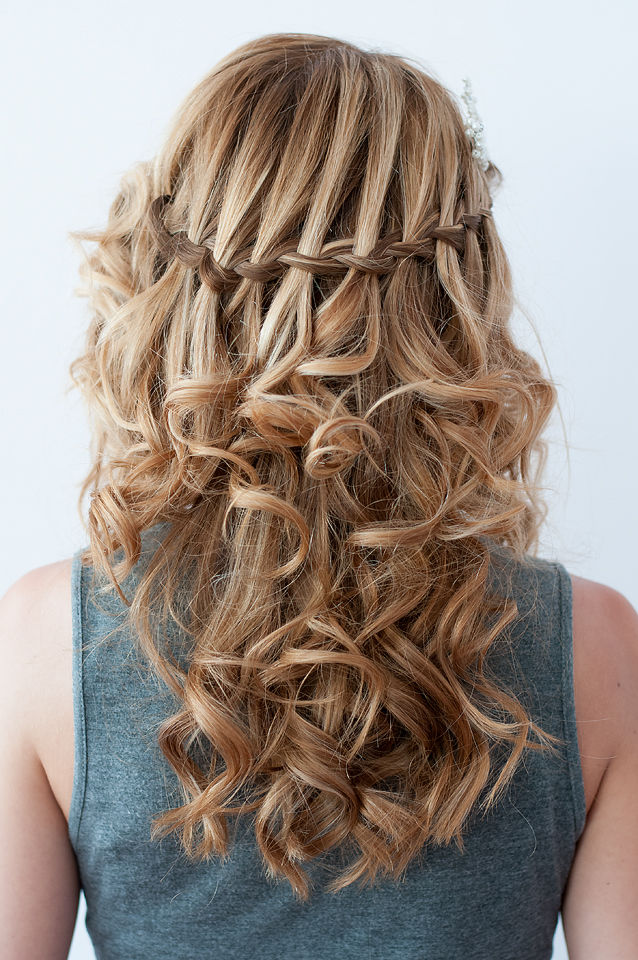
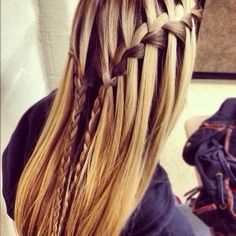
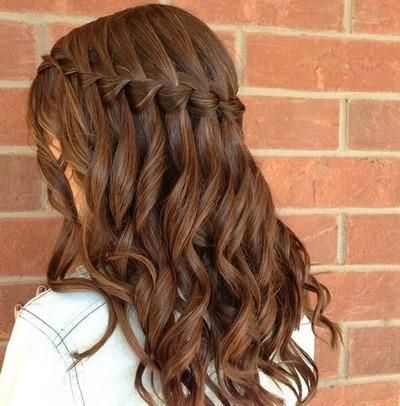
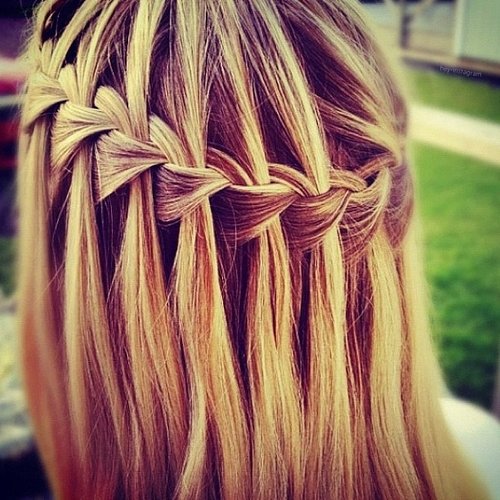
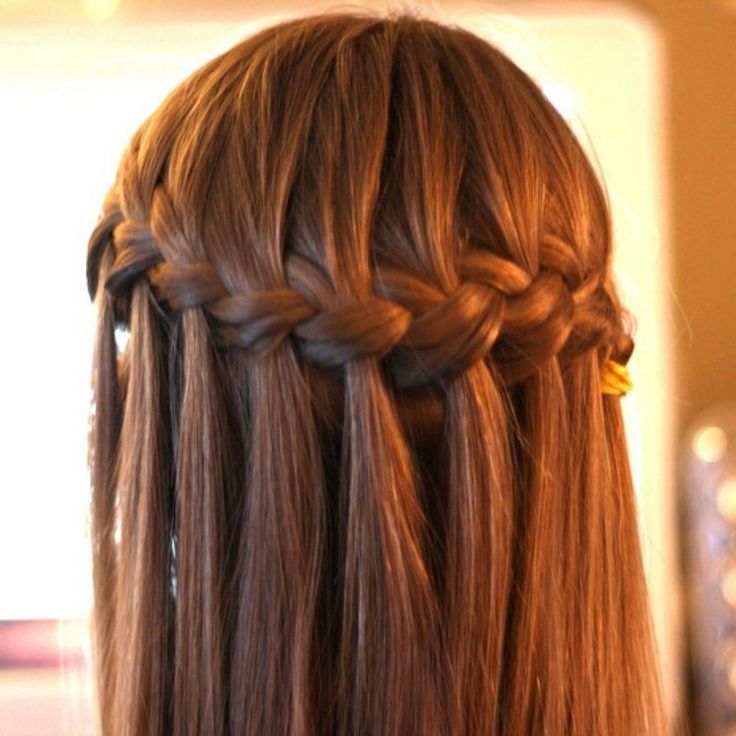
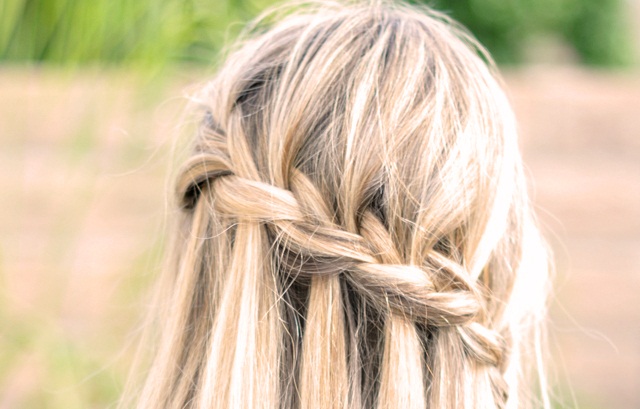
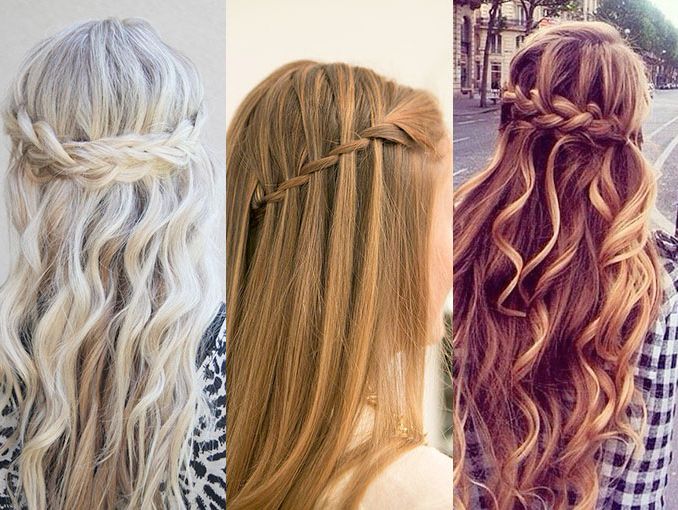
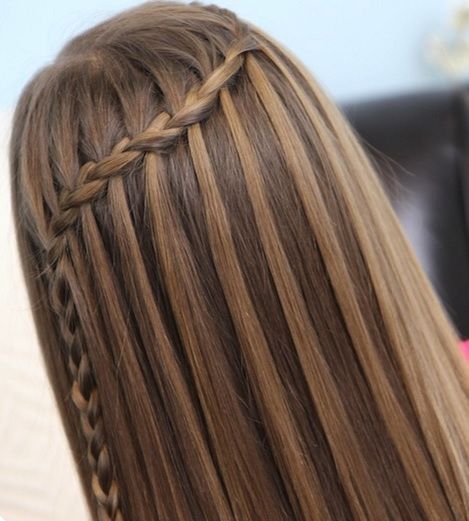
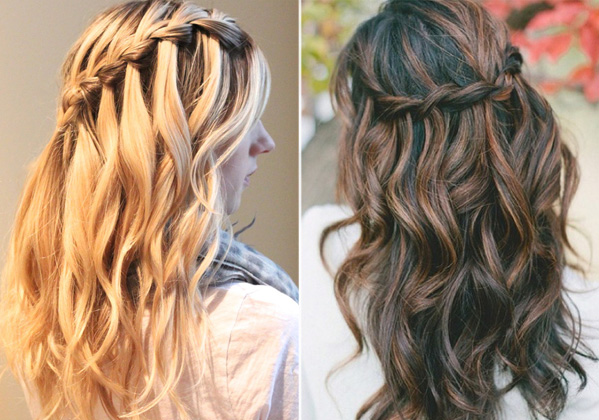
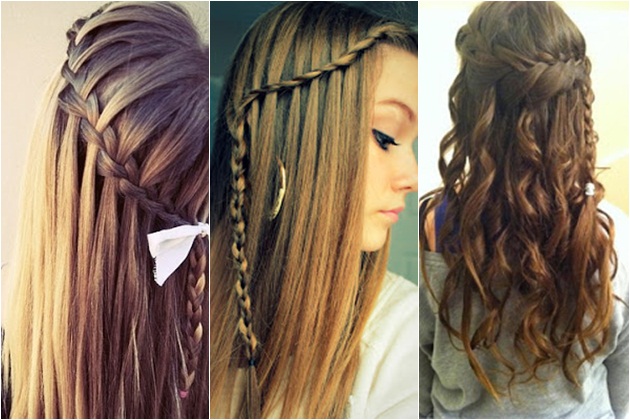
Now I will leave you some ideas of different types of cascade hairstyle designs
Waterfall Braids Hairstyles Images






If you liked the explanation and I find it useful, I invite you to share it with your friends and mothers, on facebook, twitter, pinterest or instagram, which can surely serve any woman with daughters as yourself if you want to look elegant with a pretty cascade braid.
If you are looking for how to make a cascade braid I will explain step by step how to do it with photos and explanation at each step with all the tricks and secrets that you can not find elsewhere.
I learned this as I worked in one of the most important hairdressing salons of today, then I perfected this technique with my young daughters as it was the best elegant hairstyle to go to school.
Hair is undoubtedly the fundamental part for our face, the frame that gives the face and a good hairstyle is essential to know how to do it.
Braided hairstyles are the most used by women since it is used a lot for a girl and a teenager because it makes you more youthful when using it.
There are many types of braids but in this case cascade or waterfall braid As it is said in English, I assure you that you will like it a lot once you learn it since it is one of the simplest hairstyles but at the same time it takes more patience when doing it.
Although it seems very complicated you will realize that by following these steps you will learn to do it quickly and easily without so many complications.
It is a hairstyle that you can do at home quietly and look your hair as if you were a model just out of a hairdresser.
Whether it matters if your hair is straight or with curlers or loops.
How to braid a waterfall
The advantage of braiding is that you can style your mane on the occasion that you implement the hairstyle.
And it can be used both for a night party and for girls especially not to have hair above their eyes or forehead at school.
The good thing about the cascade braid unlike other braids is that the hairstyle allows you to use your hair loose but at the same time arranged to be unique at that moment that you do.
Prepare the Hair for the Cascade Braid
1) Prepare materials
The first thing you have to do as for any beauty treatment is to gather and gather all the materials you need.
Since if you start braiding your hair and you lack a hair band to hold it, you will have to start again and it would be a waste of time.
So first look for a hair brush, some hair bands or hair ties and I also recommend you look for some bobby pins to hold your mane.
All this works since if you finish making the braid you can say that it does not come apart.
It happens to me many times when I start braiding my daughter that I don’t have any past to hold the braid and then when I leave her for a few minutes to go look for her, everything I did is undone.
That is why I always recommend putting the rubber bands on your wrist so that as soon as you have finished all the braiding you do not loose the tip of the braid and you can hold it.
2) Detangle hair
This is essential since if you have untangled hair it will be much easier to work with your head and mane and that the hairstyles that you make are really beautiful, this applies to any type of hairstyle that you do.
Brush your hair well with a brush that is, if possible, a bristle, or use combs that are wide-toothed, which does not hurt the scalp.
This last comb should be used if you have damp or wet hair after taking a shower.
With this comb or brush what you have to do is eliminate all kinds of knots you have or tangle that often happens to us, so this will facilitate the way to handle your locks by braiding it.
To eliminate the knots I recommend that you start from the tips of each lock you take.
With this step what you do is facilitate when taking each lock to make your braids which will be free of knots.
3) Side Stripe Hairstyle
To give the waterfall effect that is what you are looking for when making this type of braid, without a doubt the hairstyle that favors it is to make a side stripe to improve that appearance.
When you have all the hair to one side what you do is separate the other side of the head as much hair as possible is an easy hairstyle to do and what you achieve is that the mane begins to take the shape you are looking for cascade.
If your stripe is in the center of the head, it can be done the same, you should not change the style you use, but it is always advisable to make a total side stripe better so that it is much better. the other side of your face if they see you from the front and the back of your neck if they see you from the back.
4) Smoothing
If you do not have straight hair what you have to do is apply some straightening serum that allows you to perform the braiding and is more elegant and not all curly or some rinsing cream that leaves it as smooth as possible.
On the other hand, if you have straight and fine hair or if instead you have it very long, the best thing for this type of waterfall braids is to apply a cream to be able to comb easily.
The advantage of the straightening serum or a cream to remove the frizz or straightening is that you can control with more precision the lock of the braid and these hair styles will come out much easier regardless of the cuts you wear on your head.

Cascade braid
1) Take the first lock of your hair
What you have to do to start making the braid is to separate in a lock of your hair that is close to the forehead where you carry the bangs.
You have to calculate the width that has to be approximately 2 to 3 centimeters between those values, that you can modify as you like, what you have to consider is that the bigger the first lock you took, the thicker the beginning of the braiding.
Tip to keep in mind if you did a side parting you have to start the braid on the side of the head where you have a greater amount of hair so that the waterfall effect you are looking for can be generated.
2) Divide the first strand into three parts that are the same
This part is essential so that you do not lose the basic effect of this hairstyle since you have to have practice with your hands so that the movements are fast.
I give you a tip to do this you can do it with two fingers that you pass through the lock of hair so that you have the three parts that have to be equal in thickness so that the braid is as perfect as possible.
The most comfortable way is to first hold your lock of hair that you are going to braid and hold two parts of the hair in one hand and take a third of the lock with the other hand.
The fingers have to tighten the strands of hair so they have to be as if it were a hook.
If you put the position of the hands well as I explain, picking up in that way, I assure you that braiding the hair will be very simple.
Any questions you have you can see at the end of the tutorial the video that looks perfectly all the steps.

3) Complete braiding process
The first lock has to be made using the three separate locks in this section.
Using the three strand techniques used to make a classic braid.
In case you don’t know how to do it, I’ll explain it briefly.
How to make a normal braid?
– A normal braid is made first by crossing the lock you have on your left side of the mane over the center part where the nape of the neck is
-then what you have to do is cross the lock that you have on your right side of the mane over the center part that was previously the part on your left and that’s it.
let’s continue with the waterfall braid:
Once you have finished this process you have to add more hair to your braid adding also the three strands at the beginning.
This part is essential when you want to create the famous French braid that I explain in the following article.
To make it clear to you how the cascade braid is composed
First you start with a normal braid with the three strands
Second step you continue with a French braid but adding the first braid.
4) Add more hair to your braid
Up to here you already have the first part done but to continue with your new hairstyle you have to add more hair and for that you collect all the hair from the top of your head.
This would be the left part where you have your hand on your hair.
After you combine it with the added part you have to continue braiding.
For that you have to do the following steps:
– You have to cross the part of the left lock of your hair, you will notice greater thickness for the part you added of hair and you have to be on the center part.
– In this step you must change what you have been doing, you have to release the right part of the hair so that it is hanging and falls, with this what you cause is to cause that waterfall effect that you are looking for.
You have to do this instead of crossing the right part of the strand over the center part, which is how you have been doing it in the braid process.
To make that right part that you drop naturally clearer is the first process of the waterfall look of the braid.

5) Keep braiding and adding hair
From this step what you should do is the French braiding technique.
Where you have to add more hair to the bottom and top of the braid you do.
French braids have an advantage of greatly favoring the face and makeup that you use as it also has the advantage of collecting all the hair although the complication within this classic hairstyle that you need help to do.
To continue with the cascade braid you have to drop the right part of the lock and then grab the new part on the right of the lock of your head from the root located just in the part behind the section you recently released.
Now you have to select a lock with the same diameter as the parts that you already used on your head throughout the mane and you must cross this new part that you took from the right over the center part.
This is what I explain to you about the technique of the three locks to make a braid.
Now you have to add more hair but on the left side.
You have to do it by taking a part of the lock of your hair from the top and combining it with the part on the left.
To make it clear to you it is the same process from the beginning to add new portions or groups of hair to your braid.
To take into account this type of braid, it is carried out horizontally as if it were a French braid that has to go through the central part of the back of your head, so that on your right side it has to be loose horizontally to give that effect to a waterfall.

6) End of the Waterfall Braid
If you have already grasped the process, once you have made the braid that is around your entire head to where you want it to end (I recommend that it be near the other ear) you have to stop adding hair.
Then you release the hair so that the braid is finished but with the addition of continuing to braid the three strands of the parts of your hair as if you were making a normal but crossed braid.
These tips I recommend so that it is perfect when it comes to seeing your hairstyle well.
Hold the tip of the braid with a hair band, hairpin or just an elastic band but try to make sure that it does not cut the hair due to pressure.
To keep the strands in place you can use a headband or a little spray fixative on the braids.
If you want how to apply a beautiful flower it is beautiful.
With this you will have your hair collected with one of the simplest hairstyles when you learn to perform the braiding process.

Tips to make a waterfall braid
– Always try to comb and shape with wet hair so that it is easier for you to do the braids since having wet hair the braids will exert more pressure and the shape that you give will be better supported.
– The strands have to be left flat so that there are no lumps in the final hairstyle.
– The pins and bands that you apply to the braids to fix them that are a color or shade that matches your hair color.
– As I said before so that your makeup stands out next to the hairstyle you can add a hair appliqué that is a flower or a colored ribbon at the ends of the braids.
– The braids always do them when the hair is not clean for at least 24 hours which allows you not to slip or slide as much and will make it easier to build the waterfall.

Video to learn how to make a waterfall braid
Youtube video that explains step by step how to make a waterfall braid
Now I will leave you some ideas of different types of cascade hairstyle designs
Waterfall Braids Hairstyles Images


If you liked the explanation and I find it useful, I invite you to share it with your friends and mothers, on facebook, twitter, pinterest or instagram, which can surely serve any woman with daughters as yourself if you want to look elegant with a pretty cascade braid.
If you are looking for how to make a cascade braid I will explain step by step how to do it with photos and explanation at each step with all the tricks and secrets that you can not find elsewhere.
I learned this as I worked in one of the most important hairdressing salons of today, then I perfected this technique with my young daughters as it was the best elegant hairstyle to go to school.
Hair is undoubtedly the fundamental part for our face, the frame that gives the face and a good hairstyle is essential to know how to do it.
Braided hairstyles are the most used by women since it is used a lot for a girl and a teenager because it makes you more youthful when using it.
There are many types of braids but in this case cascade or waterfall braid As it is said in English, I assure you that you will like it a lot once you learn it since it is one of the simplest hairstyles but at the same time it takes more patience when doing it.
Although it seems very complicated you will realize that by following these steps you will learn to do it quickly and easily without so many complications.
It is a hairstyle that you can do at home quietly and look your hair as if you were a model just out of a hairdresser.
Whether it matters if your hair is straight or with curlers or loops.
How to braid a waterfall
The advantage of braiding is that you can style your mane on the occasion that you implement the hairstyle.
And it can be used both for a night party and for girls especially not to have hair above their eyes or forehead at school.
The good thing about the cascade braid unlike other braids is that the hairstyle allows you to use your hair loose but at the same time arranged to be unique at that moment that you do.
Prepare the Hair for the Cascade Braid
1) Prepare materials
The first thing you have to do as for any beauty treatment is to gather and gather all the materials you need.
Since if you start braiding your hair and you lack a hair band to hold it, you will have to start again and it would be a waste of time.
So first look for a hair brush, some hair bands or hair ties and I also recommend you look for some bobby pins to hold your mane.
All this works since if you finish making the braid you can say that it does not come apart.
It happens to me many times when I start braiding my daughter that I don’t have any past to hold the braid and then when I leave her for a few minutes to go look for her, everything I did is undone.
That is why I always recommend putting the rubber bands on your wrist so that as soon as you have finished all the braiding you do not loose the tip of the braid and you can hold it.
2) Detangle hair
This is essential since if you have untangled hair it will be much easier to work with your head and mane and that the hairstyles that you make are really beautiful, this applies to any type of hairstyle that you do.
Brush your hair well with a brush that is, if possible, a bristle, or use combs that are wide-toothed, which does not hurt the scalp.
This last comb should be used if you have damp or wet hair after taking a shower.
With this comb or brush what you have to do is eliminate all kinds of knots you have or tangle that often happens to us, so this will facilitate the way to handle your locks by braiding it.
To eliminate the knots I recommend that you start from the tips of each lock you take.
With this step what you do is facilitate when taking each lock to make your braids which will be free of knots.
3) Side Stripe Hairstyle
To give the waterfall effect that is what you are looking for when making this type of braid, without a doubt the hairstyle that favors it is to make a side stripe to improve that appearance.
When you have all the hair to one side what you do is separate the other side of the head as much hair as possible is an easy hairstyle to do and what you achieve is that the mane begins to take the shape you are looking for cascade.
If your stripe is in the center of the head, it can be done the same, you should not change the style you use, but it is always advisable to make a total side stripe better so that it is much better. the other side of your face if they see you from the front and the back of your neck if they see you from the back.
4) Smoothing
If you do not have straight hair what you have to do is apply some straightening serum that allows you to perform the braiding and is more elegant and not all curly or some rinsing cream that leaves it as smooth as possible.
On the other hand, if you have straight and fine hair or if instead you have it very long, the best thing for this type of waterfall braids is to apply a cream to be able to comb easily.
The advantage of the straightening serum or a cream to remove the frizz or straightening is that you can control with more precision the lock of the braid and these hair styles will come out much easier regardless of the cuts you wear on your head.

Cascade braid
1) Take the first lock of your hair
What you have to do to start making the braid is to separate in a lock of your hair that is close to the forehead where you carry the bangs.
You have to calculate the width that has to be approximately 2 to 3 centimeters between those values, that you can modify as you like, what you have to consider is that the bigger the first lock you took, the thicker the beginning of the braiding.
Tip to keep in mind if you did a side parting you have to start the braid on the side of the head where you have a greater amount of hair so that the waterfall effect you are looking for can be generated.
2) Divide the first strand into three parts that are the same
This part is essential so that you do not lose the basic effect of this hairstyle since you have to have practice with your hands so that the movements are fast.
I give you a tip to do this you can do it with two fingers that you pass through the lock of hair so that you have the three parts that have to be equal in thickness so that the braid is as perfect as possible.
The most comfortable way is to first hold your lock of hair that you are going to braid and hold two parts of the hair in one hand and take a third of the lock with the other hand.
The fingers have to tighten the strands of hair so they have to be as if it were a hook.
If you put the position of the hands well as I explain, picking up in that way, I assure you that braiding the hair will be very simple.
Any questions you have you can see at the end of the tutorial the video that looks perfectly all the steps.

3) Complete braiding process
The first lock has to be made using the three separate locks in this section.
Using the three strand techniques used to make a classic braid.
In case you don’t know how to do it, I’ll explain it briefly.
How to make a normal braid?
– A normal braid is made first by crossing the lock you have on your left side of the mane over the center part where the nape of the neck is
-then what you have to do is cross the lock that you have on your right side of the mane over the center part that was previously the part on your left and that’s it.
let’s continue with the waterfall braid:
Once you have finished this process you have to add more hair to your braid adding also the three strands at the beginning.
This part is essential when you want to create the famous French braid that I explain in the following article.
To make it clear to you how the cascade braid is composed
First you start with a normal braid with the three strands
Second step you continue with a French braid but adding the first braid.
4) Add more hair to your braid
Up to here you already have the first part done but to continue with your new hairstyle you have to add more hair and for that you collect all the hair from the top of your head.
This would be the left part where you have your hand on your hair.
After you combine it with the added part you have to continue braiding.
For that you have to do the following steps:
– You have to cross the part of the left lock of your hair, you will notice greater thickness for the part you added of hair and you have to be on the center part.
– In this step you must change what you have been doing, you have to release the right part of the hair so that it is hanging and falls, with this what you cause is to cause that waterfall effect that you are looking for.
You have to do this instead of crossing the right part of the strand over the center part, which is how you have been doing it in the braid process.
To make that right part that you drop naturally clearer is the first process of the waterfall look of the braid.

5) Keep braiding and adding hair
From this step what you should do is the French braiding technique.
Where you have to add more hair to the bottom and top of the braid you do.
French braids have an advantage of greatly favoring the face and makeup that you use as it also has the advantage of collecting all the hair although the complication within this classic hairstyle that you need help to do.
To continue with the cascade braid you have to drop the right part of the lock and then grab the new part on the right of the lock of your head from the root located just in the part behind the section you recently released.
Now you have to select a lock with the same diameter as the parts that you already used on your head throughout the mane and you must cross this new part that you took from the right over the center part.
This is what I explain to you about the technique of the three locks to make a braid.
Now you have to add more hair but on the left side.
You have to do it by taking a part of the lock of your hair from the top and combining it with the part on the left.
To make it clear to you it is the same process from the beginning to add new portions or groups of hair to your braid.
To take into account this type of braid, it is carried out horizontally as if it were a French braid that has to go through the central part of the back of your head, so that on your right side it has to be loose horizontally to give that effect to a waterfall.

6) End of the Waterfall Braid
If you have already grasped the process, once you have made the braid that is around your entire head to where you want it to end (I recommend that it be near the other ear) you have to stop adding hair.
Then you release the hair so that the braid is finished but with the addition of continuing to braid the three strands of the parts of your hair as if you were making a normal but crossed braid.
These tips I recommend so that it is perfect when it comes to seeing your hairstyle well.
Hold the tip of the braid with a hair band, hairpin or just an elastic band but try to make sure that it does not cut the hair due to pressure.
To keep the strands in place you can use a headband or a little spray fixative on the braids.
If you want how to apply a beautiful flower it is beautiful.
With this you will have your hair collected with one of the simplest hairstyles when you learn to perform the braiding process.

Tips to make a waterfall braid
– Always try to comb and shape with wet hair so that it is easier for you to do the braids since having wet hair the braids will exert more pressure and the shape that you give will be better supported.
– The strands have to be left flat so that there are no lumps in the final hairstyle.
– The pins and bands that you apply to the braids to fix them that are a color or shade that matches your hair color.
– As I said before so that your makeup stands out next to the hairstyle you can add a hair appliqué that is a flower or a colored ribbon at the ends of the braids.
– The braids always do them when the hair is not clean for at least 24 hours which allows you not to slip or slide as much and will make it easier to build the waterfall.

Video to learn how to make a waterfall braid
Youtube video that explains step by step how to make a waterfall braid
Now I will leave you some ideas of different types of cascade hairstyle designs
Waterfall Braids Hairstyles Images


If you liked the explanation and I find it useful, I invite you to share it with your friends and mothers, on facebook, twitter, pinterest or instagram, which can surely serve any woman with daughters as yourself if you want to look elegant with a pretty cascade braid.
If you are looking for how to make a cascade braid I will explain step by step how to do it with photos and explanation at each step with all the tricks and secrets that you can not find elsewhere.
I learned this as I worked in one of the most important hairdressing salons of today, then I perfected this technique with my young daughters as it was the best elegant hairstyle to go to school.
Hair is undoubtedly the fundamental part for our face, the frame that gives the face and a good hairstyle is essential to know how to do it.
Braided hairstyles are the most used by women since it is used a lot for a girl and a teenager because it makes you more youthful when using it.
There are many types of braids but in this case cascade or waterfall braid As it is said in English, I assure you that you will like it a lot once you learn it since it is one of the simplest hairstyles but at the same time it takes more patience when doing it.
Although it seems very complicated you will realize that by following these steps you will learn to do it quickly and easily without so many complications.
It is a hairstyle that you can do at home quietly and look your hair as if you were a model just out of a hairdresser.
Whether it matters if your hair is straight or with curlers or loops.
How to braid a waterfall
The advantage of braiding is that you can style your mane on the occasion that you implement the hairstyle.
And it can be used both for a night party and for girls especially not to have hair above their eyes or forehead at school.
The good thing about the cascade braid unlike other braids is that the hairstyle allows you to use your hair loose but at the same time arranged to be unique at that moment that you do.
Prepare the Hair for the Cascade Braid
1) Prepare materials
The first thing you have to do as for any beauty treatment is to gather and gather all the materials you need.
Since if you start braiding your hair and you lack a hair band to hold it, you will have to start again and it would be a waste of time.
So first look for a hair brush, some hair bands or hair ties and I also recommend you look for some bobby pins to hold your mane.
All this works since if you finish making the braid you can say that it does not come apart.
It happens to me many times when I start braiding my daughter that I don’t have any past to hold the braid and then when I leave her for a few minutes to go look for her, everything I did is undone.
That is why I always recommend putting the rubber bands on your wrist so that as soon as you have finished all the braiding you do not loose the tip of the braid and you can hold it.
2) Detangle hair
This is essential since if you have untangled hair it will be much easier to work with your head and mane and that the hairstyles that you make are really beautiful, this applies to any type of hairstyle that you do.
Brush your hair well with a brush that is, if possible, a bristle, or use combs that are wide-toothed, which does not hurt the scalp.
This last comb should be used if you have damp or wet hair after taking a shower.
With this comb or brush what you have to do is eliminate all kinds of knots you have or tangle that often happens to us, so this will facilitate the way to handle your locks by braiding it.
To eliminate the knots I recommend that you start from the tips of each lock you take.
With this step what you do is facilitate when taking each lock to make your braids which will be free of knots.
3) Side Stripe Hairstyle
To give the waterfall effect that is what you are looking for when making this type of braid, without a doubt the hairstyle that favors it is to make a side stripe to improve that appearance.
When you have all the hair to one side what you do is separate the other side of the head as much hair as possible is an easy hairstyle to do and what you achieve is that the mane begins to take the shape you are looking for cascade.
If your stripe is in the center of the head, it can be done the same, you should not change the style you use, but it is always advisable to make a total side stripe better so that it is much better. the other side of your face if they see you from the front and the back of your neck if they see you from the back.
4) Smoothing
If you do not have straight hair what you have to do is apply some straightening serum that allows you to perform the braiding and is more elegant and not all curly or some rinsing cream that leaves it as smooth as possible.
On the other hand, if you have straight and fine hair or if instead you have it very long, the best thing for this type of waterfall braids is to apply a cream to be able to comb easily.
The advantage of the straightening serum or a cream to remove the frizz or straightening is that you can control with more precision the lock of the braid and these hair styles will come out much easier regardless of the cuts you wear on your head.

Cascade braid
1) Take the first lock of your hair
What you have to do to start making the braid is to separate in a lock of your hair that is close to the forehead where you carry the bangs.
You have to calculate the width that has to be approximately 2 to 3 centimeters between those values, that you can modify as you like, what you have to consider is that the bigger the first lock you took, the thicker the beginning of the braiding.
Tip to keep in mind if you did a side parting you have to start the braid on the side of the head where you have a greater amount of hair so that the waterfall effect you are looking for can be generated.
2) Divide the first strand into three parts that are the same
This part is essential so that you do not lose the basic effect of this hairstyle since you have to have practice with your hands so that the movements are fast.
I give you a tip to do this you can do it with two fingers that you pass through the lock of hair so that you have the three parts that have to be equal in thickness so that the braid is as perfect as possible.
The most comfortable way is to first hold your lock of hair that you are going to braid and hold two parts of the hair in one hand and take a third of the lock with the other hand.
The fingers have to tighten the strands of hair so they have to be as if it were a hook.
If you put the position of the hands well as I explain, picking up in that way, I assure you that braiding the hair will be very simple.
Any questions you have you can see at the end of the tutorial the video that looks perfectly all the steps.

3) Complete braiding process
The first lock has to be made using the three separate locks in this section.
Using the three strand techniques used to make a classic braid.
In case you don’t know how to do it, I’ll explain it briefly.
How to make a normal braid?
– A normal braid is made first by crossing the lock you have on your left side of the mane over the center part where the nape of the neck is
-then what you have to do is cross the lock that you have on your right side of the mane over the center part that was previously the part on your left and that’s it.
let’s continue with the waterfall braid:
Once you have finished this process you have to add more hair to your braid adding also the three strands at the beginning.
This part is essential when you want to create the famous French braid that I explain in the following article.
To make it clear to you how the cascade braid is composed
First you start with a normal braid with the three strands
Second step you continue with a French braid but adding the first braid.
4) Add more hair to your braid
Up to here you already have the first part done but to continue with your new hairstyle you have to add more hair and for that you collect all the hair from the top of your head.
This would be the left part where you have your hand on your hair.
After you combine it with the added part you have to continue braiding.
For that you have to do the following steps:
– You have to cross the part of the left lock of your hair, you will notice greater thickness for the part you added of hair and you have to be on the center part.
– In this step you must change what you have been doing, you have to release the right part of the hair so that it is hanging and falls, with this what you cause is to cause that waterfall effect that you are looking for.
You have to do this instead of crossing the right part of the strand over the center part, which is how you have been doing it in the braid process.
To make that right part that you drop naturally clearer is the first process of the waterfall look of the braid.

5) Keep braiding and adding hair
From this step what you should do is the French braiding technique.
Where you have to add more hair to the bottom and top of the braid you do.
French braids have an advantage of greatly favoring the face and makeup that you use as it also has the advantage of collecting all the hair although the complication within this classic hairstyle that you need help to do.
To continue with the cascade braid you have to drop the right part of the lock and then grab the new part on the right of the lock of your head from the root located just in the part behind the section you recently released.
Now you have to select a lock with the same diameter as the parts that you already used on your head throughout the mane and you must cross this new part that you took from the right over the center part.
This is what I explain to you about the technique of the three locks to make a braid.
Now you have to add more hair but on the left side.
You have to do it by taking a part of the lock of your hair from the top and combining it with the part on the left.
To make it clear to you it is the same process from the beginning to add new portions or groups of hair to your braid.
To take into account this type of braid, it is carried out horizontally as if it were a French braid that has to go through the central part of the back of your head, so that on your right side it has to be loose horizontally to give that effect to a waterfall.

6) End of the Waterfall Braid
If you have already grasped the process, once you have made the braid that is around your entire head to where you want it to end (I recommend that it be near the other ear) you have to stop adding hair.
Then you release the hair so that the braid is finished but with the addition of continuing to braid the three strands of the parts of your hair as if you were making a normal but crossed braid.
These tips I recommend so that it is perfect when it comes to seeing your hairstyle well.
Hold the tip of the braid with a hair band, hairpin or just an elastic band but try to make sure that it does not cut the hair due to pressure.
To keep the strands in place you can use a headband or a little spray fixative on the braids.
If you want how to apply a beautiful flower it is beautiful.
With this you will have your hair collected with one of the simplest hairstyles when you learn to perform the braiding process.

Tips to make a waterfall braid
– Always try to comb and shape with wet hair so that it is easier for you to do the braids since having wet hair the braids will exert more pressure and the shape that you give will be better supported.
– The strands have to be left flat so that there are no lumps in the final hairstyle.
– The pins and bands that you apply to the braids to fix them that are a color or shade that matches your hair color.
– As I said before so that your makeup stands out next to the hairstyle you can add a hair appliqué that is a flower or a colored ribbon at the ends of the braids.
– The braids always do them when the hair is not clean for at least 24 hours which allows you not to slip or slide as much and will make it easier to build the waterfall.

Video to learn how to make a waterfall braid
Youtube video that explains step by step how to make a waterfall braid
Now I will leave you some ideas of different types of cascade hairstyle designs
Waterfall Braids Hairstyles Images


If you liked the explanation and I find it useful, I invite you to share it with your friends and mothers, on facebook, twitter, pinterest or instagram, which can surely serve any woman with daughters as yourself if you want to look elegant with a pretty cascade braid.


