Table of Contents
This time I’m going to show you how hairstyles are made with french braids or as its original name is called french braid or french braids which is one of the styles that are most used when you are looking for some type of braiding.
It is the most classic but at the same time it is still the most effective so it is chosen so much among the girls for being simple, fast but elegant at the same time.
Used by dancers, athletes, celebrities and now you have to use it yourself.
In the following article I am going to explain all the steps in detail that you must do to achieve the beauty of this hairstyle but at the same time I am going to leave you a photo gallery where you are going to be able to choose which one you like the most since It has different variations.
You can do the French braids sideways, inverted French braids, two French braids among many others that I will show you.
This braid made her very famous today for Kim Kardashian.
This braid is the most chosen by mothers for their girls as well as the ponytail hairstyle as they are easy to do but at the same time it has long hair for the little girl.
If you want to get more ideas to braid, I recommend you see these tutorials that I prepared in the most complete guide to Hairstyles with Braids on the Internet.
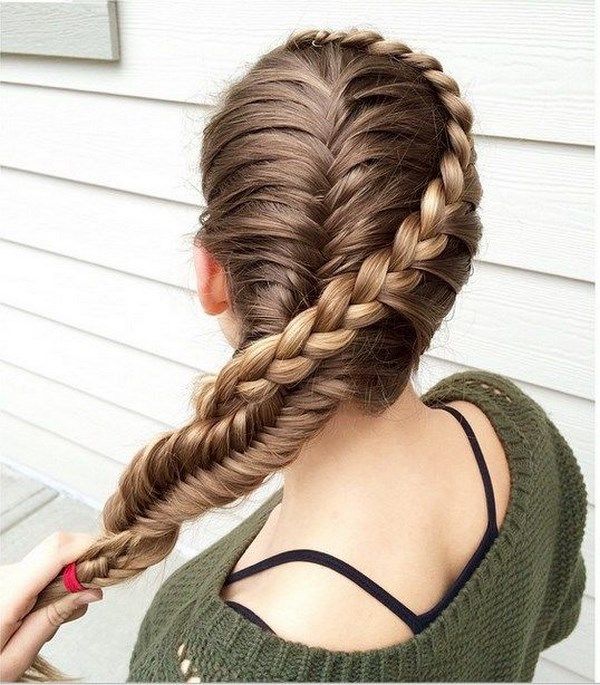
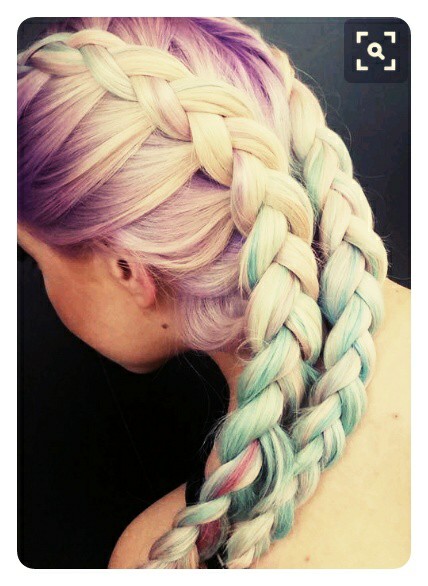
French Braids Hairstyles Images
In these photos I invite you first before each hairstyle tutorial, so you can see the great style that is in fashion and sets trends within fast and elegant hairstyles.
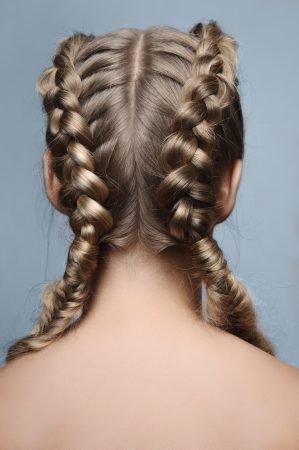
The two French braids is widely used for female athletes who are engaged in being a boxer and in different sports disciplines
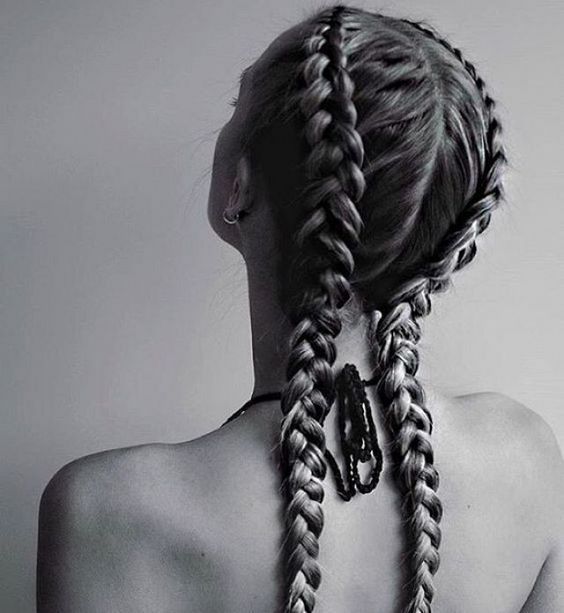
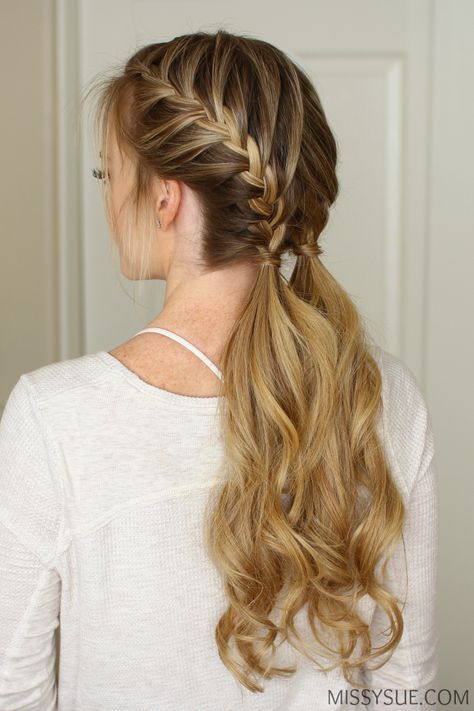
Double French braids that you can use for pigtails or for collected hairstyles
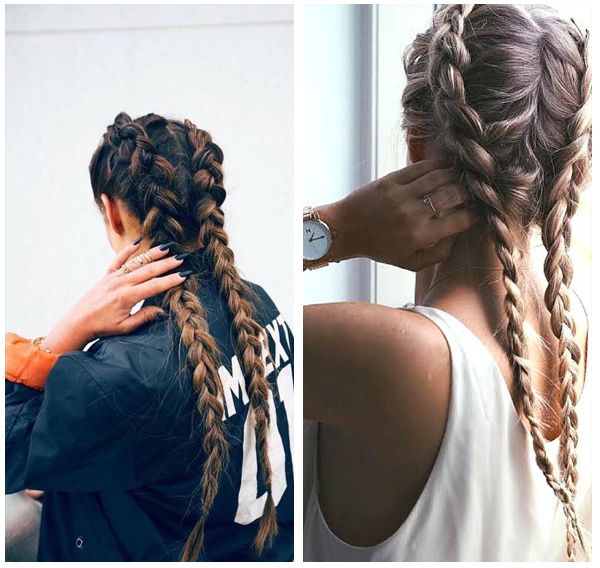
Hairstyles with French braids for long hair with ponytail and hair band
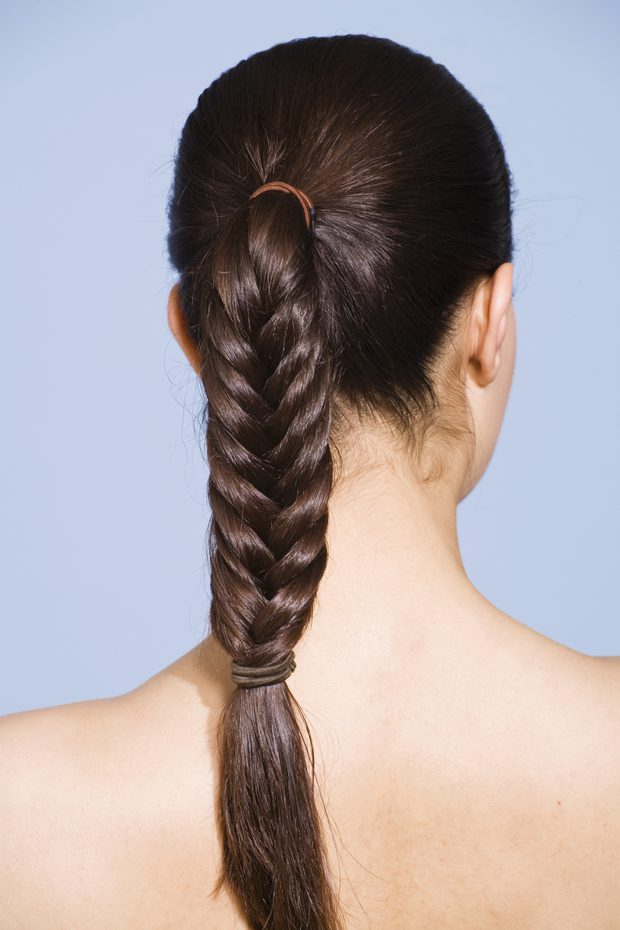
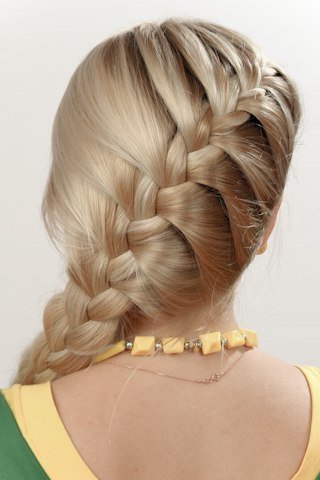
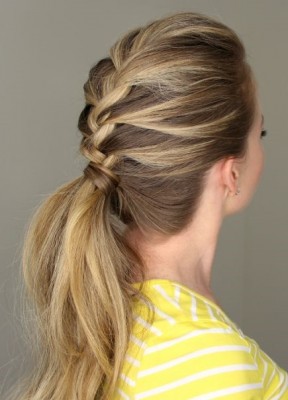
Some people mistake dreadlocks for the type of French braids or French braids that are hairstyles that have different combinations
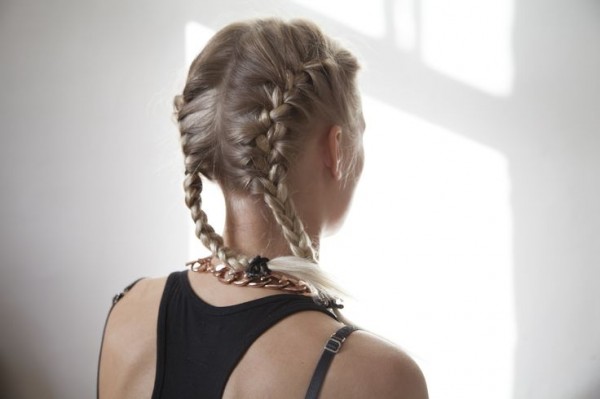
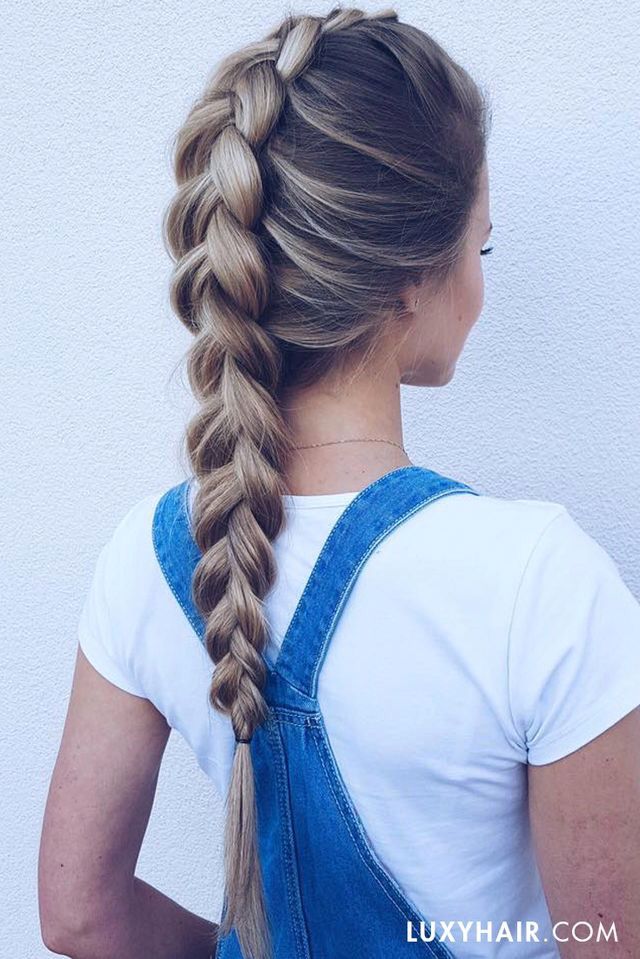
This derivative of the half braid French braid hairstyle explained step by step is very useful and original referring in part to the Dutch braids
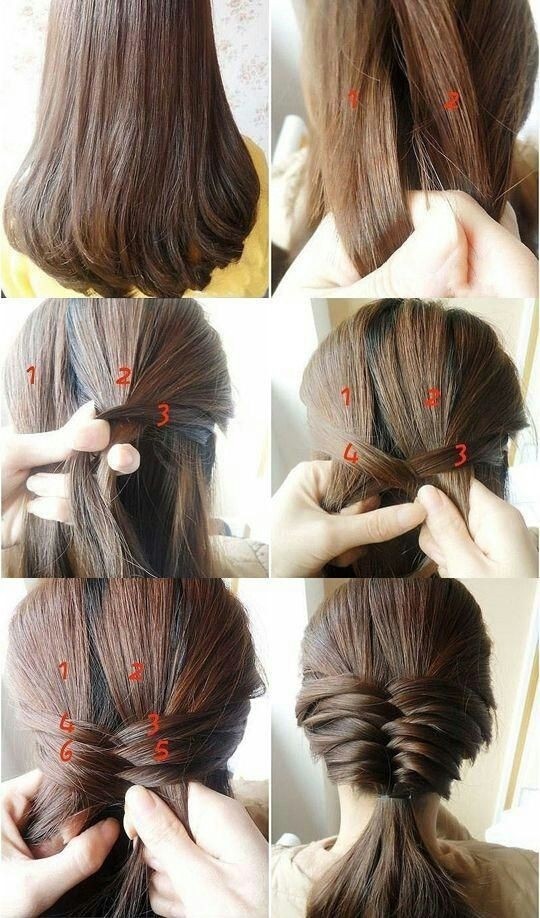
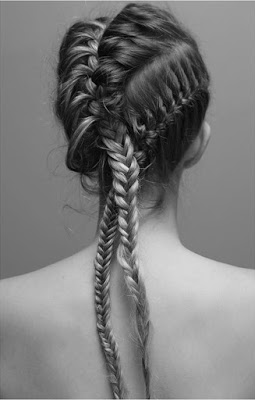
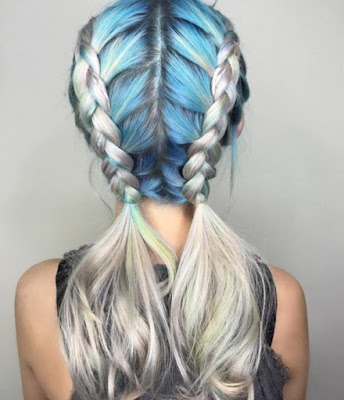
French braid hairstyles with short hair to show that this style can be worn by any type of haircut
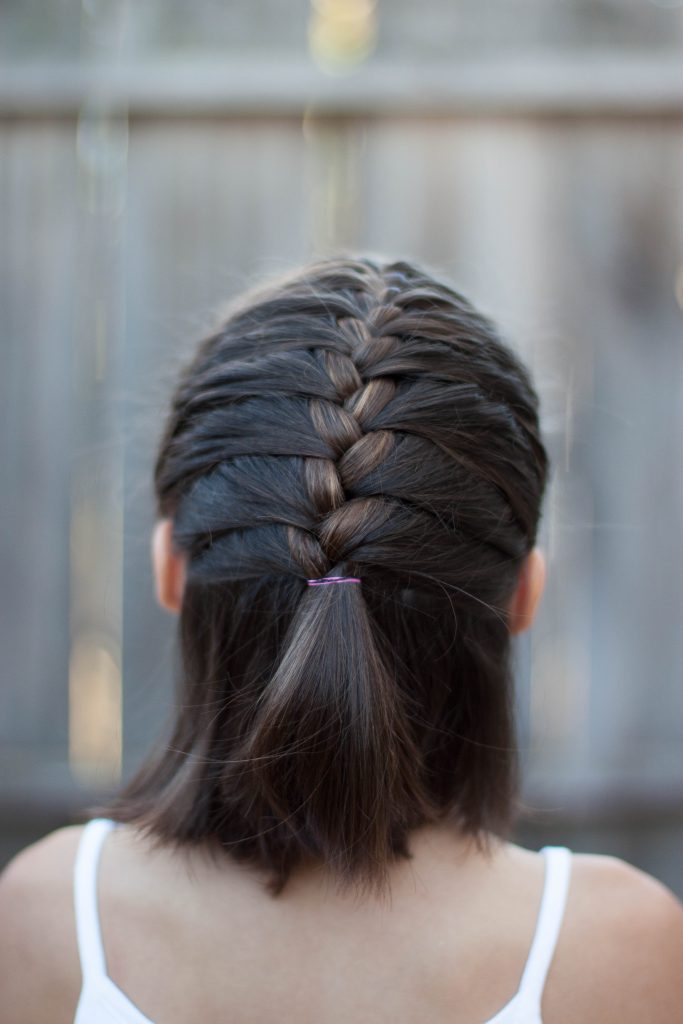
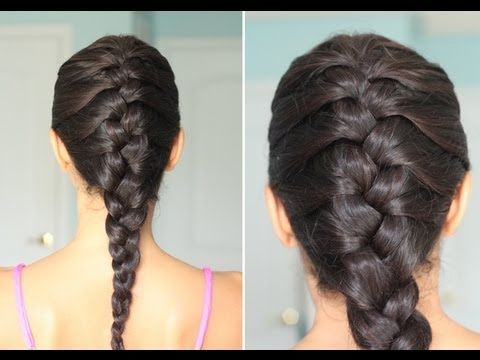
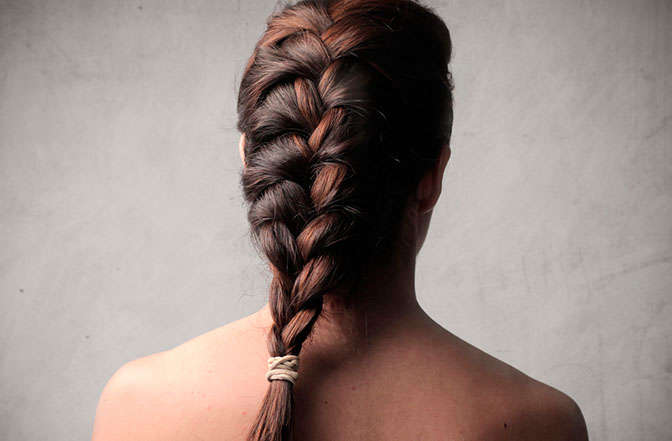
Classic hairstyle that every dancer ever did to dance for comfort but also for elegance
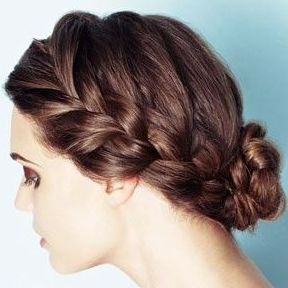
It reminds me of Emilia Clarke’s hairstyle playing Daenerys Targaryen in Games of Thrones
How to Make a French Braid
Making a French braid is easy although many women seeing its shape may think that it is very difficult at first but when they know all the steps and practice them they really understand why it is one of the hairstyles most used by all women.
When you talk about braid in general line, you are referring to the traditional classic braid that is this type of braiding that is done and is the best when you want an elegant, youthful and quick hairstyle to do.
Before starting describing each step, what you have to do is prepare your mane, so with a brush that you use, start brushing it to prepare the strands that do not have any type of knot so that it is smooth if you have wavy and soft hair. .
With this you will have the benefit of being able to braid it more easily, which is why this tip I advise you to do for any type of braid and of course have long hair to be able to braid more accurately.
If you have straight hair you may have an advantage but it also influences that you take it and take it very well because it can be more difficult to manage each strand especially if it is fine hair.
Another tip is that if in your hairstyle you are only going to do one single braid then you have to brush your hair from the root of the forehead to the back at the nape of the neck.
Following the tips for the preparation is that if you choose to do more than one braid or decide that your braid is on the side of some side you have to divide your hair into different sections depending on the number of braids you intend to do and in turn brushing to detangle.
Always consider that making the braid with hair that is wet is much better because it will be easier for you to maneuver and adapt to the shape you need, such as undoing the braid and achieving a wavy that is delicate but at the same time natural something that it is trend for a wedding.
Let’s start by looking at this Youtube video:
1) You have to start dividing sections to take locks that are large at the top of the head (upper) approximately you have to calculate 9 centimeters what would be 4 inches in terms of width neither more nor less.
2) All the hair you take has to be from the root of your scalp, which is considered the same row of hair, so everything that is under or above your lock should no longer be considered.
3) If your case is like mine with bangs, you can choose two options: on the one hand, let it loose and on the other, join it to the braid you are going to make, so if you brush your hair next to your fringe, it will be all combed back. This is already a personal decision of each person. If you consider joining bangs with braid then take your hair from the top center of the head (it has to overcome your forehead)
4) It has nothing to do with the width of a braid for the section you start, I will tell you this because many girls make this mistake, so that you are clear you can start with a small lock of all the ones you divided although it is not the most It is recommended for a matter of neatness but that the same braid can add volume as you add and add more locks.
5) This is the fundamental moment for your romantic hairstyle to be perfect since you have to divide your first lock that you took into three equal parts, just as you do for classic traditional braids you have to do the same for the French since once that you have all three sections of hair you have to learn the pattern of the braiding process.
6) As I told you in the previous point, the parts must be the same, otherwise you will lose the effect when braiding them and you have to separate them with the fingers of your hand
7) Starting to braid is the same as making a traditional braid so the first thing is to hold two of the three strands that you had to have with one hand and the third strand you handle with the other hand.
8) You have to cross the right lock of the three strands over the center, the next step is to cross the left lock over the center of the braid that you are making
9) The previous step you have to repeat several times until you have a solid base of several strands with this you have the traditional or classic braid assembly.
10) But what you want is a French Braid so now we will continue adding processes related to the hairstyle you are looking to do
11) Now you have to keep adding new hair to the traditional braiding pattern that you have made, so step by step the locks add up, but keep in mind that if you are going to cross a section over the center section you have to take a part of tuft of the side of your mane and begin to include it in the main lock that you are going to cross braiding.
12) So you have to be clear that here begins the real French braid where a smaller strand of hair is added from the sides each time you cross a main strand.
13) Consider that the less hair you add the more crosses your French braiding will have
14) Something I learned is that for the French braid to look beautiful you have to take hair that is close to your neck from the sides as well as from your forehead and face.
What happened to me as a mistake I made is that I took many strands but close to the main strand which was later covered by the wicks on the outside which you have to avoid since the sides will always win.
As you get down from your head, especially at the nape of the neck, the amount of hair is less to take, which means that the braid will have less hair, so you can end the process.
To finish once you have no more hair left for the braid consider finishing it as a traditional classic braid which with a ponytail or ponytail You fix it so that it doesn’t fall apart.
Among the tips, consider not using hair bands because leaving the hair so knotted can hurt the hair.
As you can see all this explained can be somewhat extensive but in practice the way to do it is simple and it is a hairstyle that can go to parties without hurting the hair with invasive hairstyles.
As color data, it is also called root braid for taking all the hair off my head.
Now I am going to explain how to make a derivative of the French braid that we just made in the previous explanation.
In its origin it is very similar but it has some changes that cause this hairstyle to be different and unique.
To start as I explained above you have to prepare your hair so you have to brush the hair very well so that it is softer but also that it does not have any knots or tangles in the hair.
With this hairstyle you have the advantage of being able to do the braid on the side or on the side of your head regardless of whether you have short hair or your mane is long, which is advisable.
You have to use strands from the center of your hair or from the side depending on the style you like to wear, that’s why it’s always good to learn by practicing what is your best look.
1) Unlike the classic French Braid, what you have to do is take a section that is smaller, which separates a lock of your hair that is close to the next lock that you are going to use.
2) You have to consider that in this hairstyle it matters a lot the size that you make your lock because it is what will define the volume that your braid has, so what I recommend from experience is that you take a large lock of your hair If you want the braid to get a lot of volume but if you want a thin braid then the lock should be smaller, what is used as standard in these hairstyles are 1 inch locks which is equivalent to approximately 2.5 centimeters thick.
3) This is the moment where you have to divide the lock into three parts that are the same and you have to place each of the strands at an angle that have a downward slope so that your face can be embroidered, with this you should prevent them from going towards the nape of the neck.
4) You have to start doing the braiding so you have to do the traditional braid to start so that the French half braid takes the shape you need so you have to cross the right lock over the center lock and then the left lock over the one in the middle.
5) In this step you will notice the main difference between the French braid and the French half braid where in the latter you always add hair from a single side of that lock that you are doing the braiding instead on the French braid must be done on both sides. Regarding which side you add hair that does not impact the hairstyle at all but the important thing is to always do it on the same side
6) As you are doing your braid you will realize that the shape that it will take is that of a princess crown, so that halo that you will have around the head is the shape it has to take, but you must define whether what you want is to be seen over the ears or underneath since depending on whether you like your ears it is a decision of how you want to look it.
As advice that I can give you is that if you make only one braid it is best to wrap it around your head in its entirety.
What always happens to me is that I run out of hair to add when I reach the ear on the other side.
On the other hand, if you do two braids it is best to stop braiding them when you are reaching the nape of your neck.
That is why it is always better that you hold the first braid with a hair band and repeat the braiding process for the second braid but on the other side of the mane.
7) To finish the ideal braiding you will notice when you have no more hair to add so you have to continue as if you were doing a traditional braid until you find the ends of the lock.
So that the French half braid does not fall apart you have to use a hair band or a garter.
Remember that a good hairstyle must always be accompanied by a correct makeup application according to the skin color.
How to make an inverted French braid
It is also called dutch french braid and I will explain how to do this hairstyle detailing each step and that you can see later in the video.
You will need a comb to make the divisions of the braid, a hair band or a butterfly to hold it, spray or gel to fix some unruly hair that you have.
1) The first step to make the inverted French braid is to put a bit of gel on all the hair and comb back with your fingers.
2) In the forehead hair you take as if it were a box just on each side of the forehead inlets and take a little hair to make a lock
3) Now make a braid with three pieces of strands of each section that you separated, each section is passed through the bottom and soon after starting the braiding you make a knot
4) Consider that the French braid is a simple braid but that hair is added to one side first and then to the other side and to finish in the middle
5) You keep braiding until you have your hair and end up holding with a rubber band.
In this youtube video you will be able to learn how to make the inverted French braid:
I hope that all these recommendations and hairstyle tips will serve you so that your next braid is wonderful and great.
Before finishing, if you are interested in learning to make another type of braid, I recommend this tutorial to learn
Cascade Braids
Please, if you liked it and served it, share it on your Instagram, Google+, WhatsApp and Twitter networks, so we are the ones who learn to see each other more beautiful.
This time I’m going to show you how hairstyles are made with french braids or as its original name is called french braid or french braids which is one of the styles that are most used when you are looking for some type of braiding.
It is the most classic but at the same time it is still the most effective so it is chosen so much among the girls for being simple, fast but elegant at the same time.
Used by dancers, athletes, celebrities and now you have to use it yourself.
In the following article I am going to explain all the steps in detail that you must do to achieve the beauty of this hairstyle but at the same time I am going to leave you a photo gallery where you are going to be able to choose which one you like the most since It has different variations.
You can do the French braids sideways, inverted French braids, two French braids among many others that I will show you.
This braid made her very famous today for Kim Kardashian.
This braid is the most chosen by mothers for their girls as well as the ponytail hairstyle as they are easy to do but at the same time it has long hair for the little girl.
If you want to get more ideas to braid, I recommend you see these tutorials that I prepared in the most complete guide to Hairstyles with Braids on the Internet.
French Braids Hairstyles Images
In these photos I invite you first before each hairstyle tutorial, so you can see the great style that is in fashion and sets trends within fast and elegant hairstyles.
The two French braids is widely used for female athletes who are engaged in being a boxer and in different sports disciplines

Double French braids that you can use for pigtails or for collected hairstyles

Hairstyles with French braids for long hair with ponytail and hair band


Some people mistake dreadlocks for the type of French braids or French braids that are hairstyles that have different combinations


This derivative of the half braid French braid hairstyle explained step by step is very useful and original referring in part to the Dutch braids


French braid hairstyles with short hair to show that this style can be worn by any type of haircut


Classic hairstyle that every dancer ever did to dance for comfort but also for elegance

It reminds me of Emilia Clarke’s hairstyle playing Daenerys Targaryen in Games of Thrones


How to Make a French Braid
Making a French braid is easy although many women seeing its shape may think that it is very difficult at first but when they know all the steps and practice them they really understand why it is one of the hairstyles most used by all women.
When you talk about braid in general line, you are referring to the traditional classic braid that is this type of braiding that is done and is the best when you want an elegant, youthful and quick hairstyle to do.
Before starting describing each step, what you have to do is prepare your mane, so with a brush that you use, start brushing it to prepare the strands that do not have any type of knot so that it is smooth if you have wavy and soft hair. .
With this you will have the benefit of being able to braid it more easily, which is why this tip I advise you to do for any type of braid and of course have long hair to be able to braid more accurately.
If you have straight hair you may have an advantage but it also influences that you take it and take it very well because it can be more difficult to manage each strand especially if it is fine hair.
Another tip is that if in your hairstyle you are only going to do one single braid then you have to brush your hair from the root of the forehead to the back at the nape of the neck.
Following the tips for the preparation is that if you choose to do more than one braid or decide that your braid is on the side of some side you have to divide your hair into different sections depending on the number of braids you intend to do and in turn brushing to detangle.
Always consider that making the braid with hair that is wet is much better because it will be easier for you to maneuver and adapt to the shape you need, such as undoing the braid and achieving a wavy that is delicate but at the same time natural something that it is trend for a wedding.
Let’s start by looking at this Youtube video:
1) You have to start dividing sections to take locks that are large at the top of the head (upper) approximately you have to calculate 9 centimeters what would be 4 inches in terms of width neither more nor less.
2) All the hair you take has to be from the root of your scalp, which is considered the same row of hair, so everything that is under or above your lock should no longer be considered.
3) If your case is like mine with bangs, you can choose two options: on the one hand, let it loose and on the other, join it to the braid you are going to make, so if you brush your hair next to your fringe, it will be all combed back. This is already a personal decision of each person. If you consider joining bangs with braid then take your hair from the top center of the head (it has to overcome your forehead)
4) It has nothing to do with the width of a braid for the section you start, I will tell you this because many girls make this mistake, so that you are clear you can start with a small lock of all the ones you divided although it is not the most It is recommended for a matter of neatness but that the same braid can add volume as you add and add more locks.
5) This is the fundamental moment for your romantic hairstyle to be perfect since you have to divide your first lock that you took into three equal parts, just as you do for classic traditional braids you have to do the same for the French since once that you have all three sections of hair you have to learn the pattern of the braiding process.
6) As I told you in the previous point, the parts must be the same, otherwise you will lose the effect when braiding them and you have to separate them with the fingers of your hand
7) Starting to braid is the same as making a traditional braid so the first thing is to hold two of the three strands that you had to have with one hand and the third strand you handle with the other hand.
8) You have to cross the right lock of the three strands over the center, the next step is to cross the left lock over the center of the braid that you are making
9) The previous step you have to repeat several times until you have a solid base of several strands with this you have the traditional or classic braid assembly.
10) But what you want is a French Braid so now we will continue adding processes related to the hairstyle you are looking to do
11) Now you have to keep adding new hair to the traditional braiding pattern that you have made, so step by step the locks add up, but keep in mind that if you are going to cross a section over the center section you have to take a part of tuft of the side of your mane and begin to include it in the main lock that you are going to cross braiding.
12) So you have to be clear that here begins the real French braid where a smaller strand of hair is added from the sides each time you cross a main strand.
13) Consider that the less hair you add the more crosses your French braiding will have
14) Something I learned is that for the French braid to look beautiful you have to take hair that is close to your neck from the sides as well as from your forehead and face.
What happened to me as a mistake I made is that I took many strands but close to the main strand which was later covered by the wicks on the outside which you have to avoid since the sides will always win.
As you get down from your head, especially at the nape of the neck, the amount of hair is less to take, which means that the braid will have less hair, so you can end the process.
To finish once you have no more hair left for the braid consider finishing it as a traditional classic braid which with a ponytail or ponytail You fix it so that it doesn’t fall apart.
Among the tips, consider not using hair bands because leaving the hair so knotted can hurt the hair.
As you can see all this explained can be somewhat extensive but in practice the way to do it is simple and it is a hairstyle that can go to parties without hurting the hair with invasive hairstyles.
As color data, it is also called root braid for taking all the hair off my head.
Now I am going to explain how to make a derivative of the French braid that we just made in the previous explanation.
In its origin it is very similar but it has some changes that cause this hairstyle to be different and unique.
To start as I explained above you have to prepare your hair so you have to brush the hair very well so that it is softer but also that it does not have any knots or tangles in the hair.
With this hairstyle you have the advantage of being able to do the braid on the side or on the side of your head regardless of whether you have short hair or your mane is long, which is advisable.
You have to use strands from the center of your hair or from the side depending on the style you like to wear, that’s why it’s always good to learn by practicing what is your best look.

1) Unlike the classic French Braid, what you have to do is take a section that is smaller, which separates a lock of your hair that is close to the next lock that you are going to use.
2) You have to consider that in this hairstyle it matters a lot the size that you make your lock because it is what will define the volume that your braid has, so what I recommend from experience is that you take a large lock of your hair If you want the braid to get a lot of volume but if you want a thin braid then the lock should be smaller, what is used as standard in these hairstyles are 1 inch locks which is equivalent to approximately 2.5 centimeters thick.
3) This is the moment where you have to divide the lock into three parts that are the same and you have to place each of the strands at an angle that have a downward slope so that your face can be embroidered, with this you should prevent them from going towards the nape of the neck.
4) You have to start doing the braiding so you have to do the traditional braid to start so that the French half braid takes the shape you need so you have to cross the right lock over the center lock and then the left lock over the one in the middle.
5) In this step you will notice the main difference between the French braid and the French half braid where in the latter you always add hair from a single side of that lock that you are doing the braiding instead on the French braid must be done on both sides. Regarding which side you add hair that does not impact the hairstyle at all but the important thing is to always do it on the same side
6) As you are doing your braid you will realize that the shape that it will take is that of a princess crown, so that halo that you will have around the head is the shape it has to take, but you must define whether what you want is to be seen over the ears or underneath since depending on whether you like your ears it is a decision of how you want to look it.
As advice that I can give you is that if you make only one braid it is best to wrap it around your head in its entirety.
What always happens to me is that I run out of hair to add when I reach the ear on the other side.
On the other hand, if you do two braids it is best to stop braiding them when you are reaching the nape of your neck.
That is why it is always better that you hold the first braid with a hair band and repeat the braiding process for the second braid but on the other side of the mane.
7) To finish the ideal braiding you will notice when you have no more hair to add so you have to continue as if you were doing a traditional braid until you find the ends of the lock.
So that the French half braid does not fall apart you have to use a hair band or a garter.
Remember that a good hairstyle must always be accompanied by a correct makeup application according to the skin color.
How to make an inverted French braid
It is also called dutch french braid and I will explain how to do this hairstyle detailing each step and that you can see later in the video.
You will need a comb to make the divisions of the braid, a hair band or a butterfly to hold it, spray or gel to fix some unruly hair that you have.
1) The first step to make the inverted French braid is to put a bit of gel on all the hair and comb back with your fingers.
2) In the forehead hair you take as if it were a box just on each side of the forehead inlets and take a little hair to make a lock
3) Now make a braid with three pieces of strands of each section that you separated, each section is passed through the bottom and soon after starting the braiding you make a knot
4) Consider that the French braid is a simple braid but that hair is added to one side first and then to the other side and to finish in the middle
5) You keep braiding until you have your hair and end up holding with a rubber band.
In this youtube video you will be able to learn how to make the inverted French braid:
I hope that all these recommendations and hairstyle tips will serve you so that your next braid is wonderful and great.
Before finishing, if you are interested in learning to make another type of braid, I recommend this tutorial to learn
Cascade Braids
Please, if you liked it and served it, share it on your Instagram, Google+, WhatsApp and Twitter networks, so we are the ones who learn to see each other more beautiful.
This time I’m going to show you how hairstyles are made with french braids or as its original name is called french braid or french braids which is one of the styles that are most used when you are looking for some type of braiding.
It is the most classic but at the same time it is still the most effective so it is chosen so much among the girls for being simple, fast but elegant at the same time.
Used by dancers, athletes, celebrities and now you have to use it yourself.
In the following article I am going to explain all the steps in detail that you must do to achieve the beauty of this hairstyle but at the same time I am going to leave you a photo gallery where you are going to be able to choose which one you like the most since It has different variations.
You can do the French braids sideways, inverted French braids, two French braids among many others that I will show you.
This braid made her very famous today for Kim Kardashian.
This braid is the most chosen by mothers for their girls as well as the ponytail hairstyle as they are easy to do but at the same time it has long hair for the little girl.
If you want to get more ideas to braid, I recommend you see these tutorials that I prepared in the most complete guide to Hairstyles with Braids on the Internet.
French Braids Hairstyles Images
In these photos I invite you first before each hairstyle tutorial, so you can see the great style that is in fashion and sets trends within fast and elegant hairstyles.
The two French braids is widely used for female athletes who are engaged in being a boxer and in different sports disciplines

Double French braids that you can use for pigtails or for collected hairstyles

Hairstyles with French braids for long hair with ponytail and hair band


Some people mistake dreadlocks for the type of French braids or French braids that are hairstyles that have different combinations


This derivative of the half braid French braid hairstyle explained step by step is very useful and original referring in part to the Dutch braids


French braid hairstyles with short hair to show that this style can be worn by any type of haircut


Classic hairstyle that every dancer ever did to dance for comfort but also for elegance

It reminds me of Emilia Clarke’s hairstyle playing Daenerys Targaryen in Games of Thrones


How to Make a French Braid
Making a French braid is easy although many women seeing its shape may think that it is very difficult at first but when they know all the steps and practice them they really understand why it is one of the hairstyles most used by all women.
When you talk about braid in general line, you are referring to the traditional classic braid that is this type of braiding that is done and is the best when you want an elegant, youthful and quick hairstyle to do.
Before starting describing each step, what you have to do is prepare your mane, so with a brush that you use, start brushing it to prepare the strands that do not have any type of knot so that it is smooth if you have wavy and soft hair. .
With this you will have the benefit of being able to braid it more easily, which is why this tip I advise you to do for any type of braid and of course have long hair to be able to braid more accurately.
If you have straight hair you may have an advantage but it also influences that you take it and take it very well because it can be more difficult to manage each strand especially if it is fine hair.
Another tip is that if in your hairstyle you are only going to do one single braid then you have to brush your hair from the root of the forehead to the back at the nape of the neck.
Following the tips for the preparation is that if you choose to do more than one braid or decide that your braid is on the side of some side you have to divide your hair into different sections depending on the number of braids you intend to do and in turn brushing to detangle.
Always consider that making the braid with hair that is wet is much better because it will be easier for you to maneuver and adapt to the shape you need, such as undoing the braid and achieving a wavy that is delicate but at the same time natural something that it is trend for a wedding.
Let’s start by looking at this Youtube video:
1) You have to start dividing sections to take locks that are large at the top of the head (upper) approximately you have to calculate 9 centimeters what would be 4 inches in terms of width neither more nor less.
2) All the hair you take has to be from the root of your scalp, which is considered the same row of hair, so everything that is under or above your lock should no longer be considered.
3) If your case is like mine with bangs, you can choose two options: on the one hand, let it loose and on the other, join it to the braid you are going to make, so if you brush your hair next to your fringe, it will be all combed back. This is already a personal decision of each person. If you consider joining bangs with braid then take your hair from the top center of the head (it has to overcome your forehead)
4) It has nothing to do with the width of a braid for the section you start, I will tell you this because many girls make this mistake, so that you are clear you can start with a small lock of all the ones you divided although it is not the most It is recommended for a matter of neatness but that the same braid can add volume as you add and add more locks.
5) This is the fundamental moment for your romantic hairstyle to be perfect since you have to divide your first lock that you took into three equal parts, just as you do for classic traditional braids you have to do the same for the French since once that you have all three sections of hair you have to learn the pattern of the braiding process.
6) As I told you in the previous point, the parts must be the same, otherwise you will lose the effect when braiding them and you have to separate them with the fingers of your hand
7) Starting to braid is the same as making a traditional braid so the first thing is to hold two of the three strands that you had to have with one hand and the third strand you handle with the other hand.
8) You have to cross the right lock of the three strands over the center, the next step is to cross the left lock over the center of the braid that you are making
9) The previous step you have to repeat several times until you have a solid base of several strands with this you have the traditional or classic braid assembly.
10) But what you want is a French Braid so now we will continue adding processes related to the hairstyle you are looking to do
11) Now you have to keep adding new hair to the traditional braiding pattern that you have made, so step by step the locks add up, but keep in mind that if you are going to cross a section over the center section you have to take a part of tuft of the side of your mane and begin to include it in the main lock that you are going to cross braiding.
12) So you have to be clear that here begins the real French braid where a smaller strand of hair is added from the sides each time you cross a main strand.
13) Consider that the less hair you add the more crosses your French braiding will have
14) Something I learned is that for the French braid to look beautiful you have to take hair that is close to your neck from the sides as well as from your forehead and face.
What happened to me as a mistake I made is that I took many strands but close to the main strand which was later covered by the wicks on the outside which you have to avoid since the sides will always win.
As you get down from your head, especially at the nape of the neck, the amount of hair is less to take, which means that the braid will have less hair, so you can end the process.
To finish once you have no more hair left for the braid consider finishing it as a traditional classic braid which with a ponytail or ponytail You fix it so that it doesn’t fall apart.
Among the tips, consider not using hair bands because leaving the hair so knotted can hurt the hair.
As you can see all this explained can be somewhat extensive but in practice the way to do it is simple and it is a hairstyle that can go to parties without hurting the hair with invasive hairstyles.
As color data, it is also called root braid for taking all the hair off my head.
Now I am going to explain how to make a derivative of the French braid that we just made in the previous explanation.
In its origin it is very similar but it has some changes that cause this hairstyle to be different and unique.
To start as I explained above you have to prepare your hair so you have to brush the hair very well so that it is softer but also that it does not have any knots or tangles in the hair.
With this hairstyle you have the advantage of being able to do the braid on the side or on the side of your head regardless of whether you have short hair or your mane is long, which is advisable.
You have to use strands from the center of your hair or from the side depending on the style you like to wear, that’s why it’s always good to learn by practicing what is your best look.

1) Unlike the classic French Braid, what you have to do is take a section that is smaller, which separates a lock of your hair that is close to the next lock that you are going to use.
2) You have to consider that in this hairstyle it matters a lot the size that you make your lock because it is what will define the volume that your braid has, so what I recommend from experience is that you take a large lock of your hair If you want the braid to get a lot of volume but if you want a thin braid then the lock should be smaller, what is used as standard in these hairstyles are 1 inch locks which is equivalent to approximately 2.5 centimeters thick.
3) This is the moment where you have to divide the lock into three parts that are the same and you have to place each of the strands at an angle that have a downward slope so that your face can be embroidered, with this you should prevent them from going towards the nape of the neck.
4) You have to start doing the braiding so you have to do the traditional braid to start so that the French half braid takes the shape you need so you have to cross the right lock over the center lock and then the left lock over the one in the middle.
5) In this step you will notice the main difference between the French braid and the French half braid where in the latter you always add hair from a single side of that lock that you are doing the braiding instead on the French braid must be done on both sides. Regarding which side you add hair that does not impact the hairstyle at all but the important thing is to always do it on the same side
6) As you are doing your braid you will realize that the shape that it will take is that of a princess crown, so that halo that you will have around the head is the shape it has to take, but you must define whether what you want is to be seen over the ears or underneath since depending on whether you like your ears it is a decision of how you want to look it.
As advice that I can give you is that if you make only one braid it is best to wrap it around your head in its entirety.
What always happens to me is that I run out of hair to add when I reach the ear on the other side.
On the other hand, if you do two braids it is best to stop braiding them when you are reaching the nape of your neck.
That is why it is always better that you hold the first braid with a hair band and repeat the braiding process for the second braid but on the other side of the mane.
7) To finish the ideal braiding you will notice when you have no more hair to add so you have to continue as if you were doing a traditional braid until you find the ends of the lock.
So that the French half braid does not fall apart you have to use a hair band or a garter.
Remember that a good hairstyle must always be accompanied by a correct makeup application according to the skin color.
How to make an inverted French braid
It is also called dutch french braid and I will explain how to do this hairstyle detailing each step and that you can see later in the video.
You will need a comb to make the divisions of the braid, a hair band or a butterfly to hold it, spray or gel to fix some unruly hair that you have.
1) The first step to make the inverted French braid is to put a bit of gel on all the hair and comb back with your fingers.
2) In the forehead hair you take as if it were a box just on each side of the forehead inlets and take a little hair to make a lock
3) Now make a braid with three pieces of strands of each section that you separated, each section is passed through the bottom and soon after starting the braiding you make a knot
4) Consider that the French braid is a simple braid but that hair is added to one side first and then to the other side and to finish in the middle
5) You keep braiding until you have your hair and end up holding with a rubber band.
In this youtube video you will be able to learn how to make the inverted French braid:
I hope that all these recommendations and hairstyle tips will serve you so that your next braid is wonderful and great.
Before finishing, if you are interested in learning to make another type of braid, I recommend this tutorial to learn
Cascade Braids
Please, if you liked it and served it, share it on your Instagram, Google+, WhatsApp and Twitter networks, so we are the ones who learn to see each other more beautiful.
This time I’m going to show you how hairstyles are made with french braids or as its original name is called french braid or french braids which is one of the styles that are most used when you are looking for some type of braiding.
It is the most classic but at the same time it is still the most effective so it is chosen so much among the girls for being simple, fast but elegant at the same time.
Used by dancers, athletes, celebrities and now you have to use it yourself.
In the following article I am going to explain all the steps in detail that you must do to achieve the beauty of this hairstyle but at the same time I am going to leave you a photo gallery where you are going to be able to choose which one you like the most since It has different variations.
You can do the French braids sideways, inverted French braids, two French braids among many others that I will show you.
This braid made her very famous today for Kim Kardashian.
This braid is the most chosen by mothers for their girls as well as the ponytail hairstyle as they are easy to do but at the same time it has long hair for the little girl.
If you want to get more ideas to braid, I recommend you see these tutorials that I prepared in the most complete guide to Hairstyles with Braids on the Internet.
French Braids Hairstyles Images
In these photos I invite you first before each hairstyle tutorial, so you can see the great style that is in fashion and sets trends within fast and elegant hairstyles.
The two French braids is widely used for female athletes who are engaged in being a boxer and in different sports disciplines

Double French braids that you can use for pigtails or for collected hairstyles

Hairstyles with French braids for long hair with ponytail and hair band


Some people mistake dreadlocks for the type of French braids or French braids that are hairstyles that have different combinations


This derivative of the half braid French braid hairstyle explained step by step is very useful and original referring in part to the Dutch braids


French braid hairstyles with short hair to show that this style can be worn by any type of haircut


Classic hairstyle that every dancer ever did to dance for comfort but also for elegance

It reminds me of Emilia Clarke’s hairstyle playing Daenerys Targaryen in Games of Thrones


How to Make a French Braid
Making a French braid is easy although many women seeing its shape may think that it is very difficult at first but when they know all the steps and practice them they really understand why it is one of the hairstyles most used by all women.
When you talk about braid in general line, you are referring to the traditional classic braid that is this type of braiding that is done and is the best when you want an elegant, youthful and quick hairstyle to do.
Before starting describing each step, what you have to do is prepare your mane, so with a brush that you use, start brushing it to prepare the strands that do not have any type of knot so that it is smooth if you have wavy and soft hair. .
With this you will have the benefit of being able to braid it more easily, which is why this tip I advise you to do for any type of braid and of course have long hair to be able to braid more accurately.
If you have straight hair you may have an advantage but it also influences that you take it and take it very well because it can be more difficult to manage each strand especially if it is fine hair.
Another tip is that if in your hairstyle you are only going to do one single braid then you have to brush your hair from the root of the forehead to the back at the nape of the neck.
Following the tips for the preparation is that if you choose to do more than one braid or decide that your braid is on the side of some side you have to divide your hair into different sections depending on the number of braids you intend to do and in turn brushing to detangle.
Always consider that making the braid with hair that is wet is much better because it will be easier for you to maneuver and adapt to the shape you need, such as undoing the braid and achieving a wavy that is delicate but at the same time natural something that it is trend for a wedding.
Let’s start by looking at this Youtube video:
1) You have to start dividing sections to take locks that are large at the top of the head (upper) approximately you have to calculate 9 centimeters what would be 4 inches in terms of width neither more nor less.
2) All the hair you take has to be from the root of your scalp, which is considered the same row of hair, so everything that is under or above your lock should no longer be considered.
3) If your case is like mine with bangs, you can choose two options: on the one hand, let it loose and on the other, join it to the braid you are going to make, so if you brush your hair next to your fringe, it will be all combed back. This is already a personal decision of each person. If you consider joining bangs with braid then take your hair from the top center of the head (it has to overcome your forehead)
4) It has nothing to do with the width of a braid for the section you start, I will tell you this because many girls make this mistake, so that you are clear you can start with a small lock of all the ones you divided although it is not the most It is recommended for a matter of neatness but that the same braid can add volume as you add and add more locks.
5) This is the fundamental moment for your romantic hairstyle to be perfect since you have to divide your first lock that you took into three equal parts, just as you do for classic traditional braids you have to do the same for the French since once that you have all three sections of hair you have to learn the pattern of the braiding process.
6) As I told you in the previous point, the parts must be the same, otherwise you will lose the effect when braiding them and you have to separate them with the fingers of your hand
7) Starting to braid is the same as making a traditional braid so the first thing is to hold two of the three strands that you had to have with one hand and the third strand you handle with the other hand.
8) You have to cross the right lock of the three strands over the center, the next step is to cross the left lock over the center of the braid that you are making
9) The previous step you have to repeat several times until you have a solid base of several strands with this you have the traditional or classic braid assembly.
10) But what you want is a French Braid so now we will continue adding processes related to the hairstyle you are looking to do
11) Now you have to keep adding new hair to the traditional braiding pattern that you have made, so step by step the locks add up, but keep in mind that if you are going to cross a section over the center section you have to take a part of tuft of the side of your mane and begin to include it in the main lock that you are going to cross braiding.
12) So you have to be clear that here begins the real French braid where a smaller strand of hair is added from the sides each time you cross a main strand.
13) Consider that the less hair you add the more crosses your French braiding will have
14) Something I learned is that for the French braid to look beautiful you have to take hair that is close to your neck from the sides as well as from your forehead and face.
What happened to me as a mistake I made is that I took many strands but close to the main strand which was later covered by the wicks on the outside which you have to avoid since the sides will always win.
As you get down from your head, especially at the nape of the neck, the amount of hair is less to take, which means that the braid will have less hair, so you can end the process.
To finish once you have no more hair left for the braid consider finishing it as a traditional classic braid which with a ponytail or ponytail You fix it so that it doesn’t fall apart.
Among the tips, consider not using hair bands because leaving the hair so knotted can hurt the hair.
As you can see all this explained can be somewhat extensive but in practice the way to do it is simple and it is a hairstyle that can go to parties without hurting the hair with invasive hairstyles.
As color data, it is also called root braid for taking all the hair off my head.
Now I am going to explain how to make a derivative of the French braid that we just made in the previous explanation.
In its origin it is very similar but it has some changes that cause this hairstyle to be different and unique.
To start as I explained above you have to prepare your hair so you have to brush the hair very well so that it is softer but also that it does not have any knots or tangles in the hair.
With this hairstyle you have the advantage of being able to do the braid on the side or on the side of your head regardless of whether you have short hair or your mane is long, which is advisable.
You have to use strands from the center of your hair or from the side depending on the style you like to wear, that’s why it’s always good to learn by practicing what is your best look.

1) Unlike the classic French Braid, what you have to do is take a section that is smaller, which separates a lock of your hair that is close to the next lock that you are going to use.
2) You have to consider that in this hairstyle it matters a lot the size that you make your lock because it is what will define the volume that your braid has, so what I recommend from experience is that you take a large lock of your hair If you want the braid to get a lot of volume but if you want a thin braid then the lock should be smaller, what is used as standard in these hairstyles are 1 inch locks which is equivalent to approximately 2.5 centimeters thick.
3) This is the moment where you have to divide the lock into three parts that are the same and you have to place each of the strands at an angle that have a downward slope so that your face can be embroidered, with this you should prevent them from going towards the nape of the neck.
4) You have to start doing the braiding so you have to do the traditional braid to start so that the French half braid takes the shape you need so you have to cross the right lock over the center lock and then the left lock over the one in the middle.
5) In this step you will notice the main difference between the French braid and the French half braid where in the latter you always add hair from a single side of that lock that you are doing the braiding instead on the French braid must be done on both sides. Regarding which side you add hair that does not impact the hairstyle at all but the important thing is to always do it on the same side
6) As you are doing your braid you will realize that the shape that it will take is that of a princess crown, so that halo that you will have around the head is the shape it has to take, but you must define whether what you want is to be seen over the ears or underneath since depending on whether you like your ears it is a decision of how you want to look it.
As advice that I can give you is that if you make only one braid it is best to wrap it around your head in its entirety.
What always happens to me is that I run out of hair to add when I reach the ear on the other side.
On the other hand, if you do two braids it is best to stop braiding them when you are reaching the nape of your neck.
That is why it is always better that you hold the first braid with a hair band and repeat the braiding process for the second braid but on the other side of the mane.
7) To finish the ideal braiding you will notice when you have no more hair to add so you have to continue as if you were doing a traditional braid until you find the ends of the lock.
So that the French half braid does not fall apart you have to use a hair band or a garter.
Remember that a good hairstyle must always be accompanied by a correct makeup application according to the skin color.
How to make an inverted French braid
It is also called dutch french braid and I will explain how to do this hairstyle detailing each step and that you can see later in the video.
You will need a comb to make the divisions of the braid, a hair band or a butterfly to hold it, spray or gel to fix some unruly hair that you have.
1) The first step to make the inverted French braid is to put a bit of gel on all the hair and comb back with your fingers.
2) In the forehead hair you take as if it were a box just on each side of the forehead inlets and take a little hair to make a lock
3) Now make a braid with three pieces of strands of each section that you separated, each section is passed through the bottom and soon after starting the braiding you make a knot
4) Consider that the French braid is a simple braid but that hair is added to one side first and then to the other side and to finish in the middle
5) You keep braiding until you have your hair and end up holding with a rubber band.
In this youtube video you will be able to learn how to make the inverted French braid:
I hope that all these recommendations and hairstyle tips will serve you so that your next braid is wonderful and great.
Before finishing, if you are interested in learning to make another type of braid, I recommend this tutorial to learn
Cascade Braids
Please, if you liked it and served it, share it on your Instagram, Google+, WhatsApp and Twitter networks, so we are the ones who learn to see each other more beautiful.


